Media & Techniques
Needle Felting, Part 2 (Ep. 025)
Welcome to Part 2 of the Needle Felting introduction! Last week, in Part 1, Cassie covered everything you need to get started with needle felting on your own. This week, she tackles the topic of how to bring the craft into your classroom. She starts the episode with an awkward experience that taught her you can felt with cat hair (3:00). She then talks about the supplies you need for the classroom (5:00) and how you can make magic with wet felting at any level (11:00). Full episode transcript below.
Resources and Links:
- Wool Buddies
- The Complete Photo Guide to Felting
- All Things Needle Felted
- The Art Ed Now conference can be found here (use the code SAVE20NOW for $20 off your registration!)
Transcript
Hey there, friends. Welcome to part two my needle felting podcast chat. I guess that’s what we could call it. Last week on episode 25, I was sharing with you all things needle felting. It’s my absolute favorite craft. I have been doing it for several years and I feel like a kid. I don’t know what I’m talking about. But not so much that I’ve lost interest. Still learning more new and fun techniques is really what keeps us passionate I think about any sort of craft or activity. However, I didn’t realize it was going to take me the entire podcast just to chat you through how to get started with needle felting. I thought for sure I would be able to talk to you also about how to bring it into the the art room. Boy, was I mistaken. So if you haven’t taken a listen, you might want to go back and listen to episode 25 which is all about needle felting.
Today, I’m going to share with you how you can bring the art of felting, both wet and needle felting into your art room. This is Everyday Art Room and I’m Cassie Stephens. All right, guys. Let me just say this, if you listen to last week’s podcast and you’re thinking, “Eh, I already know what to do. She already explained all the supplies and what to get.” Let me just say that those are supplies that you would want to purchase for yourself. I’m going to be sharing with you today what you would want to purchase for your students in your art room. So these things, these supplies I’m going to be different so you will want to take a listen.
So let’s get started. First, if you’re like me and you love having a book in front of you to kind of explain the process, I thought I would share with you a couple of my favorite felting books. Felting is making a comeback and there’s actually quite a bit, just a little bit of search on your favorite bookseller website or Amazon, you’ll find that there are quite a few needle felting and wet felting books out there and a lot of them are geared toward kids. One of my favorite books is called The Complete Photo Guide to Felting. It’s by Ruth Lane. It’s an older book but it really is like a felting bible and it walks you through all types of felting, both needle and wet felting and all the techniques that those entail.
Another one that a buddy of mine uses is called Woolbuddies. It’s by Jackie Huang, H-U-A-N-G. Hopefully I’m pronouncing that correctly. It’s a great book to introduce felting techniques to your students. They’ll end up creating these amazing, cute, little felted creatures. Of course, if you’re feeling a little bit wackadoo like purchased this book for me, hold onto your hats, Felting with Cat Hair. That’s right. It is actual fur and that’s what you felt with is animal hair. So I guess you can felt with cat hair. She’s always asking me if I have used any of the techniques in the book yet and I always have to tell her, “No mom.” Anyways, so those are just a few of my book recommendations. But like I said, tons of resources out there, tons of videos on YouTube including my channel. So there’s just tons of resources out there for you to get started.
Supplies. I’m going to share with you today needle felting and wet felting. So let’s first address needle felting. Needle felting, if you’re going to do it with students, because it doesn’t involve a needle felting tool which a needle felting is very specifically designed needle, it has a razor sharp tip and it’s barbed. So if your students are not careful, they will poke themselves and there will be blood. Nobody likes bloodshed in their art room so when you do something like needle felting, you will definitely want to do it with students who, number one, are older students, the oldest I’ve done it with is my fourth graders. I think my third graders might be able to handle it if I were working with them in smaller groups.
What was I going to say? I lost my train of thought. I’m so sorry. So you definitely want to be doing that with your older students and, ah, I got it back. You definitely also want to do it with students who you feel like are trustworthy kids who are not going to harm themselves or each other purposefully so take caution. In last week’s podcast, I shared that for my students, I purchased every kid one of those pink Clover needle felting tools. It’s a tool that holds three individual needles in it and it looks just like a pin, big mistake. First of all, very expensive. Secondly, because they were new to this, they broke a lot of needles and we were constantly having to open up the pin and replace the needles. What I would recommend is just to purchase a pack of needle felting needles. You can get them very inexpensively. Usually they come in a pack of about 50 and the kids can just hold the individual needle, not have a tool that has to have three.
The other thing you’re going to need for needle felting with your students is a cushion. Last week, I mentioned that the cushion that I use is by Clover and it runs about 12 bucks. So obviously you don’t want to splurge on that for each student. It’s just not necessarily. What you can use is a foam block. I have purchased those giant upholstery pieces of foam from the local craft store and I have cut it down with an electric knife. What I noticed though about that foam is because it’s such a tight surface that as my students were needle felting, sometimes their needles were breaking. So here’s what I would recommend instead. I would recommend reaching out to Sue Bunch at Back to Back Fiber. She sells a very inexpensive foam block that’s a little bit more porous so as the students are needle felting, it works great and you won’t have the problem that I did of having your needles break.
Again, as far roving goes, she’s a great resource. Also, Esther’s Place. These are two great retailers that you can find online where you can easily purchase your supplies for class sets. I know Sue definitely does class sets. Both of these lovely ladies, you can pick up the phone and call them and they will be more than happy to walk you through the amount of roving and the supplies that you would need. Of course there’s the surface to needle felt on. When I needle felted with my students, the least expensive supply that I felt I could needle felt on is craft store felt. So let me share with you the project that we did. We were doing a giant collaborative mural and it was titled Johnson Elementary, that’s the name of my school, has heart. Every child in my school created a three inch by three inch heart using a different media technique.
My third graders, they embroidered hearts. My fourth graders, they needle felted hearts. For that, I had a parent volunteer who cut out many squares of three by three inch craft store felt. I had my students trace a paper heart or they could have just drawn it onto the craft store felt, placed the craft store felt onto their little cushion and picked the roving colors they wanted and proceed needle felting. Now, I will recommend this and I mentioned this last week, whenever you are needle felting especially with students, you want them to make sure to always keep their eyes on what it is they’re felting and keep their fingers away from the needle. They will be tempted as they’re needle felting to hold the roving down with their hands, and as you guys know because I chatted about it last week but just a quick review, when you’re needle felting, your needle is going up and down vertically, puncturing the roving through to the surface that you’re needle felting on.
As that needle is going up and down, you obviously don’t want to have your fingers in the way especially as you know our kids like to do, they look up, they like to chat with their friends. The moment they look away, that’s when bloodshed could happen. So for that reason, you might want to give them skewer sticks or even a pencil would work. This would allow them to use their nondominant hand to hold down the roving as they are puncturing it with their needle felting tool thus keeping the fingers out of the way.
My students really, really enjoyed doing this. It was just a totally new and unusual and fun craft for them. Because it was a small piece, it was enough to keep their interest but it wasn’t so overwhelming. If you have done needle felting before, you might know that it can get a little monotonous. Our sweet friends they might not have that much attention span to do something very, very long. So for that reason, keeping it small worked really well for me. So that’s what I would recommend for needle felting. Small surface, inexpensive supplies, make sure to have them use that skewer stick. Do it with smaller groups of kids and definitely your older, trustworthy students.
Now, let’s talk about wet felting. Me personally, when I’m creating, wet felting is not something that I enjoy doing. It’s wet. It’s messy. Usually when I do it, I do it outside. It is kind of physical labor especially if you’re going to be wet felting a larger piece. When you’re wet felting, what that essentially is is that you’re taking the fibers of felt and you are agitating them usually with soap and water and as the fibers of the felt are agitated, they start to grab onto each other, hook around each other and lock into place. However, that doesn’t happen immediately. It takes a while of agitation, rubbing, adding more water, to really get those fibers to lock into place. So for that reason, because it is kind of labor intensive, it’s not my favorite thing.
However, when you bring it into your art room, it’s pretty magical because number one, all your students can do it. It doesn’t require a sharp tool. So this is even something you could do with your students as young as preschool. So let me share a really simple, wet felting project that you can do with your students grades pre-K all the way up to high school that will just give them an introduction and not be too labor intensive for them. So all you need for this is your roving. That will be the most expensive thing you’ll need to purchase. You won’t need tons. You’ll need a zip lock bag. You’ll need some foam soap, the kind like by dial that you just kind of pump into your hands to wash your hands. You also need a container with some water in it.
So to start this, what the kids will be doing is wet felting inside of a zip lock bag. So this is great because it keeps all the soap and all the water contained so their hands are constantly getting water everywhere all over the surface of your art room. Open this zip lock bag and sprinkle into it just by flicking your hands a little bit of water and one pump of soap. Zip the bag back close and have your students, we call it massaging, just gently kind of massage the bag. Basically, they are creating a lubricant which is a word we won’t be using in the art room, thank you very much, for the felted fiber so they can move around and wiggle a lot more easily and become felted. So after they’re done kind of squishing the bubbly water, they’re going to open their bag up and start to get tufts of roving and cram it into one corner of the zip lock bag.
So when I say tufts, remember last week we chatted about how when you’re pulling roving off, you never ever want to cut it because that will ruin those little fibers. You always want to pull it like you’re pulling tufts of cotton candy which would a great visual for the kids. As they’re pulling it, they have to pull gently. The harder they pull, the harder those fibers kind of lock into place. So pull gently and I always encourage them less is best. So as they’re pulling, they can use different colors, whatever they like or whatever you want them to do and put that into the corner of their zip lock bag. Then squish all the air out of the bag. Zip it close and then just massage, massage, massage that bag. We pick it up in our hands. We rub it. We set it on the floor. We step on it. Anything we can do to agitate it.
Now, this does take some time. So what we’ve done in the past is made a little game of hot potato out of it where they’ll rub, kind of like musical chairs. We neither I ring a bell or the song ends. They pass their bag to the neighbor who then takes over. It just kind of makes it so it’s still interesting for them as they’re doing this kind of monotonous thing of massaging a zip lock bag. When it’s finished, you can have them write their name on the bag obviously. What I have my students do is simply their felted piece out of the bag and lay it on top of the bag and allow it to dry. When this felted piece is complete, it literally is going to look like something that if your cat ate a rainbow and then up checked it, this pretty much what your piece is going to look like. I mean, I’m not going to lie.
However, from there, because it has been felted, your students can cut into the surface. When something has been felted, if you cut it with scissors, it won’t unravel and it will not fray because it’s felted. The fibers are forever locked into place if it’s been felted really well. So from there, your students can cut it into different shapes, stars, hearts, whatever. They could if you want to take it a step further, needle felt on that surface or use it as a beautiful collaborative piece, especially if you have to do a school fund raiser. Imagine a bunch of felted hearts, framed. Oh my gosh, I just got an idea for an school wide collaborative. Anyway, this is so fun and so exciting and I think what wet felting, though I don’t love it personally, I really see tons of potential for it in the art room.
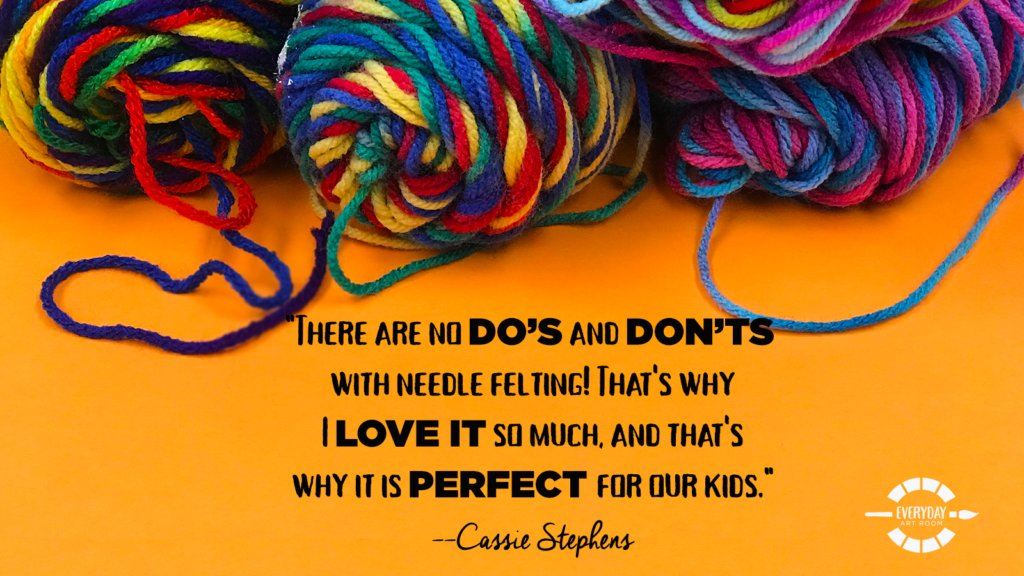
So, woo, yeah. I totally could not have shared all that I did last week and managed to cram in all of that. What on earth was I thinking? Anyway, I would love to hear from you all. If you have done felting of any kind in your art room or having had listened to this podcast, if you give it a shot, I would love to know. I feel like the best way we can learn about this craft is by continuously sharing all that we’ve learned. One of the reasons I love it so much is because there doesn’t seem to be any rules with felting. There are no dos and don’ts. It’s like the possibilities are endless. Now you know why it’s my fave. All right guys. Thank you so much for letting me share all things felting with you. I’m going to go get some cat hair and see what damage I can do. Just kidding.
Tim Bogatz: Hello, I want to tell you today about the Art Ed Now Conference. It is coming up in just over a week. On Saturday, the Art of Ed will have over 20 presentations that are all online, all incredible and all relevant to what you’re doing right now in your classroom. Each one comes with resources and handouts. You have access to every presentation for a full year after the conference. If you haven’t attended an Art Ed Now Conference before, this is the perfect time to do it. This conference is a boost of inspiration and motivation when you need it the most. There’s still time to register and you can learn everything you need to know about the conference at artednow.com. In fact, we have a discount for Everyday Art Room listeners. If you use the code SAVE20NOW, that’s S-A-V-E-2-0-N-O-W, all upper case, you will get $20 off your registration price. Again, make sure you check it out at artednow.com after Cassie wraps up the episode.
Cassie: Hey there you all. Let’s take a little dip into the mailbag. I have some really great questions today from Laura who is an art teacher out of Madison, Georgia. She’s got a lot of questions about social media. So I’m going to try my hardest to address them here. I did chat quite a bit about social media, basically Instagram because it’s my fave, a couple of podcasts ago. So if you have more questions or you’re a little bit curious about how to get the ball rolling on your Instagram or any other social media account and to gain more followers and find people to follow, you might want to take a listen to that podcast.
All right. Let’s address Laura’s questions. She says, “Where do you start after creating the accounts with all the social media? Do you keep separate accounts for private life and art teachering life?” I’m going to address that question first. I do not. When I first started blogging in 2012, I decided that my blog would basically be not just about art teachering but about lessons, things that I’ve made and outfits that I like to wear. Those were my three key weekly things I wanted to touch on. That has since changed on my blog. I don’t share what I wear every single day anymore.
However, because my blog always had that format of not just being art teachering but all things that I love, when I decided to create an Instagram account, I decided to make my Instagram also reflect that. Meaning, I didn’t want to have a separate account for my home life and personal things because I’m going to be really honest with you guys, I don’t really have a life. I mean, my life is creating, teaching art, spending time with my husband and my cat. I mean, that’s essentially it. Now, if I had children, that might be different. I might have a separate account. I totally understand people that do but for me, because I’ve always kind of shared everything, all on one platform, I’ve kind of stuck with that when it came to Instagram and my Facebook page.
Now, let’s address another question. Do you start with Instagram and have settings that you then copy and paste every time? I think she’s meaning hashtags. So yes. When you’re sharing on Instagram, I think one way to kind of shortcut is to have all of the hashtags that you always use because typing those all out can take forever. Keep them all in the notes part of your phone and then what I simply do is I copy and paste all of my hashtags every time I share something on Instagram. So that way, I’m saving a little bit of time.
She’s also asking about hashtags on Twitter. Let me just say I don’t do Twitter anymore. Nothing against Twitter, I just never … I guess I feel like I never really got it. I feel as though I am already on my phone on social media. My husband says I’m always playing with my “calculator.” I’m on it enough as it is so I was happy to let go of Twitter. I think that social media, you get out of it what you put into it. I never really put the effort into Twitter and I just never got much out of it for that reason. So I’ve since kind of let that one go.
Last question is do you follow the same people on both Instagram, Facebook and Twitter? I try but here’s the thing that kind of drives me bananas is that Instagram forces you to have not necessarily your name. We all have these great Instagram handles but at the same time, I don’t always put a face with an Instagram account because people are using these handles. So for that reason, I always get a little confused. When I go over to Facebook, which one of my friends what Instagram account. I hope that makes sense. I’m pretty sure I’m not alone in that confusion.
One last question. I think this is a great one also. So many good questions, Laura. Like on a typical day in your classroom, do you have your phone out and snap a picture and then what? Okay, so I try not to have my phone out too much when the kids are around because I think that they see adults with their calculators out enough as it is and I feel like it sends kind of a yucky message sometimes. So I try not to. But that being said, I do keep my phone when I wear my apron. It’s usually in my apron pocket. If I see the kids doing something that I remember to take a picture of, I snap a picture.
But I’m going to be honest, with my 30-minute classes, we’re go, go, going and I very rarely even stop to think to take my phone out. So that’s why on my Instagram, you’ll usually see pictures of kids’ artwork without the kids because they’ve already left and I finally have time to take things off the drying rack and really stop and admire all of their hard work and effort. From there, I usually post. So I hope that makes sense. But like I said, I went into a lot more detail on that podcast on social media. So if you have more questions, you might want to give that a listen. Thank you so much, Laura. If you all have any questions for me, please feel free to send them my way. You can find me at Everyday Art Room at theartofed.com
So the day after I did that heart felting project with my fourth grade students, the needle felted heart that I was sharing with you all earlier, I got an email from a parent saying, “My child came home from school talking about stabbing something and she’s really excited. I have no idea what she’s talking about. Can you please tell me where to get the supplies for this project so she can keep it up.” You all, that made my heart want to explode. I did have to go back and say to the kids, “All right. We’re calling this needle felting. Let’s not call this stabbing anymore.” But it’s just so thrilling when we bring something into our art room that we are passionate about like me with felting because it’s so stinking contagious for our kids.
When you share something that’s beyond just markers, paper, crayon, when you take them to … Introduce them to another art supply that they’ve never even heard of, their parents have never even heard of, it’s really, really exciting for them. So anyway, I just wanted to share that little story with you. I hope that you give felting in your art room a shot. Thank you so much guys for letting me share all things felting during this podcast and last week’s. Have a great week.
Magazine articles and podcasts are opinions of professional education contributors and do not necessarily represent the position of the Art of Education University (AOEU) or its academic offerings. Contributors use terms in the way they are most often talked about in the scope of their educational experiences.