Media & Techniques
Digital Photography (Ep. 111)
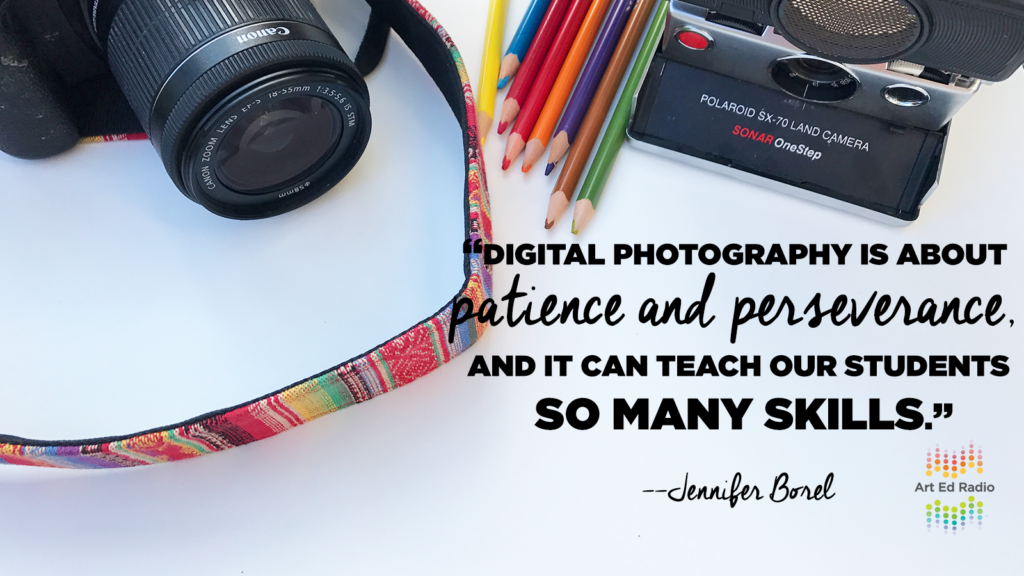
Former AOE writer and current AOE instructor Jennifer Borel joins Tim to talk all things digital photography. Listen as they discuss the ideal types of cameras–and what to do if you don’t have the budget for them (5:15), the connections between photography and other media (9:45), and how to organize and turn in digital work (17:45). Full episode transcript below.
Resources and Links
- Fun Photo Projects for Middle Schoolers
- 5 Pieces of Advice for Digital Photo Students
- The Bringing Digital Photography to Your Classroom PRO Learning Pack
Transcript
Welcome to Art Ed Radio, the podcast for art teachers. This show is produced by The Art of Education and I’m your host, Tim Bogatz.
Now, in the past Andrew and I have talked about a lot of different subjects and done a lot of different episodes on specific media. And we’ve done episodes on drawing, on sculpture, on ceramics. But we’ve never done anything on digital photography. And I wanted to cover that, but since Andrew doesn’t want to talk to me anymore, I needed to find somebody else. I wanted to find somebody that has the expertise we need to talk about how you can get into teaching digital photography in your art room. And my mind went immediately to Jennifer Borel, who is going to join me today.
Jen is a middle school teacher outside of Kansas City, she’s a former AOE writer and current AOE instructor. She also has her own photography business, she has a ton of great ideas, and I’m really looking forward to comparing notes with her on teaching digital photography and seeing what kind of ideas she has because I know they’re going to be great. And maybe most importantly for our purposes today, Jen has a brand new Art Ed PRO learning pack that just came out on Sunday. It’s called Bringing Digital Photography Into Your Art Room. It has 20 videos, 8 resources and just a plethora of great information. So if you enjoy this interview, this episode today, make sure you check out her learning pack.
And if you haven’t signed up for Art Ed PRO yet, go do it. There are almost 70 learning packs now and there are new ones being released every month. The other two new releases for April, along with digital photography, are a learning pack on sketch notes and a learning pack on teaching foundational skills. So make sure you check out everything about Art Ed PRO at theartofed.com/pro.
So, like I said, I am really looking forward to chatting today about some good approaches to getting started with teaching digital photo, with cameras, concepts ideas and wherever else this conversation may lead us. Let’s go ahead and get it started now.
Hi and Jennifer Borel is joining me now. Jen, how are you?
Jennifer: I’m doing well. I’m on spring break so I’m getting a little rest and relaxation in.
Tim: Yes, that is something that every teacher needs, for sure.
Jennifer: Yes. It feels good.
Tim: Good. So let’s dive in. I want to start off kind of simple here, talking all things digital photography today. So why do you love digital photography, or just photography in general? And what kinds of things do you think it can teach our students?
Jennifer: Sure. Well, I actually kind of fell in love with photography back when I was in high school, which is really ironic because I hope no one ever sees those photos that I took in high school because they are awful. But that was back before we really had digital cameras. They just weren’t on the scene yet, they weren’t very prevalent. So everything was on film and you never knew what you were getting back until you got it back. Like I said, it wasn’t my best work. But yes, when I got into college, digital cameras were just more available and I started to invest in camera, and invest my time in learning about them. I just kind of fell in love with it. It just sort of became my go-to art form. I really still enjoy the process today. I still enjoy learning about it today.
You asked what I think it can teach our students. I actually think it teaches our students quite a bit of patience. I’m pretty sure, isn’t it true you guys have talked on the show about working with super fast students and super slow students?
Tim: Yes. Yes, we’ve done some episodes on that.
Jennifer: Yeah, it’s a real problem. I’ve found that, at least photography, you really have to … It slows you down. I think a lot of our kids go in to a photography class and they’re like, “This is going to be easy. I just have to click a button, it takes a photo,” because that’s what they’re used to. They have these digital devices where that’s all they have to do. If you’re really teaching the art of photography and you’re showing students how to use manual mode on their camera, it does take patience, it does take perseverance. They do have to learn how to read the light around them otherwise there gonna end up with a really washed out photo or a really dark photo.
Tim: Yeah that makes sense and actually that is something I wanted to talk about too. Just the idea of camera versus phones that are so prevalent and like you said everybody has them. So when it comes down to classroom, when it comes down to teaching photography, where do you stand on camera? Do you think kids need a DSLR or can they learn with a point and shoot, or with every kid or with a majority of your kids having phones with decent cameras, can they just use their phones as a tool for photography?
Jennifer: Yeah, well I would say in a perfect world every art room would have a set of DSLR cameras but I don’t know, I haven’t really met…
Tim: We all know that is not the reality.
Jennifer: Yeah I don’t know many teachers that have twenty thousand dollars just to spend on cameras. Maybe if you’re like a high school photography teacher, then you have that already but I think you can come up with some really fun lessons, where you could incorporate the camera off of you I pad or a digital device or really get your students excited and let them have their cell phones out in class. But if you’re wanting to teach them how to use those basic concepts in photography like shutter speed, and ISO, and aperture then you’re really gonna need a DSLR camera because theirs just not a lot of point and shoot cameras or phone cameras that have a manual mode on them.
Tim: Yeah and so that makes sense and let me kind of follow up with some of those basic concepts because when I taught photography we always started out with shutter speed because that is the easiest thing for kids to get. Then we moved on to aperture and then ISO. So, do you think that is a good way to approach those concepts, or there is more things out there, or a better way to do that?
Jennifer: I would definitely say those three concepts are where you want to start. When I taught photography I tried to … well I guess you could probably back this up for me, when your trying to teach shutter speed, or goodness sake, aperture to a bunch of students, its kind of like over their head at the beginning. Yeah it is … there are hard concepts to teach. So I would say that I try to more gear it with my students and talk about light and talk about how photography is all about reading the light that’s around you and … we talk like if your camera is set on automatic mode then its making all of these choices for you and its more than likely going to get it wrong. It is not gonna do exactly what you want but if you move into manual mode than its kind of like you’re the boss telling the camera what to do and you’re trying to tell the camera what to do with all the light that surrounds you.
So when I talk about light as this big concept then when we talk about shutter speed, or aperture, or ISO each one of those things I related back to light. Like this is how light is working into this concept. And I don’t know if it helps the kid or not but I feel like it just sort of ties those three concepts together on how they all fit together.
Tim: Yeah, that makes sense. I like that approach and I like how you tie those things together, so that is a really cool approach. And then I kinda wanted to move on to and talk about composition because I think that is the biggest things that kids struggle with, for whatever reason it is really tough them to get on top of that. So let me ask you about how you approach that too? Everyone knows the rule of thirds but beyond that are there other composition tips and tricks that are easy to teach or easy for your kids to pick up. And sorry if I’m rambling here, but one other thing that I was just thinking about composition, do you find any overlap between what you teach composition wise, between like drawing and painting and what you teach in photography? Can those concepts transfer and make it easier for kids to understand?
Jennifer: Sure, I guess I’ll start with your last question and work my way back. I think there’s definitely a link between when your trying to teach your students a drawing lesson or a painting lesson and you start talking about composition. I know that I do sketch books every single week with my middle school students and we talk about you have this whole piece of paper, are you gonna draw your object really, really small and then have all this white space around it or how can you look at the composition differently? How can you pull things off the edge? How can you capture a viewers interest in this? And so I think that transfers really well into photography because you have to really survey your scene before you snap that photo. You have to think about what’s going into it, how far away you are from your subject, I think there’s a lot of tie-ins between the two.
You did mention rule of thirds, I would say yes more, maybe high school students and maybe adults in the art field they definitely know what rule of thirds is. Not so sure my middle school students do, especially when you just catch a glimpse of what their posting on social media and your like, ” Man, that is not the best compositional photo I’ve ever seen.” But teaching that is important to begin with, that’s a good place to start.
And once they’ve got that trick down, another thing I like to cover is avoiding a merger in your photo. A merger is something that is intersecting your subject somehow, whatever your photographing in a negative way. So for instance, I’m sure every person out there has taken a photo and then looked at it later and realized the person they were capturing the photo of has a huge light pole coming out of their head because it was behind them.
We all have those winners. So we kinda talk about like well, if you were to maybe get down on the ground and shoot from the ground up or if you were to use positions before you take that photo, that merger would disappear and its kind of nice because I have all of my own work done in photography and I have my own mergers that have appeared in photos, that I can pull those photos out and say, ” Here is one that has this horrible flag pole coming out of somebody’s head” and then just by switching positions you’ve gotten rid of it, you made it more compositionaly pleasing for someone to view it. And another fun trick is teaching them how to use their subjects to hide those mergers, like just by changing your position, maybe you step up on a chair or something and you’re able to hide a stop sign behind your subject. So you don’t need to edit it out later, like in Photoshop or lightroom, you can just take it and it’d be perfect, straight out of camera.
Tim: Yeah that makes sense. Now you did a nice job explaining that cause you said mergers and I was like, ” What in the heck cause I don’t know,” is that something that everybody knows? Am I just out of the loop here?
Jennifer: No, actually this is a word that I just actually heard of. I’ve always had that conversation but I didn’t know there was a term for it.
Tim: An actual term or-
Jennifer: There called, ” Mergers” apparently.
Tim: Okay, well I feel much smarter now so thank you.
Jennifer: No problem, I do too.
Tim: So, let’s say we’ve got concepts down, we’ve got some of these basic ideas down and when it comes time to move into actual projects, what are some of your favorite photo projects to teach? What kind of subject matters do you want your students to take on and why do you want them to take on those ideas?
Jennifer: That’s a good question and that’s probably where a lot of photography teachers kind of start, like what do I wanna teach my kids? One of my personal favorite lessons, actually came from something I did while I was in college. We had this assignment that we were suppose to capture portraits of people, which it seems pretty typical, at some point in the semester you’re gonna cover portraits but the reason I liked this is cause the professor kind of took a different spin on it and it was about creating … or like taking portraits but they were obstructive somehow. So I ended up taking this idea and turning it into a lesson it is called, ” Portraits without Faces,” which seems really weird when you think about that title.
This is a good way for me to describe it. I’m sure your familiar or the listeners are familiar with M.C. Escher’s, “Hand with Reflecting Sphere” where M.C. Escher’s drawing a self portrait of himself but it is in the sphere, instead of actually of him. So the sphere is obstructing the view of the portrait somehow on which a different way to see the portrait. So that is the kind of concept that then we pull into students actual photos. And they have a lot of fun with this because first they get to go get their friends involved and they always enjoy bringing them into whatever photography lesson their working on. I know that when I’m showing some of my examples of things I’ve done, I have a picture of my mom actually and she’s taking some kids bubbles that you would blow and she’s blowing bubbles, and I was able to capture her face through the bubbles so it is a little bit distorted. But your not looking directly at her face, like there is something interfering with it.
I like this idea because I feel like kids can get really creative and usually there’s a lot of fun stuff that gets turned in for the class to view. There’s more fun projects that are like … I really like working with macro lens, which is a lens that will zoom in really close to your subject and so its fun to have kids go out and look for the elements of our principles of design and their using a macro lens to find items that somehow reflect those concepts. So there’s all sorts of way you can pull in those art concepts into photography classes. The face lessons are definitely one of my favorites, I talk about it actually and show some pictures in the photography pro pack that’s being releases here soon. So yeah it is definitely something I would check out so you can actually see photos from it.
Tim: Yeah that’s cool, I’m looking forward to checking that out for sure now. I just have one last question for you because I know there is one more thing that a lot of people struggle with, when they are doing digital photography. When it is time to turn in work, how do you do it? What advice do you have? Can you talk a little about the logistics of turning in digital work, how you organize it and then maybe how you assess or grade all of the work that is coming in to you.a
Jennifer: Yeah, well for me you’re working with a digital format so I really like things to be turned in digitally. It just helps me stay organized. So I’m actually like a Google girl all the way. My whole district is set up with the Google suites, so all the students work on that and just makes sense to kind of go that direction for me. So my personal favorite platform is, Google Classroom. I know the longer it is out it seems like more teachers are becoming familiar with this platform but if you haven’t checked it out, I would highly encourage it, it is pretty awesome. You essentially can make a classroom that is online and you can push out assignments on there and then students can turn in their work to that assignment that you’ve put on to the classroom.
So I can assign something and they have all the directions there and whenever they are finished taking their digital work or they’ve gone through post-editing they can just send it right back, they can attach that file back and turn the project in, which is super convenient when you’re trying to-
Tim: Yes that is awesome.
Jennifer: …Keep everything organized but that being said I am also the queen of my own personal digital photos, like going to some horrible graveyard of digital files. I mean ever since phones became more prevalent, I’m sure you’re probably the same … who goes and prints photos anymore, it just doesn’t seem to happen. So I do, when a student is like really excited about a portrait or something that they’ve taken, I do encourage students actually print out their work or we map their work sometimes, there’s exhibits that they can put their work in, it just kind a takes it up another lever from it just being an assignment that they had to turn in but now seeing it printed out it almost feels more like a work of art.
So when they have their works printed out or even if we are showing them digitally, I love gathering the classroom to talk about it. I feel like there is always some kid who brings up something about someones work that I wasn’t expecting and just sort of changes the way I view that work. I like hearing about what the students were thinking when they took a picture. You never know, sometimes these students get pretty in depth with the things that they were thinking or feeling when they took these photos.
So it is fun to be able to talk about their work actually in class and usually when I assess their art or their photography I’m looking at their effort level or their creativity level. Asking questions like did they meet the requirements and sometimes those conversations we have about the photograph also plays into their grades. So I don’t want it to become something where the kid hates photography by the end of the class. I just want them to be able to grow and they can go out and take continuous glazing photos and know how to do that without feeling trapped in automatic mode where they can’t get out that.
Tim: Yeah that’s cool, that makes a lot of sense and I think everything you just said there is really good advice. So we’ll go ahead and leave it there. So Jen, thank you so much for joining me today and passing along all of your advice, I really, really appreciate it.
Jennifer: Well thanks so much for having me.
Tim: Awesome, that was a really fun talk. I appreciate all of Jen’s insights and it was good to talk some shop about teaching digital photography. Now if you wanna dive in a little bit deeper, I have a couple of suggestions for you. First of all we have a couple excellent articles that I would link in the show notes. One was written by Andrew, probably like two or three years ago just some really good tips for teaching digital photography, introducing it to your students and we also have a new one from Ray Yang that just came out last month and so we have one old one, one new with some great ideas on lessons, some tips and tricks for teaching that can really help you.
And secondly if you really wanna jump into a lot of information make sure you check out Jen’s PRO learning pack. She mentioned it during the interview, I mentioned it in the introduction and when you put all of this together there are just so many resources out there and hopefully they can all help you bring this creative, this engaging art form that’s hopefully new to your students and give them something to get excited about.
Art Ed Radio is produced by The Art of Education with audio engineering from Michael Crocker. Remember you can sign up for e-mail list at artradio.com, find all of that awesome content I was just talking about and listen to all of our old episodes, maybe even find something new that you just can’t wait to teach. Thanks for listening and we will talk to you next week.
Magazine articles and podcasts are opinions of professional education contributors and do not necessarily represent the position of the Art of Education University (AOEU) or its academic offerings. Contributors use terms in the way they are most often talked about in the scope of their educational experiences.