Curriculum
The Best Alternatives to Holiday Lessons (Ep. 018)
How big of a role do holiday projects play in your classroom? And if you choose not to teach them, what other options do you have? In today’s episode, Cassie talks about those ideas and more. Join her as she discusses why she doesn’t teach holiday projects (4:15), some of her favorite alternatives to teach instead (12:00), and why guided drawing always has a place in her classroom (24:00). Full episode transcript below.
Resources and Links:
- You can find all of the great lessons that Cassie mentioned in today’s episode on her blog
- She also mentioned the amazing Don Masse
- What is the Role of Holiday Projects in the Art Room?
Transcript
I don’t know if you know this, but I am the proud owner of a rainbow tree. That’s right. I’ve got a six foot, it looks like a Christmas tree, but painted like a rainbow has spiraled down this tree. It’s kind of amazing. I’m not going to lie. I was gifted this tree by a company, in order for me to decorate it and share it on social media, and it’s gone a little bit, I guess you could say, viral. It seems like every time I get on Facebook, a large Facebook group is sharing it, which means there’s a lot more shares and a lot of commentary.
I was spending a little bit of time reading the comments because it was so fun to see a lot of people encouraging me, people I didn’t know, saying, “What an amazing tree. That looks like a fun art room.” You get the idea. I did read one comment that really stuck with me, and I wanted to share it with you. It said, “This tree is what is wrong with America. This tree is ugly. This tree does not look like a traditional Christmas tree. This is why people are homeschooling their kids.” Say what now? Obviously, this person had a problem with my untraditional Christmas tree. Let me just say, when this tree is in my room, I am not referring to it as a Christmas tree. It’s the art room tree. Here’s why. I live in America.
I teach in America. America is full of a rainbow of people, people of a rainbow of colors, a rainbow of beliefs, a rainbow of thoughts, and thank goodness. I would not want to have it any other way. America used to kind of be referred to, and maybe it still is, as a melting pot, but I don’t really like that idea. I don’t like the idea of everybody melding and meshing and melting their thoughts and becoming just one person, just another sheeple. We’ll put it that way. I love that we’re all very different. That’s what makes us so great. Of course I responded with something like that to that comment, and I just left it at that. Some people you can’t help, you can’t fix.
All that to say that it really got me thinking about what we teach in our art rooms, especially this time of year, when a lot of us are doing holiday themed art. Should we be? I mean, if we have kids who are from all walks of life, should we really be teaching them just about one specific culture or holiday? I’m tempted to say no, but to each his own. You might be at a private Christian school that allows this. You might be teaching all of the cultures, and Christmas falls into one of those cultures. That’s fabulous. Today, in this podcast, I thought I would share with you some alternatives to holiday art projects. I’m going to share with you my top 10 winter themed art projects. I’m Cassie Stephens, and this is Everyday Art Room.
Now, if you’re like me, listening to somebody describe something is not quite the same as having a visual. For that reason, I will be linking all 10 of these top 10 winter themed projects on my blog. You can check those out there, and they will link you to complete lessons, sometimes even video-led instruction, but I thought I would go ahead and give you the rundown on my top 10. Some of these projects you can do in very short class times, because let’s be honest, this time of year is so crazy that you’re lucky if you see your classes before winter break, or you’re lucky if you see all of your students.
I know for me we have a beautiful and amazing winter program coming up, which is definitely going to eat into some of our art time, and that’s fine. That’s just par for this time of year’s course. All that to say, a lot of these, you can do in a short amount of time, and since they are winter themed, you’re not limited to having them done by the holidays, dun dun dun. See? This is why winter themed art is where it’s at. All right. Let me start off with my first one. These are in no specific order. My first one is a favorite with my second grade students, but this one could definitely be done with kids older.
This one is inspired by the contemporary folk artist Heather Galler. That’s G-A-L-L-E-R. If you are not familiar with her work, you’ve really got to get yourself familiar, because it is a fantastic body of work that really introduces kids to color, pattern, and lines. She does things from landscapes to cups of hot cocoa, which is exactly what this project is. This project really allowed my students to focus on review of line and how repeating lines create shapes and patterns. We did that for a background on a small, I think it was about a 8×8 sheet of paper.
We also created another pattern on a smaller piece of paper that was then glued down to serve as the table. Then on top of that, we reviewed collage and added ourselves a paper cutout cup of hot chocolate. Not only that, but then we had to paint the steam coming out of it, which of course incorporated a little bit of science. Because it was near the end of that project, the year that we did it, we enjoyed a cup of hot cocoa and put on the little fireplace on TV and had that going as well, so it was a lot of fun, and just a good warm fuzzy of a project to do on those cold winter days. Heather Galler, hot chocolate pattern project. Check it out.
Another one of my faves is to incorporate print making at this time of year. This one I did with my second graders also. It was a printed pattern portrait. Now, let’s talk about print making. I love doing print making with my students, and my favorite way to do print making with my kids is to purchase styrofoam trays. Not styrofoam trays. I’m sorry. Styrofoam sheets, which you can purchase through your art supply catalogs. They’re great because your kids can easily draw into them, and I like to have them draw with ink pens. I like having them use ink pens because the roller ball of the ink pen allows for them to draw very easily over the surface. It took me years to figure that out.
I was having kids draw with pencils for the longest time, and couldn’t figure out why they were accidentally jabbing holes in them. Duh, Stephens. When your kids have that sheet of styrofoam, talk to them a lot about pattern. My students had a sheet that was about, not very large. It was about six by eight, and they drew patterns all over it. Now, when you’re doing print making like this with your students, and they’re drawing on that styrofoam with an ink pen, it’s important that they get their lines deep incised in the plate.
I always tell them, “Do it twice,” but you’ll have those kids who’ll bring you there plate so that you can check it, and you can tell they only did it once, but they swearing they did it twice. Here’s a little side trick. Get two different color ink pens. Have them draw their design first with let’s say black. Then they have to trace over their designs with the second color, let’s say red. There you have evidence that they, yes, actually have traced over their designs twice. Now, if you’ve got their pattern plates ready to go, you could do the traditional print making method of using brayers and ink. However, brayers and ink, they ain’t cheap.
It might not be some mess that you want to deal with when winter break is quickly approaching. If you have never tried out marker printing, then you really got to give it a go. I learned this trick from Don Massey, who is the blogger over at Shine Brite Zamorano. He is fabulous. This is what you do. You simply take that styrofoam tray, have the kids color on it with their water soluble markers. They don’t even have to color quickly. They don’t even have to finish coloring in one class period. They can return to coloring the following class period.
Once their entire printing plate is colored with whatever colors they desire, with washable markers, have them take a sheet of paper and wipe it with a damp sponge, press their styrofoam tray down on that, massage, massage, massage, peel it off, and voila. You will be amazed at how phenomenally this prints, and with like zero mess and zero expensive supplies. What do you do with these marvelous printing sheets? Well, I’m so glad that you asked. You can then use these … This is what we did for our portraits … To cut out hats and mittens, and then add those to a self portrait drawing.
We created our self portraits on construction paper with oil pastel, painted the hair, and then cut out mittens and hats from our printed examples. This was a multi-layer project, but it was fabulous and we learned so much. One of my favorite artists of all time that is a wonderful tie in for winter projects is Charlie Harper. Ah. Can we just take a moment and talk about how much I love the artist Charlie Harper, and why he’s so great to share with your students? His work is phenomenal, and his work includes a lot of woodland animals. If you take a look at his artwork, you’ll see a lot of winter work in his collection of masterpieces.
I love to take a close look at those, break them down into shapes and lines, and do a little guided drawing with my students. For example, I recently did a guided drawing of a faun laying down, based on Charlie Harper’s painting with my, once again, second grade students. After we did that guided drawing together, they simply cut it out and glued it to a painted paper background. Definitely look into his artwork. He’s got tons of winter animals like foxes and deer, and all sorts of other beautiful birds and creatures that you could definitely use to incorporate into a winter themed project.
I can see each grade level, in fact, doing a different animal, and having a beautiful display of woodland creatures in the wintertime. That’s one that obviously I’m really excited about. A project that I do almost every year, this is my number four down the list, every year with my kindergarten students, is a starry night inspired winter landscape. I love this project because it really introduces my kindergarten students to mixing tints and shades. This is how it works. The kids start out with a white sheet of paper, and on that white sheet of paper with blue and white paint, they create tints of blue.
I show them how to paint a line with blue across the middle of their paper that can be straight or curvy, depending on what kind of horizon line they’re wanting to create for their landscape. After they paint that blue line about across the middle of their paper, they then clean their brush and add white paint to their brush, and to that blue line, mixing it from the blue line down, kind of pulling that blue paint down with the white paint, which creates a beautiful, light, wintery snow blue. Then, for the top of the paper, we paint another blue line just above the first one. This time, we use black, and we start at the blue line and paint up.
This is a great lesson to introduce your students to tints and shades. From there, once the painting is dry, we bust out the oil pastels and we look at Vincent van Gogh’s Starry Night. In that shade of the sky, the kids draw lines and shapes to emulate a moon and stars. From there, they use collage and review of shapes to create small houses in their landscape. Each one of these always turns out so amazing, and like I said, the kids learn so stinking much. My fifth one to share with y’all is one that my fourth graders did last year, and they turned out so beautifully. However, if I do it again, I will add another layer to this project, so let me share it with you.
My fourth grade students had large sheets of paper, 12 by 18, and on that large sheet of paper, they were to draw a large pine tree. They could draw it any way they wanted to. We talked about just keeping it simple. We talked about drawing it with lots of different lines. We talked about having it curved and a little bit straight. We looked at other artists’ renditions of trees, and realistic trees. The possibilities were endless. However, my one rule was they had to draw the tree large. They could add a trunk, and they could add lines to the background. Now, it’s at this point some of my students said, “Is it okay if a draw ornaments in my tree?”
I said to them, “That’s fine, but keep in mind that we might not be finished with this project until after the holidays, which might look a little strange when we have these hanging in the hallway.” This is a project where, if you do have students that do want to make a Christmas themed work of art, then that option’s available to them. Once they’re done drawing their design in pencil on this large sheet of paper, my students used black glue to outline their drawing. That’s why it was so important to make sure that everything was drawn pretty large. If you’ve ever used black glue with your students, it’s a lot like puffy paint, except that it spreads out just a little bit more.
It’s a little bit more liquidy-er than puffy paint. If you’ve never made black glue, oh boy, that’s a good time. Just kidding. Prepare yourself, and give yourself some time. I’ve made black glue a couple of different ways. I have made it with India ink, and I have made it with black temper paint. Both seem to work well. The key really is in the glue. You need to use Elmer’s Glue-All. You cannot use Elmer’s School Glue. What I usually do is I take a big container that I plan on throwing away, I dump a bunch of glue in that container, and I just start adding the black ink or black paint a little bit at a time, until the glue takes on a dark, inky, rich color.
Then I pour that back into the glue bottles, and cap them. That’s how I make black glue. If that didn’t sound like fun, then you’re right. It’s not, but I did use the black glue that I created last year this year with my students. The only thing I had to do was unclog the glue bottles. Don’t get me started. Anyway, so once my students were finished drawing and then outlining with black glue, the following art class, it was a great lesson to talk about color. We learned all about analogous colors.
In each shape that they created with the black glue, they had to use analogous colors, the reason being, as you know, is because they all want to use every color in the rainbow, and when every color in the rainbow is mixed together, what do you get? You get doo doo brown, and nobody wants that. That’s why we use analogous colors. Now, we did this on white paper, with black glue and chalk. Remember I said that I might change it up a little bit? Here’s how I would change that. I think it was maybe podcast that I recorded week before last, I chatted with you about how much I love chalk, and one of my new favorite ways to use chalk is to use liquid starch. Liquid starch and chalk are amazing together. It’s a match made in Heaven.
If you can’t find liquid starch, look in the grocery section. Do not use spray starch. If you still can’t find liquid starch then, you know, go on Amazon and you’re bound to find it there. What the deal with the starch, in case you missed it, is this. The kids color wherever they want their chalk color to be, and then they dip their finger in the liquid starch and just massage … How many times have I said that word in this podcast … That over their chalk. What the liquid starch does is it helps to really blend the colors of chalk together. It makes them a lot more vibrant, and it also acts as a binder, so then you don’t have to spray on any fixative. That’s right. It’s magic.
I learned that trick from my good buddy Jan Alvarado. All sorts of shout outs today. My next favorite winter project is the lost art of snowflake making. Man, I remember sitting with my dad at the kitchen table, making mountains of snowflakes. Then I forgot how to do it. Kids, they don’t make them anymore. Why not bring that back, especially on one of those last days of school before break? What do you do with a bunch of snowflakes? Well, here’s a couple of projects that you can do to incorporate snowflakes. This one was my favorite.
After my students cut out beautiful snowflakes, we then took the snowflake and used 3M spray adhesive, and we sprayed a small matte board. The matte board was the same diameter … Is that the right word? The same width, we’ll go with that, as the snowflake. I hit it with spray glue, the kids gently laid their paper snowflake down on top of it, and then I hit it with spray glue one more time to make sure that the top of the snowflake had glue. You with me so far? Then, using the world’s cheapest, thinnest, junkiest aluminum foil, I had them place that right on top of their entire work of art, and the spray glue made sure to grab and anchor everything in place.
They took it back to their seat, and, with a gentle finger, not a fingernail, they massaged … Okay, that’s number three. If this were a drinking game, y’all would be toasted … Massaged their finger across their aluminum foil to really bring out the outline of their snowflake. It’s like magic, because that foil is so thin. The following art class, I then sprayed black matte spray paint on their snowflake. Now, listen carefully. It’s important that you buy the yuckiest spray paint that your local hardware store sells. I’m talking the one that’s a dollar a can, because that’s what’s going to burnish off the easiest.
Get you the cheapo can of spray paint, and also get you the steel wool that is the finest of steel wool, the finest of steel wool. Then the kids take that steel wool and they burnish or rub, I was tempted to say massage, they rub the spray paint off of the snowflake design, and it’s just stunning. Suddenly, you have this beautiful outline of a snowflake showing through, and it’s gorgeous. We then mounted these on painted backgrounds, and they were really a showstopper. Another thing that you can do with your snowflakes that you’ve cut out is if you have jelly plates, use them like a stencil for print making.
Simply ink up your jelly plate, place your snowflake on top, and then take, we used fabric, actually. We were making little snowflake quilts. Take your fabric or piece of paper, lay it right on top, and you’ll have this amazing kind of stenciled snowflake design. All right, so enough about snowflakes. Another fun project that you can do, great for the end of the year, also great if you have a music teacher who is in need of a backdrop for her winter program, winter murals. Winter murals are a lot of fun, and this is a way that you can get all of the kids working on one project. The year that we did a winter mural, I had my older kids go to P.E. where they were rollerskating.
We did gestural drawings of the kids rollerskating, brought those back to the art room, and transformed those roller skates into ice skates, and created drawings of our friends who were then ice skating. Those were used in the foreground of our mural. My younger students created collage houses, painted trees. My first graders painted large sheets of paper with patterns and designs on them, which served as the background. That really came in handy when we needed that big mural for our winter program. Last but not least, this time of year, you really can’t beat guided drawing. My students absolutely love guided drawing, because all of them feel really successful.
Now, I’ve been asked before, “What do you do about those kiddos who don’t feel successful, who are kind of feeling a little downhearted about their drawing, and you don’t want to have them keep starting over again?” That’s a great question. Usually what I do is I tell the kids, “Look, this is just a practice drawing. This is just a sketch. If you’re not happy with it by next art class, we’ll do another one, but in the meantime, think of it as a beautiful oops, and keep going.” Guided drawing, things like penguins, bunnies, bear, like I mentioned before, reindeer. We’ve done those on colorful pieces of construction paper and then cut those creatures out and glued them to beautiful painted backgrounds.
Whew. Okay. I feel like I have given you a little bit of a mountain of options for winter projects, something that can maybe serve as an alternative to holiday art. Just a thought. Whew. Thank you guys so much for letting me share all these projects with you, and saying the word massage about five, oh, make that six times.
Tim Bogatz: Thank you, as always, for tuning in to Everyday Art Room. We’ve been talking about Art Ed PRO, the essential subscription for professional art teachers. It’s on demand professional development with video tutorials, downloadable handouts, and all kinds of other resources, to help take your teaching to the next level. With three new learning packs being released earlier this week, the library now has over 50 learning packs, which should cover just about every topic you need.
The new learning packs include strategies for early finishers, something Cassie talked about just a couple weeks ago on the podcast, as well as how to teach photo shop, and how to implement a growth mindset in your art room. With so many different topics already covered, and three more packs released on the first of every month, it is the professional development you need when you need it. Make sure you check it out and start your free trial at theartofed.com/pro. Let’s go ahead and get back to the show.
Cassie: Now it’s time to take a little dip into the mail bag. This question comes from Amanda, and it’s a question that’s in reference to last week’s podcast. She asks, “Quick question about clips and points. What happens if a table gets a four consistently, or they get a four a couple of times? I have a few students that, once they, quote, “mess up,” and there isn’t an opportunity to earn the reward back, they all just go all out and not even attempt to stay on task once they know the reward is off the table, so to speak.” Wow. That’s a really great question, Amanda.
I have noticed that I, in fact, I had this happen today. I had a third grade table where, and it’s a group of dudes, so we’ve got four dudes at one table. Guess who’s the idiot in this picture? They just love to chat, and they cannot, there’s not a lot of self control at that table. I had them move one clip, and then I had them move another clip, so they were down to three. In my class, you don’t get the opportunity to move that clip back, but just because that’s what I do in my class doesn’t mean that you can’t change things up in your class. If you tell that table that has moved a clip, “Hey, I am willing to give you your clip back, but you have to be willing to make a change.”
Maybe you could set a timer and say to them, “In five or seven or 10 minutes, I am going to make my decision as to whether or not you have earned that clip back. If your behavior has improved, easy peasy, you get your clip back. If your behavior has not improved, then I’m sorry. I will either just keep the clips at four, or move another clip.” Maybe giving that table that’s just like, “Well, we moved a clip, so forget it,” is throwing up their hands, maybe they need a little bit of a wiggle room in your system. I’m always looking for ways to break my own rules, which is kind of stupid, but you’ve got to do what you think is going to work for these kids.
Holding some kids to such hard and fast rules sometimes just doesn’t work for that group, and when it doesn’t work, then you’ve got to think of an alternative. That’s what I would consider doing. Now, for that table of mine that I mentioned before, I’ve actually been thinking a lot about them today, so I’m glad you asked this question, because for me, what I plan to do is say to that table, “Look, table of dudes, this is obviously not working out. We need to break up this group of dudes.” I am going to give them the opportunity to make the choice to approach another table and say, “I would like to sit at this table,” and perhaps ask a person to voluntarily move to the other table.
We’ll see how that goes. I’ll keep y’all posted. Like I said, this teaching game, we’re all trying to figure it out. It’s like a day to day, hour by hour, they’re always throwing something new at us, those rascally little kids. That’s what keeps us on our toes, and let’s face it, that’s what keeps us coming right back every single day. Thank you so much for the question, Amanda. If you have a question for me, feel free to send it my way. You can reach me at everdayartroom@theartofed.com.
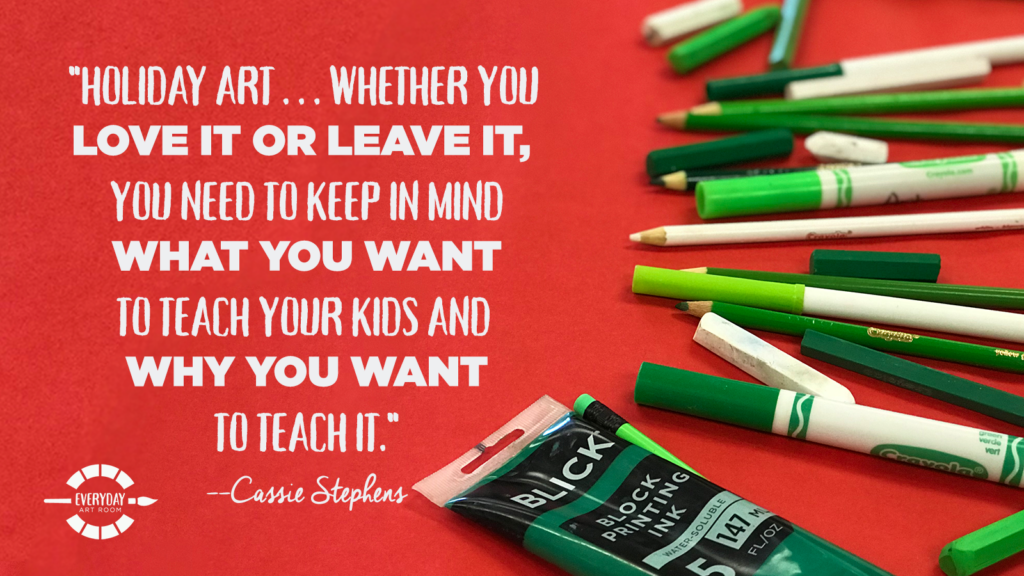
Holiday art. Love it, leave it, do what you want to do with it, but just keep in mind that group that you are teaching, and what it is that you really want to teach them about. After all, we’re not so much a melting pot as we are just a big group of people from a whole bunch of different backgrounds. Why not let all of those backgrounds and all of our different colors and beliefs shine, like a beautiful tree, a rainbow tree? Yeah. I’ll stop. Thank you so much, guys, for letting me share my top 10 alternatives to holiday art projects with you. Have a great week. This is Everyday Art Room, and I’m Cassie Stephens.
Magazine articles and podcasts are opinions of professional education contributors and do not necessarily represent the position of the Art of Education University (AOEU) or its academic offerings. Contributors use terms in the way they are most often talked about in the scope of their educational experiences.