Related
Classroom Management
 Podcast
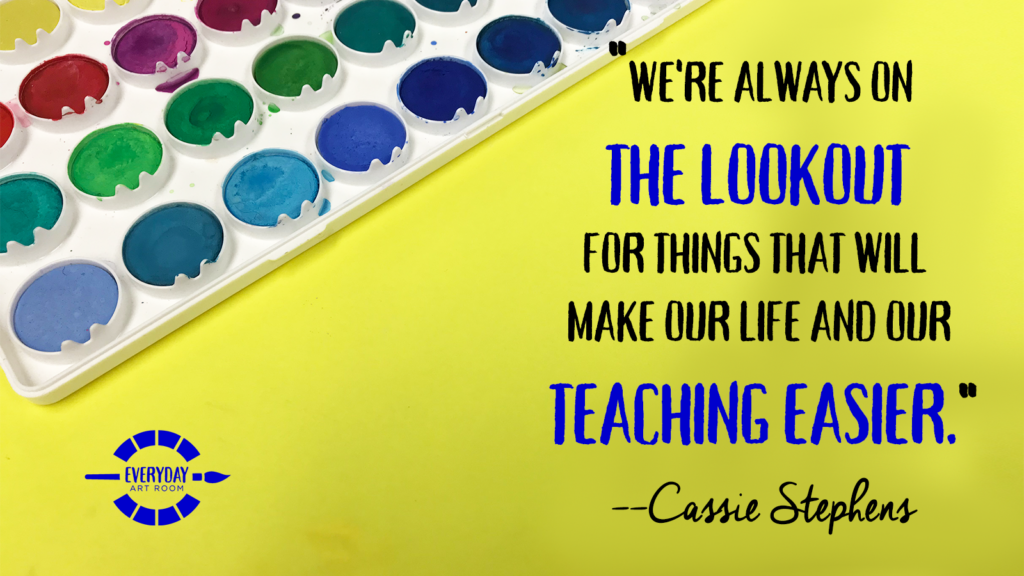
We all know that the life of an art teacher is difficult. We have to know so much and do so many things on an everyday basis, it can get overwhelming very quickly. Cassie uses this episode to share some of her favorite hacks for the art room–each of which can help make life easier in your classroom. Listen as she discusses why you need a class set of dry erase boards (3:45), the versatility of dog dishes (11:00), and why she is over the idea of glue bottles (20:00). Full episode transcript below.
So, if you follow me on my blog you might be familiar with the notion that this year I have decided to completely renovate my art room. I’ve been in the same amazing space. I’m very, very thankful to have a beautiful classroom A, and B, have one that’s huge. It used to be the school library. So, by art room standards it’s on the big side. And I know full well that I’m spoiled rotten, however you know being an art teacher that once you become an art teacher you also are just inherently a hoarder and I have been hoarding, collecting, stashing, and completely un-organizing if that’s a word, it is if you’re me, y art room for close to the last 12 years and this year I just had it. I’d had enough. So, I am in the purpose of completely redoing my entire room. All that to say I’ve been sharing the process on my blog and a lot of times also on my Instagram. And when I do I live sharing it because I get a lot of feedback from y’all.
In fact, one thing that I recently learned when I shared something about my art room was that I’d been storing my markers wrong my entire art teachering career. So, I shared a picture of how I have my markers stored, which currently is in these little cups where all the markers are standing upright so that you can see the colors of the caps is my thinking. And I had several people message me and say “Cassie, you have to have the markers pointed down.” Duh. As soon as they said that I was like “Oh my goodness. Of course. That way all of the ink is always running towards the tip of the marker.” You should be doing that with your sharpies, your markers, your pens. What? Where has this art teachering hack been my entire art teachering career? I don’t know, but I was so thankful that several people mentioned this to me and I thought “You know what? What a great theme for this weeks podcast.”
I’m going to share with you my top 10, although there’s way more, so this might be a to be continued podcast, my top 10 favorite art teachering hacks. This is Everyday Art Room and I’m Cassie Stevens.
Now, before I begin this podcast of my top 10 art teachering hacks let me just disclose the following information. I do not work for the Dollar Tree. I have never worked for the Dollar Tree and I don’t get any dollars from the Dollar Tree. And the reason I’m saying that is because I know I reference the Dollar Tree all of the time and I’m about to do so in this here blog. So, I just love it. There’s so many hacks that can be found for art teachers in the Dollar Tree that it is beyond. In fact, sometimes when I’m a little bit bored and I find myself in the vicinity of a Dollar Tree I go in there, go up and down those aisles, and I just let my imagination run wild with all of the things that I could purchase in the Dollar Tree for my art room. So, that being said, I will be referencing some of those magical things in this here podcast about my top 10 favorite art teachering hacks.
So, let me start of with number one. And, in fact, I learned about this art teachering hack from one of the AOE conferences from Artteachershateglitter. So, her suggestion was to invest in a class set of dry erase boards. Say what now? Yeah. So, she was using them for her early finishers and I managed to grab a couple at Walmart and I kind of threw them at the kids and they were finished early with some markers. I didn’t throw them. That’s, you know, kind of what I sometimes feel like doing, but you know what I mean. Gave them to the children and they ate them up. So, dry erase boards. Heres how I use them now in my room.
They are great, especially for my kindergarten friends when it comes time to early finishers. My kindergartners know when they’re done they put their things away, they go grab a dry erase board. I usually open up one of my how to draw books, my more simple ones, I put it one my overhead projector or my document camera I guess I should say. I’m showing my age. And they just sit, relax, practice writing their numbers, their letters, or drawing what they see on TV for the couple of minutes that we have left in art class. Another way that it’s great is my students also use them. My younger students do not have sketch books because I only see my friends for about 30 minutes at a time. So, my K through second friends, they don’t have sketch books, but when they are going to draw something that they’re not sure about or they want to practice first before attacking their masterpiece they know they can always go grab a dry erase board for sketching. So, dry erase boards. Get you some.
Now, you can definitely go cheap on the dry erase boards. I’ve splurged and got mine at the Dollar Tree, however one thing you don’t want to go cheap on I have noticed are dry erase markers. They’re not all created equally. So, you will have to go and spend a little bit more for those. And if dry erase boards just are not in your budget then try laminating paper. Just getting some construction paper so it’s a little bit thicker and running it through your school laminator. Also, there have been a couple of times when my lovely little children have accidentally drawn on my dry erase boards with sharpies. Have no fear if that happens to you. Take a dry erase marker, draw over the sharpie lines, and then erase. Yeah. That works. It will totally get rid of those lines. So, one of my favorite hacks, dry erase boards in the art room. Perfect for early finishers and for sketching.
Now, speaking of those markers that I mentioned earlier, I don’t know what it is about markers these days, but a lot of them I have noticed they just don’t last as long as I feel like they should or at least back in the day the used to seem to last a lot longer. Maybe it’s because I’ve been storing them wrong, but all that to say if you find yourself the proud owner of a whole bunch of dried up markers, do not throw those markers away. What we do is when we have a dried up marker I have my dried out markers sorted by color. I know that sounds a little OCD and I am not. There’s a reason behind this. Once I have accumulated a good amount, maybe 10 to 20 of one specific color of dried erase … Not dry erase markers. Sorry guys. Water soluble marker. I’m talking like Mr. Sketch and Crayola. It has to be water soluble. I’m not talking Sharpies.
Once I have a good amount of those accumulated I take all of the ones that are one color, remove the caps, bind them all with a rubber band, and turn them marker pointy side down into a mason jar filled with just I would say two inches of water. What’s going to happen is if you leave that sitting overnight you’re going to end up with a really beautiful diluted watercolor. It’s not going to be a dark and vibrant color. It’s definitely going to be diluted, but hey, if you’re short on funds and you’re short on watercolor paint this just might be a solution for you. Now, if you really want to go the extra mile, which I don’t, you can use a pair of pliers, remove the back part of the marker, and take out the felt that holds all of the marker ink. Those little felts can then be dropped into the water and then that will even make a more rich and more colorful, the word is escaping me, watercolor for you.
How do you know when the markers are done or when to take the little piece of felt out? I give it about a day, but you can also kind of tell. The tip of the marker will be white and if you’re the person who’s removed the felt and it’s sitting in there it will have turned white also. Some fiends have told me that when they do this and they put the lid on the diluted paint that sometimes a little bit of mold comes to the surface. What you can do is add a little tiny splash of mouthwash and that will knock that mold right out. So, art teachering hack number two, don’t throw away those markers. Make sure you get as much as you can out of them. And also, Crayola has a marker recycling program. So, that way you can definitely make sure that you’re not filling up landfills with markers.
Alright. Let’s talk about number three. If you listen to my podcast about all things clay, kiln fired clay and air dry clay, I know I mentioned this hack, but it’s one of my faves so I’m bringing it up again. Hack number three, use toothbrushes to teach your students how to slip and score. Teaching kids to slip and score is not my favorite thing. It’s not fun because it’s that one added step that they have to do, but they don’t enjoy doing. So, when they think you’re not looking they just don’t do it. And then they only learn to regret the error of their ways when they get their clay project back and all the pieces that they had attached have fallen off.
So, to remove that step of scratching into the clay and adding a slit, simply give your students toothbrushes. I always tell my students that the toothbrushes they’re using belong to the principle and that they need to keep it on the down low ’cause we got to give them back to her when we’re all done. Yeah. Thankfully I have a really awesome principle who’s totally okay with my antics. Anyway, what the toothbrush does is if you give the kids a cup of water they simple dip the toothbrush in the water and use that to scratch or score the surface. And as it’s scratching and adding a little bit of water it’s also creating a little bit of a slit. So, toothbrushes work great for the slip and score method.
Now, let’s talk about one of my favorite hacks that I learned from my art teacher friend Tracy Evans. Shout out to her in Texas. She shared this one with me and it’s another one of those “Where has this hack been all my life?” Doggy dishes. If you have a Dollar Tree near you I want you to run out right now and get you at least a class set of doggy dishes. Heres why dog dishes are the best thing ever. If you get the kind where its got the food and the water side, then it’s perfect. They’re usually very shallow dishes, meaning they’re not gonna hold a ton of water. So, if they accidentally do tip there’s not a huge amount to spill, but the deal is they don’t ever tip. They’re made so that they don’t tip over and we use these dog dishes for everything.
I use them when my students are painting. One side holds the sponge that they dry the brush on. The other side holds water that they clean their brush on. We use them when we are working with clay. One side holds those toothbrushes I just mentioned. The other side holds the clay water. We also used them recently when we were making our plaster pencils and plaster crayons. One side held the plaster strips and the other side held the water. So, they’re amazing. I cannot recommend dog dishes enough.
Now, when it comes to keeping your tables clean, I don’t know what that’s like, one hack that I learned from my buddy Ginger Pacer is this. When your students are using a messy material, namely painting, have them use an 18 by 12 inch tag board mat underneath their surface. This mat will capture all of their paint. And that way you don’t have to worry about going back later and scrubbing down all of the paint off the tables. Tab board is a lot thicker than cardboard and definitely thicker than paper. It’s fantastic and it’s, like I keep saying, another one of those things that I didn’t even know what it was until another art teacher shared that with me.
Alright. So, let’s talk about sewing for just a minute, sewing and weaving. Sewing and weaving, probably the toughest thing about teaching your students how to sew and weave is how to thread the needle. The thing is all of our students have seen their parents or their grandparents stick thread in their mouth and then try to thread the needle that way. And I don’t know about you, but I don’t want to touch not icky, sticky yarn when they come up to me and say “I can’t thread this needle.” So, heres what I would recommend. Get some post it notes. Cut them down so that they are about an inch in length and about a quarter of an inch wide and fold it in half so it looks like a very teeny tiny hotdog bun. Alright? So, imagine this if you will. You’ve got this tiny little folded piece of paper that’s very long and thin like a hotdog bun. Have your students place their yarn or their thread inside of that hotdog bun, but making sure that none of the thread is ticking out.
So, once they’ve got the thread inside the bun with the long part of the thread hanging out the back of the hotdog bun, you simply keep that piece of paper hotdog bun pinched as you slide it all the way through the eye of the needle. When you pull it out and take the paper off wallah. The needle is threaded. The kids will think this is magical and you’re gonna love it as well because then you don’t have to thread millions of needles at a time. Trust me on this one. It’s the best thing ever.
Alright, so that’s the one thing that’s a big, old pain in the keister about teaching weaving and teaching sewing threading the needle. The other thing, yarn. Let’s talk about yarn, shall we? Okay. I’m gonna give you about three yarn hacks all in a row. Get you real quick. So, listen up. First thing is this. When I started teaching weaving I didn’t know a single thing about a skein of yarn. So, I’m gonna pretend that you don’t either. When you get a skein of yarn you never, ever want to unwrap it from the side. You always want to find the little tail that’s sticking out of the skein of yarn from the center. And when I’m shopping for yarn at the store I always look and make sure I get a skein of yarn that has that little, tiny tail that’s sticking out from the center. If you can’t find yarn that has that little, tiny tail then what you’re going to have to do it stick your hand inside the yarn and then just pull it out from the inside.
The reason you want to do this is because they yarn will unravel naturally this way. There won’t be any tangling if you pull it from that little part. If you unravel it from the side, it’s going to constantly be flipping around and tangling on you. So, that’s hack number one. Make sure you grab the yarn from the middle of it and pull from there so it doesn’t untangle.
Now, once you’ve got your yarn pulled from there then it becomes the “How do I distribute yarn to kids?” So, heres one hack that I’ve done before. Reach out. Send a school-wide email and ask everybody and their mamma for a two liter bottle that’s been empty and preferable cleaned. And once you’ve got those giant two liter bottles, what you can do is this. At the base of the two liter bottle take an exacto knife and slice it open horizontally so that when you lower the bottom of the two liter bottle it kind of looks like a puppets mouth. From there you’re going to slide the skein of yarn in to the two liter bottle. If you have one of those bigger skeins it should fit perfectly. When you slide it in though, make sure that that little, tiny piece of yarn I keep mentioning, make sure that it can come out of the mouth of the two liter bottle.
What I did was I had, gosh, about 12 of these bottles all filled with different colors and then the kids and I just kind of put them in a box where they all fit snugly and then the kids could come up to the bottles and pull whatever color of yarn that wanted to from those bottles for whatever length that they wanted to. Now, that’s one way to have your yarn accessible for your students, however when I have my third and fourth grade kiddos in my art room I have doubled classes. So, for me to have 30 plus kids getting up, going to the yarn area, getting yarn, it’s making my eye twitch just think about it. So, I try to have the yarn already on the tables for my students.
So, to have that amount of yarn ready I create something that I have called yarn monsters. So, what I do is this. I take all the colors of yarn that I want my students to use. Basically, I want them to use every color in the rainbow. I want to let them have a lot of options. So, I grab the ends of all of those different colors of yarn. So, if you can imagine in my hand I would be holding white, black, red, orange, yellow, green, blue, violet, all of them in my hand and as I’ve got it grasped in my hand, all the ends of that yarn, I start wrapping it around my arm like this. I grab the ends, I wrap them around my elbow back up to my hand, my elbow back up to my hand, and I continue with that around and around and around motion until my arm is just completely weighted down with all this yarn that’s been wrapped around it. Then I take my scissors and I simply cut.
I cut all of the yarn that my hand is holding, all the hundreds of strands, and after I’ve got all of the yarn cut it’s all exactly the same length. It’s all exactly about, I’m trying to think measure-wise, it’s all about 24 inches in length. I lay that out completely flat on my floor. I find the middle of that giant mound of yarn, and I double knot tie as tightly as I can a piece of yarn right through the middle. If you can imagine when you pick it up it’s going to look like a Raggedy Anne wig and I make one of those for each one of my tables. I just throw them in the middle of the table and as the kids want a specific color of yarn there’s no untangling it, there’s no untying it. They just pull whatever color they want and it comes out of the yarn monster very easily. So, those are my yarn hacks I hope they help you because they have really saved me when it comes to weaving and sewing.
Alright. So, I know I’ve shared this with you before, but I am not a lover of the glue bottle. In fact, you could go as far as to say I hate glue bottles. I remember they were like the vain of my existence my first five years of teaching. The refilling of the bottles, the constant unclogging of the bottles, the finding pencil lead in the tip of the glue bottle, the kids sticking the scissors in the glue bottle. I mean, it was just nightmare after nightmare that I just decided one day I’d had enough and I don’t deal with glue bottles anymore. Heres what I do. When I buy glue I buy the giant gallon of glue and I also buy a bunch of those very small lidded condiment cups and I fill the condiment cups with about a quarter inch of glue about once a week. And my students use a glue brush, which is just a very inexpensive paint brush, and they paint the glue on their project. Not their clay projects. Sorry about that. On their collage projects.
Oh, it’s been a wonderful thing and I’ve been doing it now for beyond 10 years and there’s no looking back for me. I love it because they add just the right amount of glue. They know to put dots of glue around the edge of their artwork. They know never to put a great big, big, old blob of glue in the center. We don’t waste glue. They’re just not glue crazy. I can not tell you enough how much this has saved my sanity. And I also feel like it’s really helped their fine motor skills. I know I’ve gotten a lot of flack from other art teachers saying “Yeah, but Cassie you need to teach them glue bottle skills.” And I agree, but at this time I am just happy where I am with my glue cups and that’s my hack and I’m sticking with it.
So, moving right along. Let’s talk about oil pastels. Can we do that for a sec? This is number nine if you lost count. Oil pastels. Okay. I don’t even need to tell you why they drive me bananas because you already know. So, let’s just move onto the hack. I, this year, took a Rubbermaid tub, filled it with water, and I threw all of my oil pastels, and I have millions. I threw all of my oil pastels in that tub of water and I left them there overnight. And when I came back the papers slid right off those bad boys. It was glorious. And I had a couple of students help me with this, which is great. They thought it was amazing that they could just flick those papers right off. And then we laid them all out organized by color on my counter. Once all one million, trillion of my oil pastels were laid out I purchased a bunch of very small bins, one for each color. Imagine from the Dollar Tree, those long, skinny pencil bins. That’s what I got. And I got one for each color.
And that’s how I organize the one million, trillion. Now, that doesn’t make it very accessible for my students. So, that right there, that stash, that’s my backup stash. For my students I purchased those clear bead trays. You can find them at the craft stores. It’s for organizing beads for people who make necklaces and jewelry, work with beads. And those cases are great because they have a lot of different slots. And in those different slots I have my oil pastels organized by color.
So, every table has one of these bead jewelry cases and it’s filled with oil pastels that don’t have the paper on them. The one thing I never liked about oil pastels is I was always picking the paper off, always getting it stuck underneath my nail. It drove me bananas. And if the paper was off the oil pastels and they were all thrown in the same bin together then they get all dirty being mixed up with the other colors. And none of the kids understood what color they were using. They didn’t look fun and bright and pretty to use. Keeping them in these little bead trays organized by color has really made it so my oil pastels stay nice. They stay clean and the kids have really done a great job about keeping them organized. So, that’s been a hack I started this year and I’m loving it. So, just wanted to share.
Alright. And last but not least, this was a hack I learned my first year teaching and it was from a book by Cathy Topal, which is a fabulous book. It’s called Painting with Children. And my first year teaching I had no clue about anything, especially painting with children. And I remember opening the page where she showed that she uses ice cube trays to distribute her paint. And I know what you’re thinking “Cassie, we all do that,” but, you know, there’s the one person out there who’s a first year teacher who might not. So, this is for you. I love ice cube trays for paint distribution, however what I don’t love is is that sometimes they tend to dry out.
So, I like to get the Glad press and seal because I can use that to really make sure that the paint stays fresh from class to class. Also, another thing I like to use are egg cartons. I really love those clear egg cartons that have the double lids, but that means I have to eat a lot of eggs. So, if you’re like me and you’re not like a crazy egg eater then you might want to check out ice cube trays. In fact, I recently saw somebody share in the Facebook art teachers group that they found ice cube trays that actually come with a silicone lid, which would keep your paint a little bit more fresh.
So, there you have it, my top 10, for the moment, favorite art teachering hacks. I would love to hear yours, especially in the form of that marker one. OMG. Where had that been my whole art teachering life? So, please make sure you drop me a line and share guys. Love to hear from you.
Tim Bogatz: Hello. This is Tim Bogatz, the host of Art Ed Radio. As always, I want to thank you for listening to Cassie every week here on Everyday Art Room. I also want to tell you about the Art Ed Now conference, which was officially released today on the Art Ed website. On Thursday, August second we will have over 20 presentations that are all online, all incredible, and all relevant to what you’re doing in your classroom. Each presentation comes with resources and handouts and you have access to every presentation for a full year after the conference. If you haven’t attended an Art Ed Now conference before give it a try this summer. It will be a day of innovative and inspiring talks, new ideas, and those resources and downloads that you can use throughout the year. The early bird price of only $99 is good through the end of March and you can learn everything you need to know about the conference at ArtEdNow.com. Make sure you go check it out after this episode is over.
Cassie Stevens: And now it’s time to take a little dip into the mail bag. This question comes from Tesha. She writes “After looking at your blog and YouTube videos I was wondering if you change projects every year? You have so many great ideas.” Thanks Tesha. “Do you every repeat projects for the same grade the next year? Do you follow a particular order in which you teach your units? How do you fit in cultural projects, art history, techniques, et cetera?”
Okay. Let’s start from the beginning. Heres kind of how I think about my school year the day before school starts. Just kidding. You know, in the summer when I start thinking up and dreaming up new ideas I usually approach my school year like this. In the fall at the beginning of the school year we’re usually doing a lot of two dimensional projects, a lot of watercolor paining, a lot of tempura painting, a lot of collage. And that’s the kind of media that I’m usually working with with all of my students. And from there I start to get a little itch when it comes towards winter time that we need to work on something a little bit bigger. So, for example, this year that meant we started exploring with plaster. My first graders and my upper grades started making art supplies like pencils from plaster. We created armatures. We were making crayons and paint tubes. And now that we are after winter break, we are in fibers land.
This is usually when we do something cozy like a sewing project or a weaving project. And after that in the spring it’s usually clay. From there we then return to more two dimensional stuff. We’re preparing for our end of the year art show. So, we’re kind of winding things down, but still wanting to create beautiful works of art. So, that’s usually what I’m thinking about as far as media goes.
So, when you ask if I repeat the same projects for the same grade, I always do a weaving project with my second graders. Sometimes it takes on the form of a circle loom weaving and I love that project. So, a lot of times I repeat it, but then this year we did something a little bit different and we did CD loom weaving instead. So, it really just depends on where I think my interests and my students interests will really lie that I take the lesson from there. So, in that sense I guess I do repeat, but I kind of change things up a little bit. I guess I repeat the medium, but I don’t necessarily always repeat the project unless it’s one that I really, really love. Like, for example, third and fourth graders I love teaching string art. They love learning how to do string art. If you’re not familiar, this lesson is on my YouTube channel. So, it’s definitely one that I always seen to go back to.
The ones that I know my students are going to love are almost always the ones I bring back, even if it takes on a slightly different form of I’ve improved upon it somehow. Do you have a particular order in which you teach your units? Well, when I’m teaching my students I definitely try to scaffold on what they’ve learned from one year to the next. For example, when we do weaving first graders always start with a paper weaving, which then builds in second grade onto their circle loom weaving, which by third grade means we’re ready to either continue down the weaving path or maybe go on to something like string art or stitching. So, I do make sure that we’re building on skills learned previously and we always refer back to that when we’re approaching a new unit.
As far as cultural projects and art history and techniques, you know, I know why you’re asking this because it’s so frustrating to try to teach all of these things. Sometimes I will have an entire year based on a culture. I used to do that a lot. These days I try to kind of sneak and snake that culture and that art history in where I can tie it in. For example, we’ve been doing something called a hot minute of history where I show them a short video that I’ve created about art history and during their seven minutes of sketch time every other week they’ve been sketching something inspired by that little bit of history. So, I don’t know what to tell you Tesha. I don’t have all the answers, but that’s what I have found that has worked for me. You just keep listening to your gut and listening to what your students loves and interests are and I think that you will find your way also. Great question and yeah. That was fabulous.
If you guys have a question for me please feel free to send it my way. You can find me at the Everyday Art Room at the ArtofEd.com.
Heres a bonus hack. At the end of the year when all those lovely classroom teacher buddies of your are cleaning out their rooms and throwing things away, be sure to shoot them an email. Remind them about the art teacher in the building with the limited budget who would absolutely love those crayons, those glue bottles, even if you’re gonna pour it in a glue cup, those pencils that they might otherwise be chucking. And I’m not even kidding. I have seen the trashcan filled with art supplies and it just is heartbreaking. Because they get new art supplies from their new students every year they might not even think twice about throwing these things away. Let them know “Hey, I’m out here. And I could definitely use all of those art supplies that you think you no longer need.” Alright. There’s your bonus hack. Have a super great week you guys. And please make sure to share those hacks with me. I would love to hear from you. Toodles.
Magazine articles and podcasts are opinions of professional education contributors and do not necessarily represent the position of the Art of Education University (AOEU) or its academic offerings. Contributors use terms in the way they are most often talked about in the scope of their educational experiences.