The invention of digital photography changed the way we teach photography, and the addition of photo editing software continues to evolve the medium. The ability to edit and craft images seamlessly taps into the desire students have to shape and manage their visual identity. In short, they all want to play with Photoshop.
Here are 2 digital photo projects your students will love.
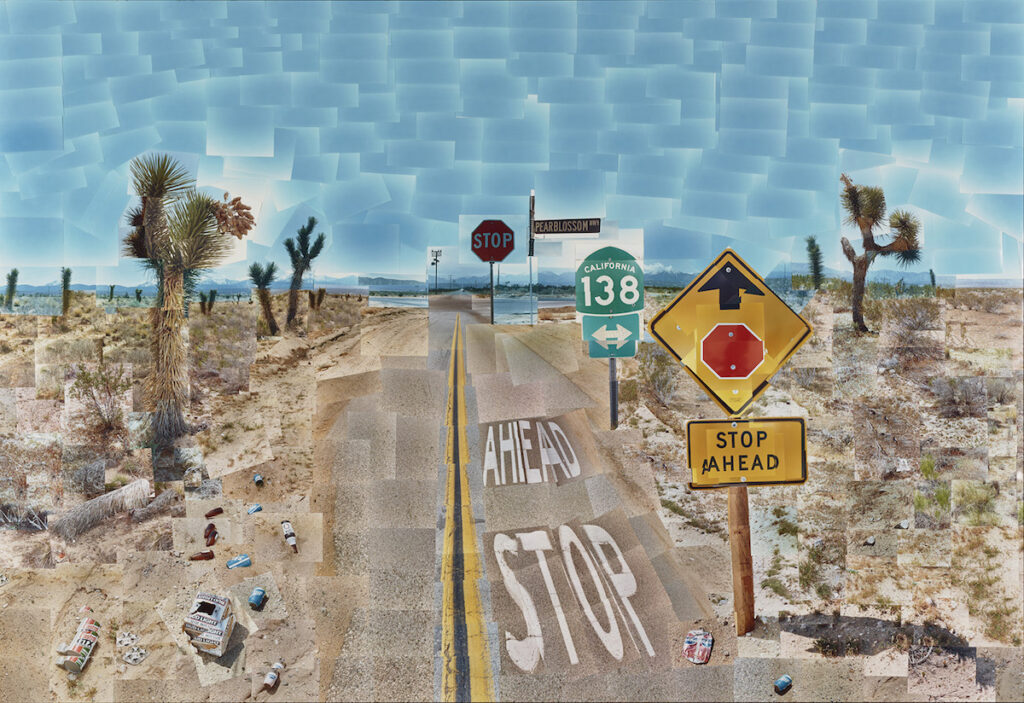
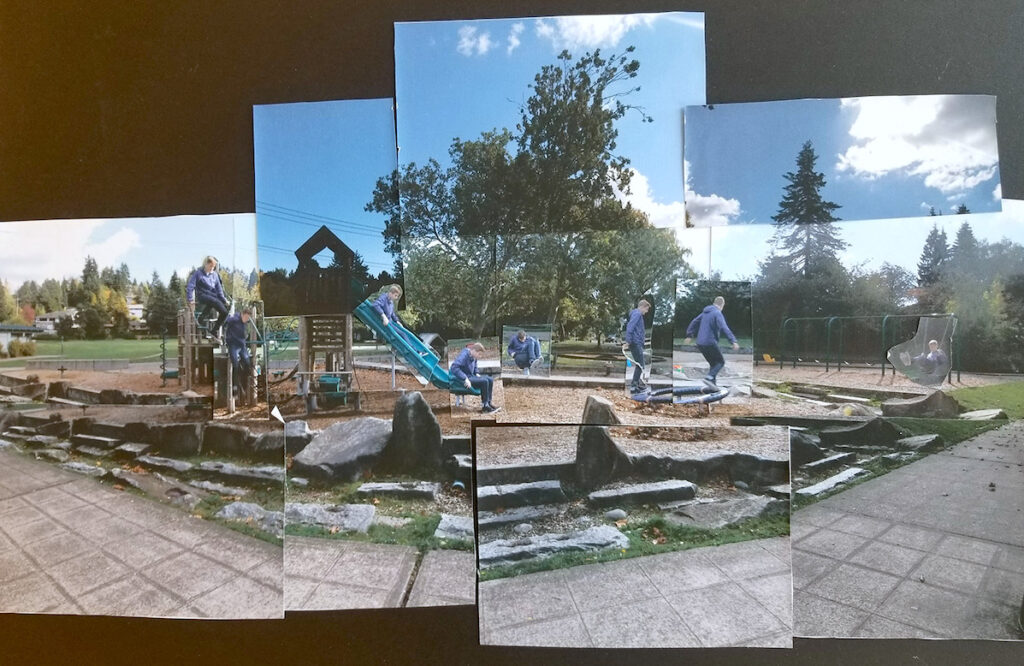
Mixing Photography and Cubism
Being able to see beyond the edge of the viewfinder and incorporating multiple perspectives in one image is easy to do with digital photography. Artists like David Hockney created portraits of spaces and people that represented more than the fraction of an instant an image normally shows. As such, the resulting images transcended and warped both space and time.
If you’d like your students to create similar images, simply follow the steps below.
1. Choose a space.
Have your students choose a space or subject they want to photograph. The larger the area, the more interesting it becomes.
2. Photograph the space.
If the student is looking to create a cleaner look with their photograph, they can use a tripod and very deliberately map out the entire space with photographs, slowly rotating the camera and having it pan horizontally and then vertically across the space. However, if they’re looking to create a more haphazard look, taking multiple shots around the space and alternating the zoom and the angle will get them there.
Are you intrigued by this process but need a refresher on digital photo or Photoshop? We have you covered! Check out the two PRO Learning Packs below to make sure this lesson is a success!
3. Reflect on the process.
As students photograph, have them consider adjusting perspective and focus on different aspects of the scene. Ask questions like:
- How does changing the zoom on an object give it importance?
- Does photographing an object from different angles provide added meaning?
- How does shifting the time of day and light of the scene alter the image?
4. Load images into Photoshop.
Load all the images into Adobe Photoshop and create separate layers for each image. If your initial photos are large, the file can become unwieldy and slow down your computer. Consider resizing the photos as you work.
To resize images, once you’ve opened an image, go to Image -> Image Size, and alter the size and the resolution of the file. You can decrease the height and width to decrease file size. Be careful when adjusting the resolution, though. Anything below 150-200 dpi will begin to appear pixelated when printed. You’ll also want to maintain consistency between each image, so try to keep file sizes at the same resolution, height, and width.
5. Compose the piece.
Using the “Move” tool, move the images around to the desired location. You can also lay a grid over the image to get photos to line up more cleanly.
Images can also be manipulated in a more analog fashion, but working in Photoshop allows students to practice specific skills. Be patient with the process. It takes time to learn a program like Photoshop, and there are lots of additional online tutorials to answer questions about tools and functions.
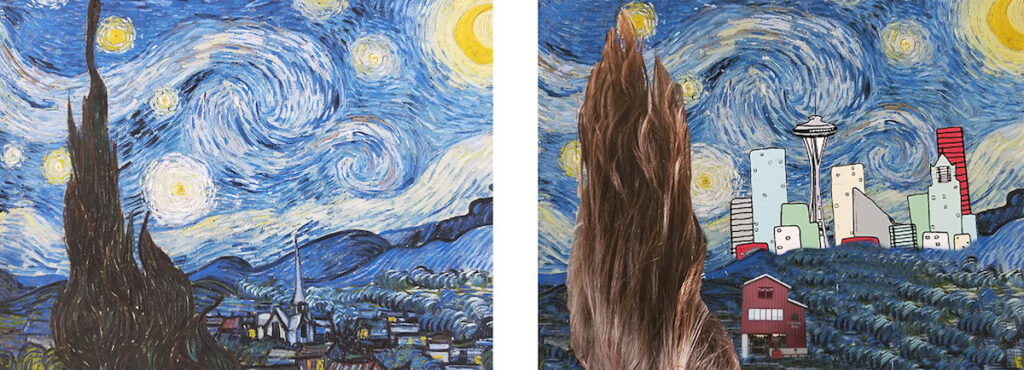
Photo Recreation
Another project I love involves recreating iconic images and having students add themselves to the work. This Photo Recreation project incorporates a bit of art history and lots of student personality into a single project.
1. Find an image; do some research.
Start by having students research artworks and provide some context and meaning to the piece. Bonus points if they’re able to find derivations of the work and the ways the artist has imbued new meaning or nuance to the appropriated work.
2. Write and sketch.
Have your students write about and sketch how they would incorporate themselves into the work. Having a solid plan is key.
3. Photograph!
From there it’s a fairly straightforward process. First, have students take photographs of themselves in a specific pose or angle that allows them to fit into the image.
4. Upload to Photoshop.
When students have loaded their photos into Photoshop, have them cut and paste themselves into the original work. (You can see how one student incorporated their hair in to the image on the right.) Students will learn how to work with the selection tools in Photoshop to cut and paste their images. They’ll also see the importance of resizing the images to match the resolution and image size of their original image.
5. Reflect and display.
Have students answer questions around their rationale for choosing the specific work and the ways their additions have enhanced or changed the meaning of the original piece. Print out both the original and the new version and display them together along with the artist statements.
Both of these projects allow students to work with some basic Photoshop tools while incorporating more conceptual ideas and research. It’s a great combination of student voice and technical prowess on a single project.
What are some of your favorite introductory digital photo projects?
How do you use software like Photoshop in digital photo classes?
Magazine articles and podcasts are opinions of professional education contributors and do not necessarily represent the position of the Art of Education University (AOEU) or its academic offerings. Contributors use terms in the way they are most often talked about in the scope of their educational experiences.