Jump rings are easy to make and have endless possibilities in the classroom. Whether you have a class dedicated to jewelry design or want to add a jewelry project into your curriculum, jump rings are a great building block with which to start. Let’s look at how to create and use jump rings in the art room.
How to Create Jump Rings
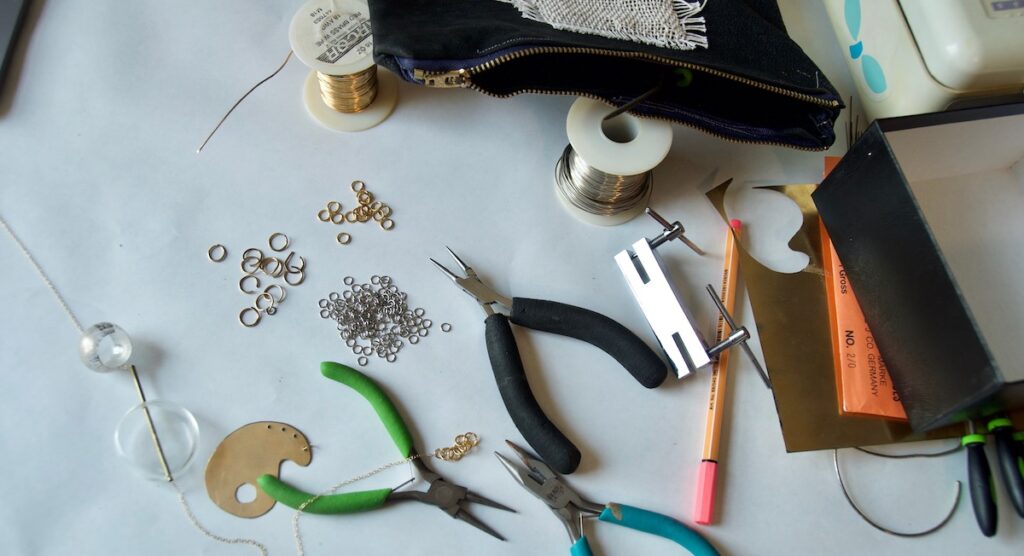
1. Gather your supplies.
Here are the basics you’ll need to get started:
- 20 gauge wire
The metal spiral from a spiral bound notebook also works in a pinch. - Pencil or dowel rod
- Wire cutters
If you don’t have these, see if you can borrow them from your tech ed department. - Solder or jewelry glue (optional)
- Pliers
2. Get your students excited to create.
Once you’ve collected your supplies, you’ll want to teach students how to make jump rings. Motivate students by providing some ideas about how to use them. Of course, jump rings work as basic connectors for things like attaching a pendant to a necklace or an earring to the hook. But, if you want to get more elaborate, you can also challenge them to create a variety of chains or chain mail.
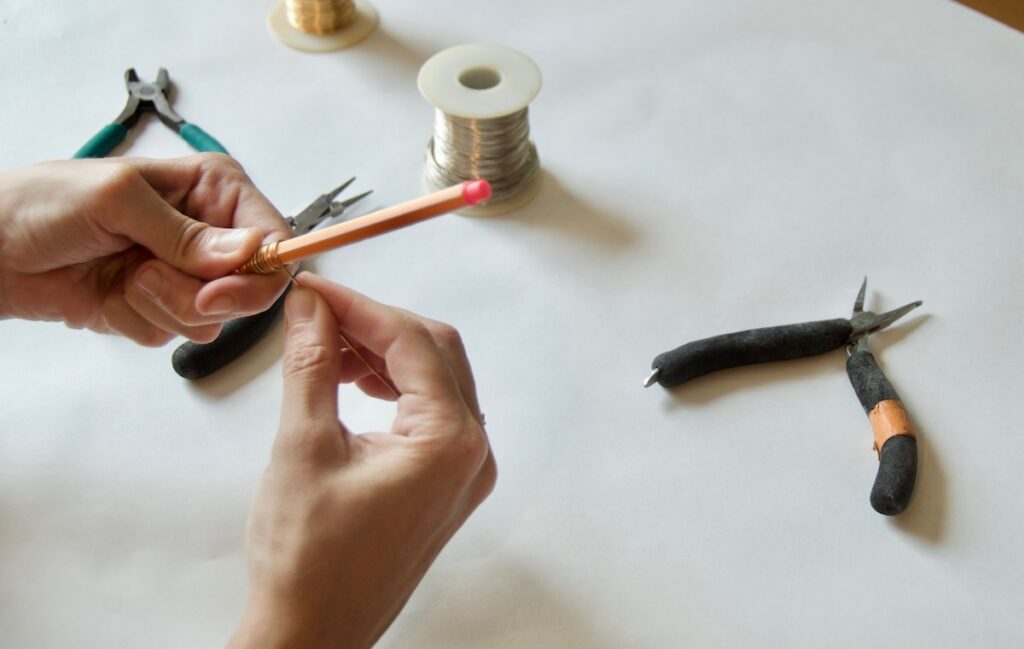
3. Create a spiral of wire.
Have students start with wire that is easy to bend, making it better for practice. Students should cut twelve inches of wire to practice. The length can then be adjusted based on what students create.
Next, have students take the wire and wrap it around a pencil, creating a spring. The goal is to wrap the wire evenly. Some students may be tempted to pull extra tight, so remind them they will need to slide their coils off the pencil. After they’ve wrapped all of their wire, they should slide the coil off the thin end of the pencil.
4. Cut apart the individual jump rings.
Some jewelers will cut the rings with a jewelry saw. However, I’ve found more success and less frustration using wire cutters.
You’ll want to show students they need to cut one circle at a time. The first and last one may not be perfect, but the rest should make complete circles. Students should cut one circle at a time, working their way down the length of the spiral.
5. Teach students how to open and close the jump rings.
Now that they’ve created their jump rings, it’s important to teach students how to open and close them. To do this properly, they’ll want to hold each side in a pair of pliers and move one side away from their body and one side toward their body. The goal is to have the jump ring close perfectly, leaving no gap.
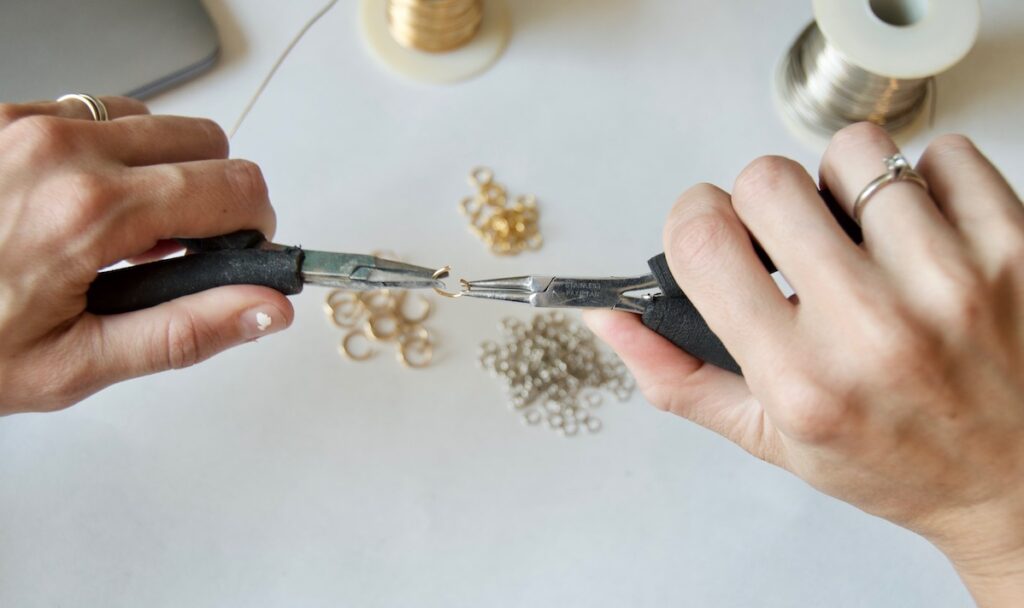
If the ring doesn’t want to close on its own, students may need to make slight adjustments. Have students open the jump ring wide, then as they close it, push slightly inward as they work to create a seamless connection. Students may need to open and close their jump ring a few times to get it correctly aligned.
Depending on your needs and tools, students may solder the ends together or use a small drop of jewelry glue. If you’re soldering, you’ll want to make sure your wire can withstand the heat of the torch needed to melt the solder.
How to Use Jump Rings
Have students look at their jewelry as well as the jewelry of others. You might also want to bring in examples. This allows them to view the size and strength of the pieces.
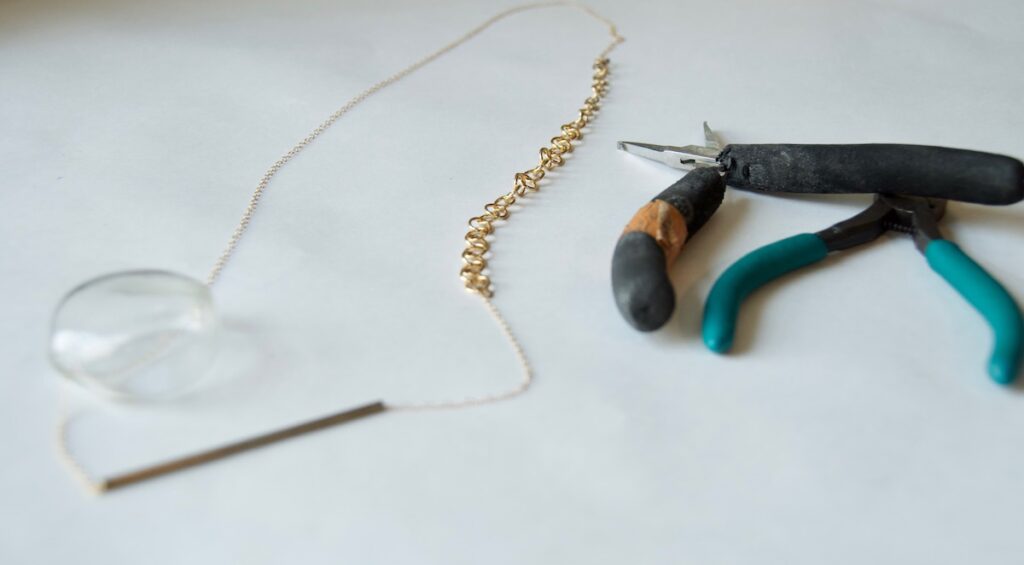
Explore shape, size, and color.
Jump rings don’t have to be perfect circles. They can easily be ovals or another shape. It all depends on what object you wrap the wire around, so let students experiment! Once students have a variety of rings, challenge them to link them together to create a chain.
Students can also experiment with different gauges and types of wire. As they work, you’ll want to talk about strength and durability of the wire they select. While thin soft wire wraps easily around a pencil or dowel rod, it may not be strong enough to function as a chain for a necklace.
Finally, wire comes in a variety of colors. Students can create patterns by using different types and colors of wire.
Challenge your students to create something more elaborate.
For students who have the desire and patience, it can be fun to create bracelets or necklaces by using chain mail techniques. Have students link jump rings together to create complex patterns. Encourage students to start with something small and simple and build up to more difficult designs.
Students often get excited by the idea and look of chain mail, but frustrated by the time and intricacies it requires to make. You might have students work on more complex designs alongside another project. Allowing them to switch back and forth lets them make progress without feeling overwhelmed.
While you can have students follow predetermined patterns, I’ve found they enjoy experimenting with pattern design. Have them link jump rings together and observe what happens.
Jump rings are easy to make and an essential element to jewelry design. Once students understand how to make jump rings the design possibilities are endless!
What’s your favorite jewelry technique to teach?
What other foundational techniques do you recommend?
Magazine articles and podcasts are opinions of professional education contributors and do not necessarily represent the position of the Art of Education University (AOEU) or its academic offerings. Contributors use terms in the way they are most often talked about in the scope of their educational experiences.