
Do you remember the first time you made a slab box out of clay? I do. I was in 5th grade, and it was hard. I remember being frustrated by how difficult it was to get the sides straight and even. In short, I didn’t have a great experience.
Many of our students feel the same way about creating with slabs. On top of that, sometimes students make multiple slab boxes throughout their art ed careers. While clay is usually exciting, seeing the same technique over and over can make students lose interest.
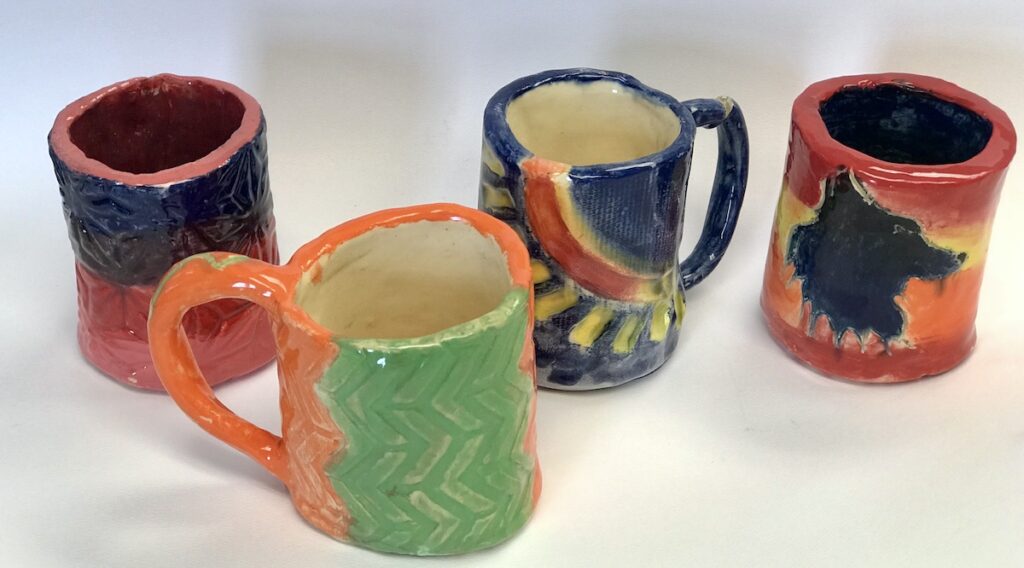
The slab method is an essential skill in any ceramics curriculum, but there are more exciting ways to teach it. Instead of a box, try a mug!
A Step-by-Step Guide to Making Clay Mugs
Gather Your Materials
To begin this project, gather the following materials:
- Clay
- Clay tools
- Slip
- Construction paper
- Newsprint
- Soda can
- Texture tools
Prep the Templates
Before any clay work begins, students will need to do a little prep work.
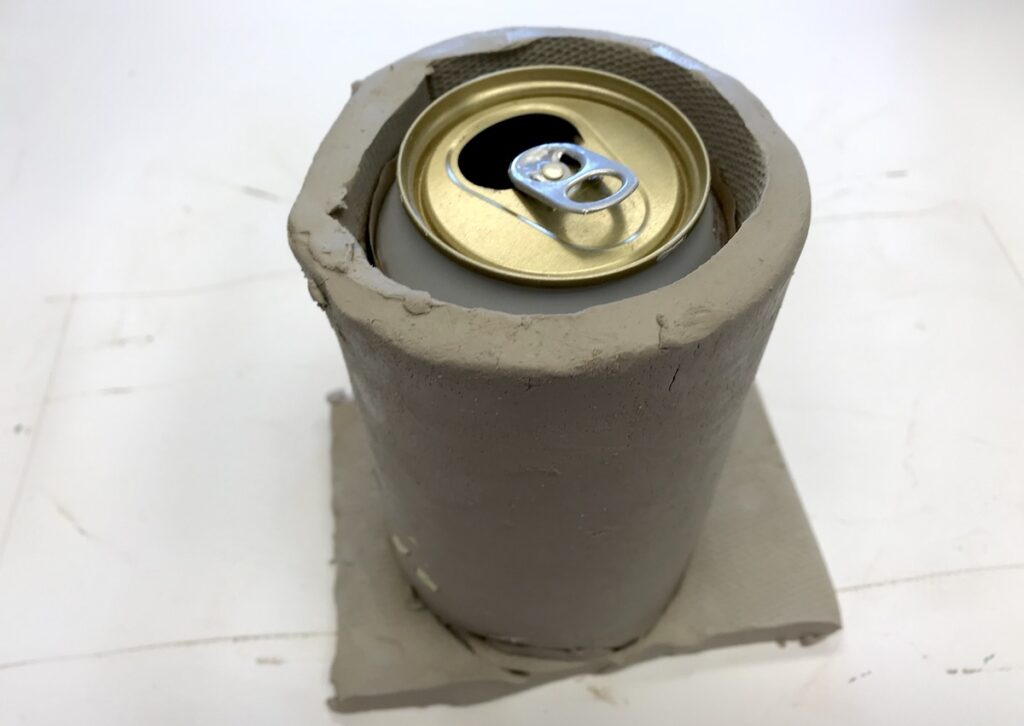
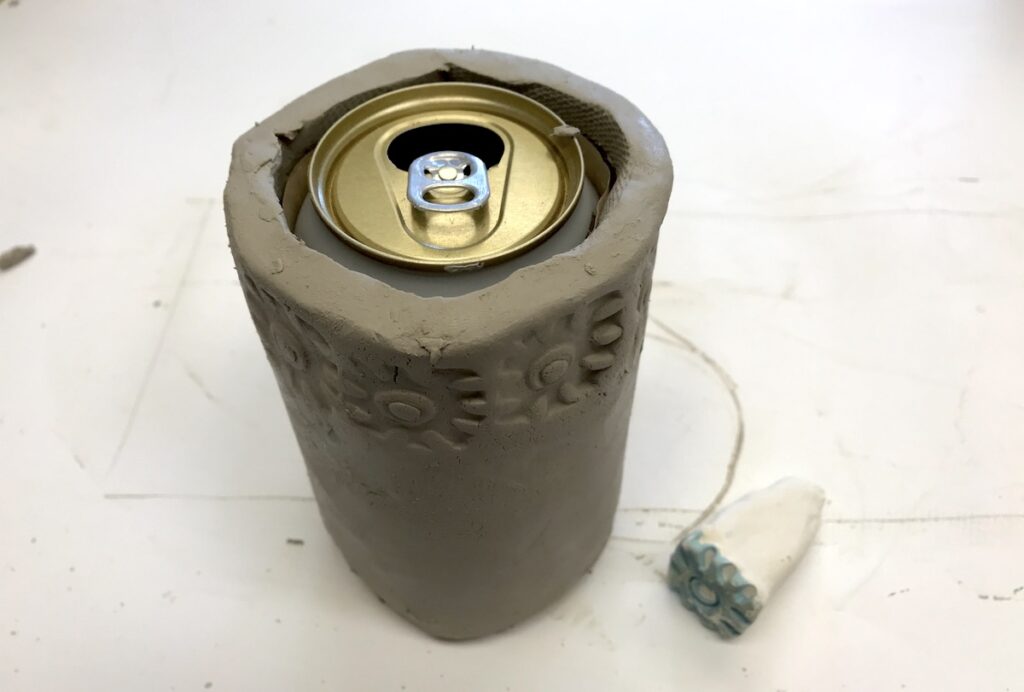
First, give each student a soda can and a thin piece of paper, like newsprint. Wrap the newsprint around the soda can and secure it in place with tape. The can will be used later on in the process to help the clay mug hold its shape.
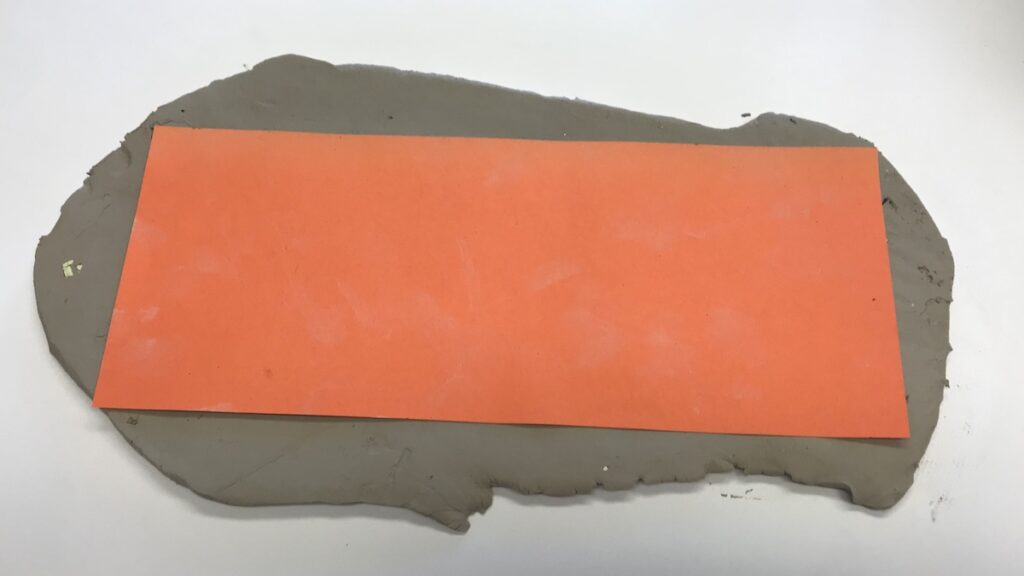
Next, have students create a construction paper template to help them determine the size of the body of their mug. The template will be a rectangle and will determine how wide and tall their mug will be.
For best results, have students make their rectangle wide enough to wrap around the soda can and overlap just a bit. The height can vary depending on the look they’re hoping to achieve.
Using paper first is a great way to help students visualize the size of their mug before they start with the clay.
Prepare the Slab
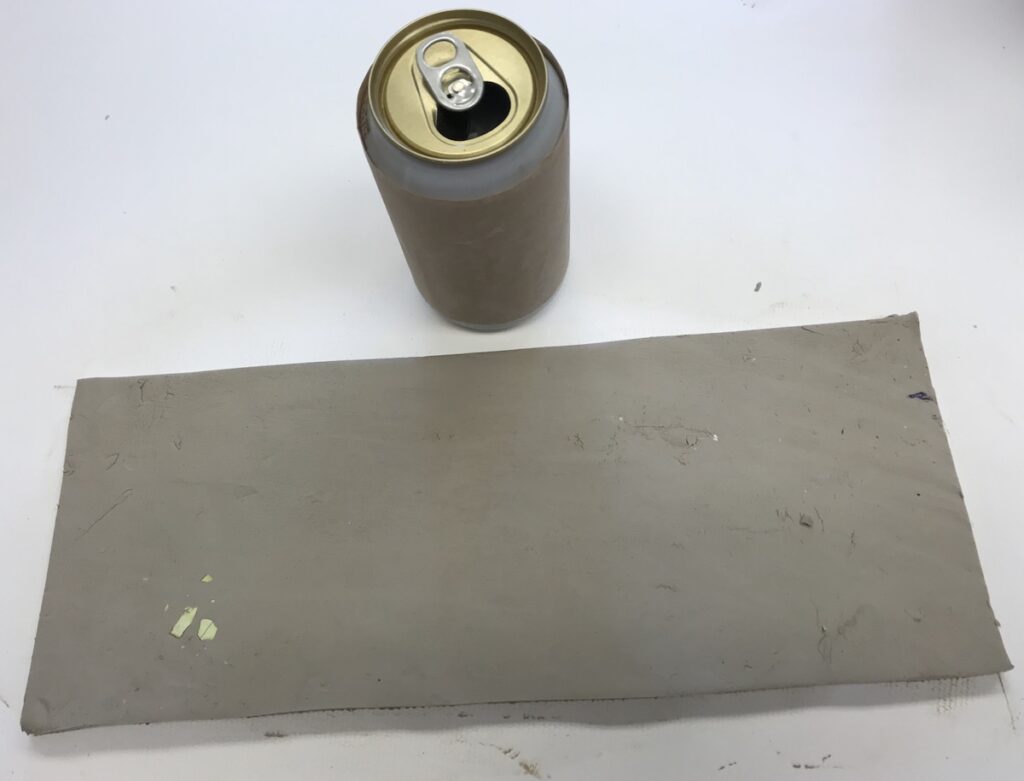
After students have the prep work out of the way, it’s time to create the slab they will use for the body of their mug. Any slab-making method will work.
Remind students to think about the thickness of their slab. Have them envision drinking out of a mug. They’ll want the slab to be thin enough for comfortable drinking, but not so thin the mug will break.
Try using this slab making method to get the perfect thickness.
Once the slab is created, students may need to smooth it with a rib tool. Then, have them use the construction paper template to trace and cut out the rectangle for the body of the clay mug.
Construct the Mug
Once the slab is cut out, students can begin constructing the mug. Follow the steps below!
Step 1: Form the cylinder.
Have students wrap their rectangular slab around the newsprint-covered soda can. Then, have them trim any excess length off the slab. Next, have students form the cylinder body of the mug by scoring, slipping, and smoothing the seam together.
Step 2: Create a base for the bottom.
Students can use the leftover clay from their slab to cut out a circle shape that fits the bottom of their mug. Have them slip and score the base to the cylinder (while the cylinder is still on the soda can) and begin smoothing the seam away. This is a significant step in the building process to prevent potential leaks in the mug.
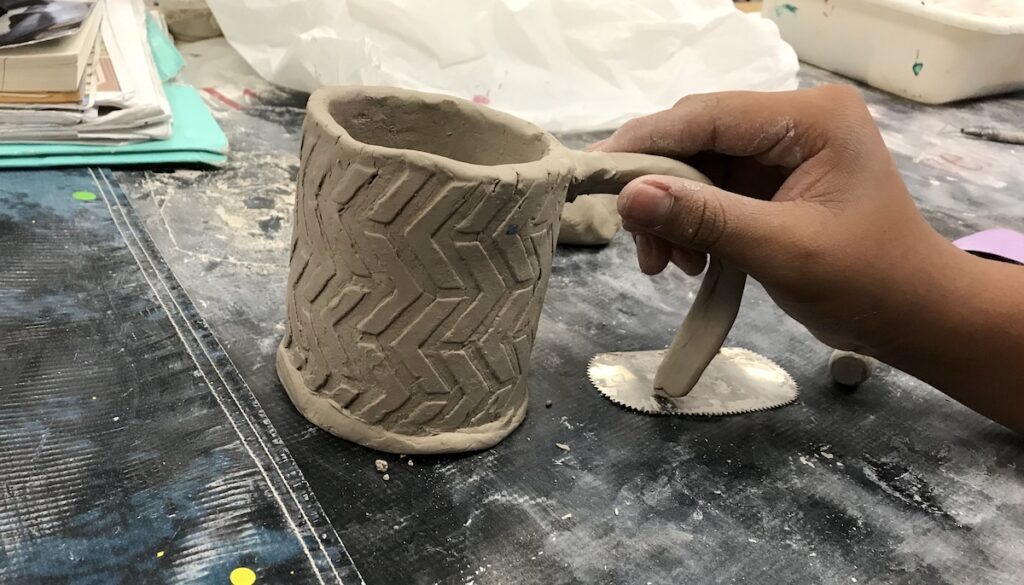
Step 3: Add texture with stamps, stencils, and drawing techniques.
Creating additive or subtractive details is an excellent way for students to personalize their mugs. Keeping the soda can in the middle of the cylinder will allow students to add details without the mug losing its shape. These added designs will make the glaze-fired pieces even more beautiful. This process is also an excellent way to teach your students about underglazes and using the sgraffito technique.
Step 4: Add a handle.
If students choose to create a handle, encourage them to make one that is comfortable to hold. Discuss the importance of shape and width as this will alter how the handle feels. Most important, encourage your students to try a variety of ways of building their handle before they decide on a final design.
Remove the Soda Can
The soda acts as a structural aid during the entire construction process. It will not hurt the clay form if it is left in during the duration of the building process as long as the clay is covered day to day. However, make sure the newsprint is left on, or the clay will stick to the can. When the student is finished adding texture to their vessel or is entirely finished with the building process, remove the can. This can be done by gently pulling the can upward. Upon the removal of the can, the paper might stay inside the cylinder but should lift out easily. Do not leave the can inside during the drying process as the clay will crack due to shrinkage.
Finish the Mugs
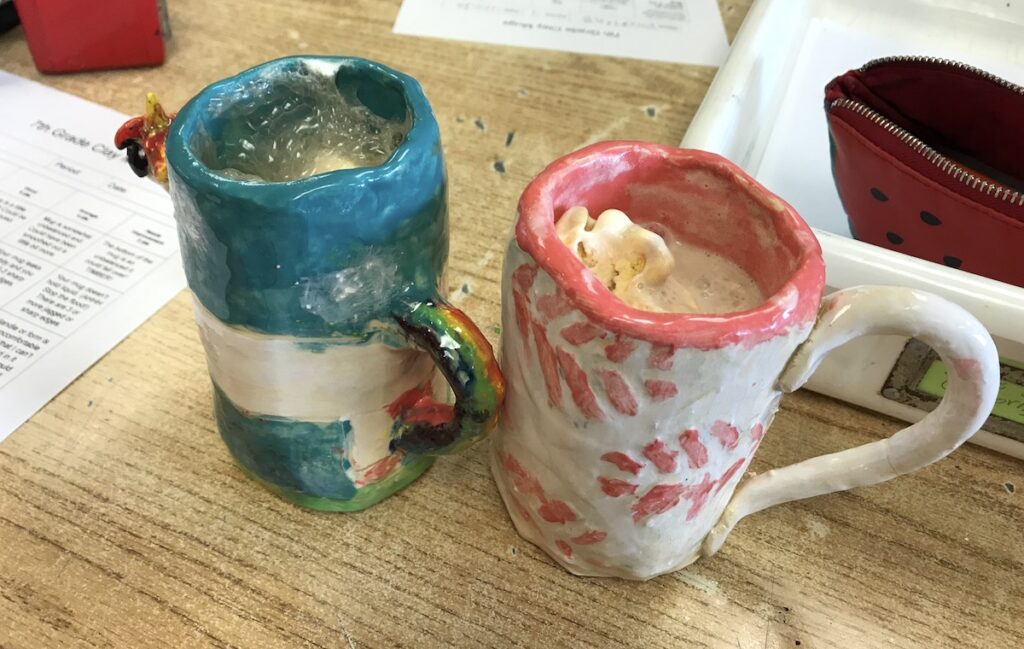
If you want your mugs to be functional, you will need to use a food-safe glaze after the bisque firing. Upon completion of this step, the best way to see if your mugs work is by having students test them out. For a fun way to assess their creations, have a hot chocolate or root beer float party. During this process, students can check for leaks, see how the handle feels, and find out how the rim feels to drink from. For an extra assessment, have students complete a take-home assessment where a family member tests out their mug.
Slab construction can be more than just building a clay box. To discover more ideas like this, check out my “Taking Slab Construction to the Next Level” presentation that will be part of the Art Ed Now Summer Conference. Here you will find even more exciting slab building techniques to try with your students!
What is your favorite way to teach slab construction?
What method of clay hand-building do you enjoy teaching most?
Magazine articles and podcasts are opinions of professional education contributors and do not necessarily represent the position of the Art of Education University (AOEU) or its academic offerings. Contributors use terms in the way they are most often talked about in the scope of their educational experiences.


