When studying photography, students need to learn aperture, shutter speed, and ISO. But, those concepts aren’t always easy to teach. Students need to know what the words mean and also understand how to control them on their camera and why they matter.
Some teachers start with definitions. While definitions can provide a brief overview, they often don’t make a lot of sense to students and aren’t memorable. To help students understand the intricacies of each concept, they must be given time to explore.
Start with Memorable Definitions
One way you can help students understand these concepts is to make your definitions and explanations more memorable. Here’s how I explain things to my students.
Shutter Speed
Shutter speed determines how long the camera is open and allowing in light. The shutter and aperture work together to determine the proper exposure.
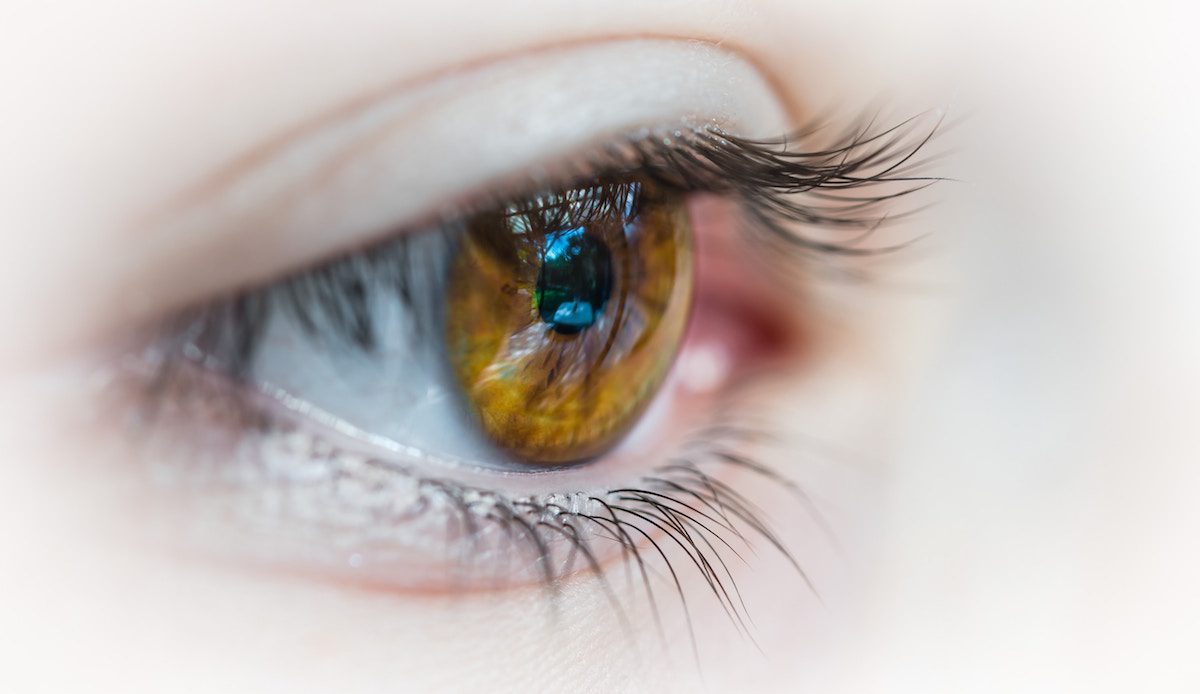
Compare the shutter to the eye. Have students blink quickly, comparing it to a fast shutter speed. Then have them open and close their eyes slowly, comparing to a slow shutter speed. Allow students to spend some time blinking. It can also help to have students listen to a fast and slow shutter speed. Have them set their camera to a slow shutter speed, like 1/30, press the shutter release and listen. Then select a fast shutter speed, like 1/2000, and do the same.
Aperture
While the shutter speed controls how long the camera is open, the aperture determines how large the opening is. Compare the aperture to the pupil. When in a dark setting, our pupils expand, working to allow in more light. In a bright room or outdoors, our pupils contract. The aperture does the same thing. Draw circles of various sizes on the board and begin to label them.

ISO
ISO measures how sensitive your image sensor is to light. If you want to add in a history lesson, make the connection to ISO and film speed. When I first started teaching, this was an easy connection, as students had to take film photography before moving on to digital. However, without that requirement, many students don’t know what film is. So you need to gauge the interest of your students and how much time you have.
A low ISO is not as sensitive but produces a high-quality photo. A high ISO, like 2000, makes your image sensor more sensitive to light, but you’re more likely to have noise (a grainy look) in your photo.
In class, we compare this to getting a tan or a sunburn. Students note if they think they have skin that is sensitive to the sun or not. We then discuss how they can adjust the sensitivity of their skin by adding sunscreen (less sensitive), or tanning oil (more sensitive).
Talking through each of these settings provides important foundational knowledge for your students. If you have students who learn best visually, there is a series of handouts in the Digital Photography Basics PRO Learning Pack they may find helpful as well.
When students have a grasp of the terms, they’re ready to explore how to apply them to their photos.
As students learn about and explore settings, stay away from manual mode. Manual mode forces them to make too many decisions at once.
I recommend starting with shutter speed. It’s the easiest for students to understand and find success.
Exploring Shutter Speed
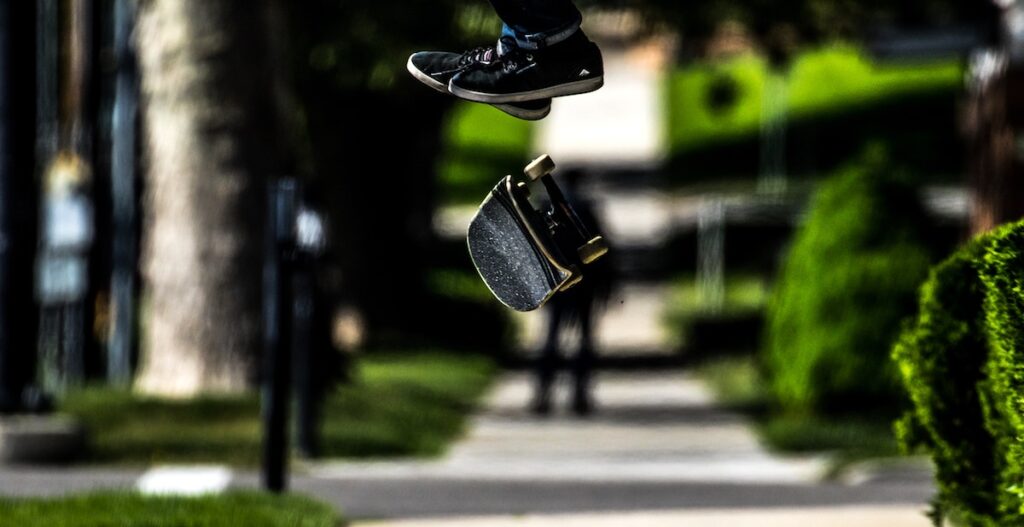
One easy way to explore shutter speed is to explore how to freeze and show motion.
Have students set their camera to Shutter Priority Mode (S or TV) s they only make decisions about shutter speed.
Talk about the difference between freezing and showing motion while looking at examples.
Freezing motion requires a fast shutter speed. Freezing motion means you’re attempting to capture the action. For example, someone jumping in the air.
Showing motion requires a slower shutter speed. Students will need to experiment with the exact shutter speed, based on where they’re taking photos.
This is also the time to introduce panning. Panning means students need to push down the shutter release and follow the moving subject with their camera. When done correctly, the subject remains focused and the background becomes blurred, demonstrating movement. Let them go and practice.

Exploring ISO
Depending on the time of day and location, your students may need to adjust their ISO to get a photo that isn’t all black or all white. Discuss the importance of adjusting ISO for times when they don’t have a flash, aren’t allowed to use a flash, or want to capture the look and feel of natural light.
As with most things, students best understand when doing. Take them to different areas of your building. Have students explore different ISO settings. Once finished, review how the ISO impacted the look of the photo.
Exploring Aperature
Playing with the aperture affects a photograph’s depth of field, or how much of the photo is in focus.

Make sure students are set on Aperture Priority Mode (A or AV). This means students will select the f-stop to achieve their desired results and the camera will select the shutter speed needed for proper exposure.
Start by showing your students examples. This gets them excited as they love the professional look of the photos. As you look at the examples, discuss foreground, subject, and background, pointing out which part of the photo is in focus.
Shallow Depth of Field
Only the subject is in focus. Both the foreground and background are blurred.
Mid-Shallow Depth of Field:
Two out of three things are in focus. Either the subject and the background or the subject and the foreground are in focus.
Max Depth of Field
The foreground, subject, and background are all in focus.
Next, review which aperture settings create which type of depth of field (DoF). Have students write the settings on a notecard they can carry with them and reference. If your students have different cameras, their f-stop options will vary. I tell them to pick the three lowest options for shallow DoF, the two middle options for mid DoF, and the three highest options for max DOF.
- 1.5 – shallow
- 2.8 – shallow
- 4 – shallow
- 5.6 -mid-shallow
- 8 – mid-shallow
- 11 – max
- 16 – max
- 22 – max
As students begin to explore DoF, they’re likely to discover that while their aperture setting plays a large role, so does the distance of the subject from the camera. The closer the student is to their subject the more blurred (or shallow) their DoF will appear.
4 Common Problems and How to Deal with Them
Of course, no matter how well you’ve prepared them, when students try out their cameras, there is going to be a learning curve. Here are some common problems and how to handle them.
1. Not enough light when trying for max DoF
As students work to apply max DoF to their photos, there will be times when the aperture settings needed will not allow enough light into the camera. Remind students aperture, shutter, and ISO work together. They may need to adjust their ISO setting.
2. Blurry subjects when trying for shallow DoF
When working to achieve shallow DoF, students often forget to zoom with their lens instead of their body and get so close to their subject the camera can’t focus. They need to be reminded if the subject looks blurry through the viewfinder, it’s always going to be blurry. Review by having them hold their hand close to their eye, noting that at a certain point, their eye can’t focus.
3. Dark photos when trying to freeze motion
Students will want to freeze motion, so they’ll select a fast shutter speed that results in a dark photo. It’s important to remind students without a flash; sometimes there isn’t enough light to produce the desired results.
4. Getting grainy photos
Students will often adjust their ISO, and then forget, leaving them confused and frustrated when they have grainy photos. Before getting started remind students to check their camera settings, assessing if they make sense for their desired results.
Camera settings can be confusing and sometimes seem meaningless to students when they start taking photos. Trying to have students use all settings at the start is overwhelming. Start by teaching the basics and slowly building to more complex projects and camera functions.
What is a common mistake your students make?
What is your favorite beginning photography lesson?
Magazine articles and podcasts are opinions of professional education contributors and do not necessarily represent the position of the Art of Education University (AOEU) or its academic offerings. Contributors use terms in the way they are most often talked about in the scope of their educational experiences.