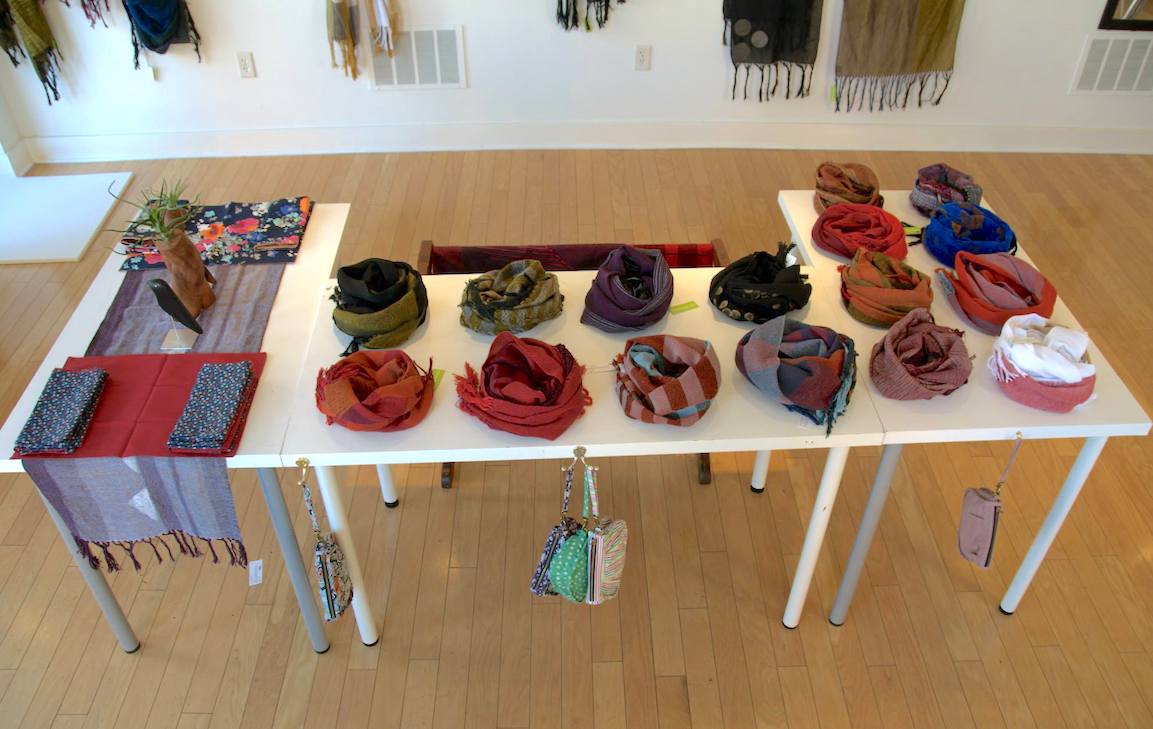
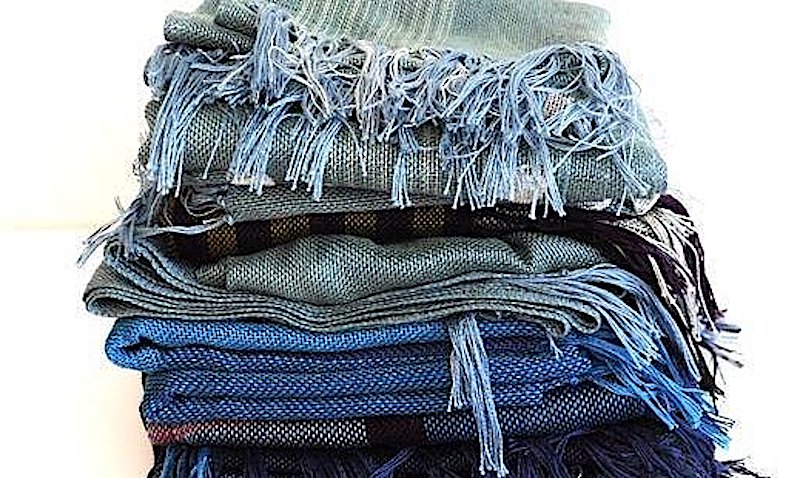
My first side job happened by accident. It began when my co-workers started asking if they could buy the woven scarves they saw me wearing to work every day. Suddenly, I realized people would pay me to do what I was doing anyway, weaving! I promptly signed myself up for a fine craft show.
It turns out; I had no idea what I was getting myself into. (If you’re going to start a side job, especially where you work for yourself, have a plan before you start. Your bookkeeper will thank you.)
Luckily, it all turned out well in the end, and today I’d like to share what I’ve learned.
7 Things to Do Before Your First Craft Show

1. Find the right venue for selling your work.
Craft shows come in a variety of shapes and sizes. Be sure to research before committing to one. While not required, it can be helpful to attend specific shows you’re considering before you apply. Look into the costs associated with the show, the standards, price points of the work, and the overall style and feel.
Obtaining a space at a show can cost anywhere from $15 to a few hundred dollars. Different shows have different rules and standards governing the type of work allowed. For example, some have strict handmade policies, while others allow almost anything.
Start by searching for craft shows in your area. If you can’t find any, explore Zapplication.
Here are 5 shows to consider.
2. Put together a stellar application with great photos.
Many shows require an application. When applying, photos matter. Jurors look at your work on a screen, quickly assigning it a score. Your photos need to be high-quality and clearly represent your work. Be aware that some shows will ask you to leave if the work you bring doesn’t resemble what you presented in your application.
Here are 3 tips for photographing your work.
- Be sure to have proper lighting.
- Keep backgrounds minimal. Black, white, or gray will ensure your work is the focal point.
- Do not watermark or add signatures to the images.
When you are finished snapping photos, select those that look the best together, presenting a clear and cohesive body of work.
Keep in mind many shows also require a booth photo. This is a bit challenging when applying for your first show. The easiest thing to do is set up your booth at home and take some photos.
Finally, be sure to get an EIN (tax ID), as it will be necessary for tax purposes. Most shows will require you to include your EIN on the application.
3. Figure out the true cost of participating in the show.
Before applying, make sure that you’ve read all of the show information and understand what your booth fee covers. For example, a $450.00 booth fee often only gives you a 10’x10′ square of concrete.
Once you’ve paid for space, determine your booth set up. You’ll need a pop-up tent (best for outdoors), or pipe and drape (best for indoors). You can find a wide range of pop up tents on Amazon. Most artists prefer EZ up white tents.
When doing an outdoor show, you’ll also need tent weights. Depending on the location, most shows require 25-50lb weights on all four corners of your tent. You can purchase tent weights or make your own by using cinder blocks. Alternately, you can fill PVC pipes with sand, attaching them to the legs of your tent with Velcro, rope, or bungee cords.
If you’re doing an indoor show, you’ll also need lights. Read the show contract, as electricity is usually sold separately. Pick up track lights or clamp lights at your local hardware store. It’s likely you’ll only have access to one outlet, so be sure to a pack a power strip and extension cords.

4. Calculate how much inventory to bring in order to make a profit.
Once you are accepted to a show, it’s time to develop an inventory plan. When planning, keep in mind how you will display the work, while also making sure you have a range of style and price.
To determine how much inventory to take, first add up all of your show costs. This includes the show fee, travel costs, your hotel and food, any promotional or display items you’re bringing with you, and any other costs you anticipate.
You need to have at least enough inventory to hit your break-even number. But let’s face it, you don’t want to break even, so at least double that number. Now you have a general idea of how much inventory to take.
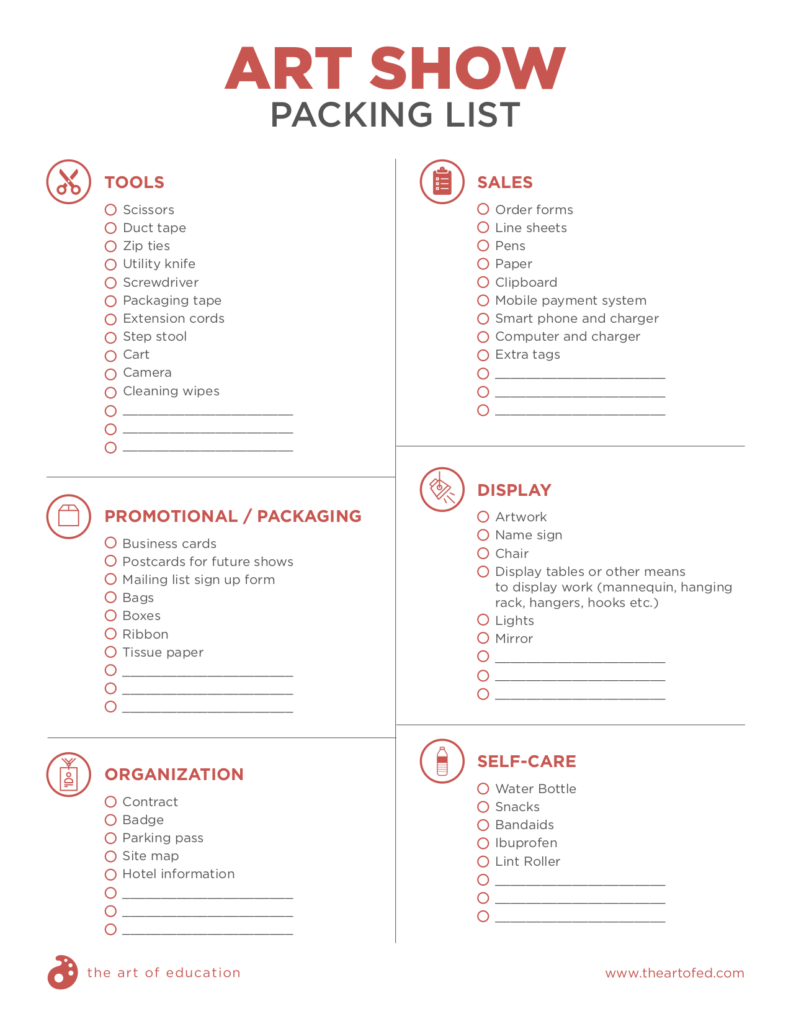
5. Create a comprehensive packing list to save your sanity.
This is usually when I lose my mind. I hate packing even for a weekend away, so packing for a show pushes me to my breaking point. I follow my packing list like it’s the law. When packing, you also need to plan for where you’re going to store all of your boxes. You might put them back into your car, but that can be a challenge for shows that require you to quickly unload your car and then park far away. Therefore, I always plan to store my packing boxes in my booth display. I fit them under tables and behind curtains.
Here is a handy packing list to get you started.
6. Make a solid plan for set up and takedown.
If at all possible, connect with someone who has done the show before and ask questions about show set up and break down. A great way to find people is to search the show’s hashtag on Instagram. While all shows come with a packet of instructions, they can be hard to understand if it’s your first time.
The site and location of the show will impact set up and break down. Some shows, like New York Now, have you drive your car onto the show floor. Others will require you to carry or cart everything to your booth space. Remember, you don’t have an unlimited amount of time to set up. If possible, do a dry run and set everything up at home.
Set up tends to be a bit smoother than break down. Set up often happens over several days, with participants assigned specific time slots. On the other hand, break down happens in a matter of hours, with everyone trying to leave at the same time. In order to save time, I often pack all of my items back into their boxes, then cart and carry everything to my car, instead of waiting to be allowed to bring my car to the booth. How you deal with break down is a mix of personal preference, schedule, and the scale of your work.
7. Consider your personal needs for the day.
While fun, doing a show can turn into a long day if you haven’t planned well. You may want to have a friend or partner tag along to help you out. If that’s not possible, make friends with those around you! It’s common practice to ask another artist to watch your booth for a few minutes if you need a short break.
Wear comfortable clothes that layer well. Show temperatures often run on the cold end and can be hard to control because of the large open space. You should be prepared to deal with a wide range of temperatures throughout the day.
Don’t forget to pack easy-to-eat snacks and drinks. Many show days are ten to twelve hours long. That can be a long time to stand in a small space and talk about your work. You’ll need nourishment. While most shows sell food, it’s expensive and causes you to leave your booth and stand in line, instead of selling your work.
At the Show
Now comes the fun part, selling your work. Here, the most important thing you can do is to make it easy for customers to interact with you and your work.
If you sell work you want people to touch, hand it to them. Help people try pieces on. Provide suggestions. Many people like to walk a show twice. Once to look and once to purchase. Make it easy for them to find their way back to you by writing your booth number on your business cards.
A Few Notes About Trade Shows
Where craft shows are for selling to individuals, trade shows are for selling to stores. A trade show is where you want to be if you want to sell your work wholesale. Much of what you would do for a craft show carries over to a trade show.
However, there are a few key differences.
1. Trade shows can be more of an investment.
The first trade show I ever did cost $10,000. While not all trade shows are as expensive, they are an investment of time and money.
2. You won’t need as much inventory upfront.
During a trade show, you display samples of your work, which you share with buyers. Therefore, you don’t need to bring quite as many items up front. Instead, you’ll write orders, producing the work after the show.
Because the majority of the work will be created after the show, you’ll need to space out your orders to ensure you have time to create the work. Keep this in mind as you and the store agree on a ship date.
3. You’ll need a specific set of forms.
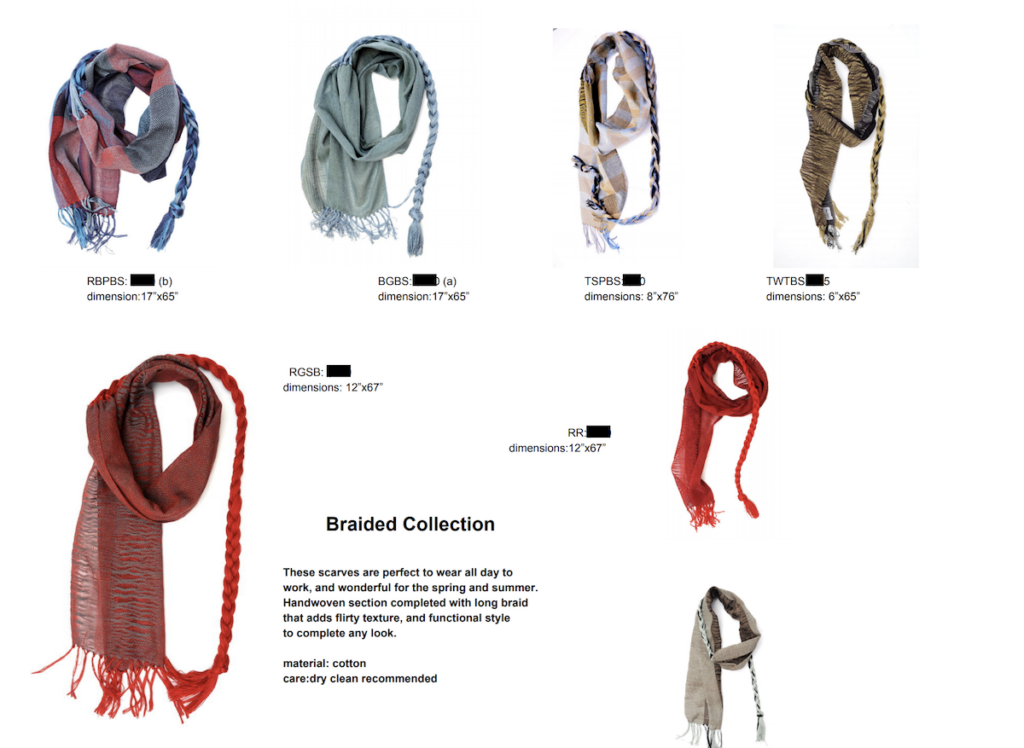
For a trade show, you’ll need both line sheets and order forms. A line sheet includes photos of your work, prices and product numbers, and other important product details. Buyers refer to your line sheet when ordering.
4. Your payment will be delayed.
When working with stores, you usually don’t get paid upfront. This is because most stores operate on what is called NET30 or NET60. Meaning, you receive payment either thirty or sixty days after they’ve received the product.
Doing shows may seem like more work than you’d expected, but with some practice, and a proper plan in place they can be fun and rewarding.
What side jobs have you tried and loved?
What questions do you still have about selling your work at craft and trade shows?
Magazine articles and podcasts are opinions of professional education contributors and do not necessarily represent the position of the Art of Education University (AOEU) or its academic offerings. Contributors use terms in the way they are most often talked about in the scope of their educational experiences.