There’s no denying that kids love clay. And, honestly, so do I! There’s just something magical about taking part of the earth and turning it into a functional and beautiful piece of art.
Of course, simple pinch pots are the perfect way to introduce clay to students. Over the years, I began to see if I could push the idea further and rattles soon evolved.
The beauty of rattles is you can teach them at any age level. I started teaching this lesson to my elementary kids. When I moved to the secondary level, I was excited to see where my big kids could take this rattle lesson, and I have yet to be disappointed!
Help your students create these amazing rattles by following the steps below!
1. Introduce the various histories of rattles.
It’s important to put the lessons you teach into a historical context for your students. Rattles are one of the oldest musical instruments and can be found in almost every culture. They are typically used to memorialize and celebrate individual beginnings.
For example, the birth of a child was commemorated with the giving of a rattle in Victorian times. In addition, in some cultures, rattles are used in healing rites or to communicate with spirits or ancestors. These ritualistic rattles are often embellished with designs or symbols.
Historically, rattles have been made out of natural materials like seed pods, gourds, dried beans, shells, pebbles, and even bones. These musical instruments have a hollow body which contains small loose beads of clay (or other material) that will make noise when shaken. Their sound is soothing and teaching kids how to create the sound they want is a powerful part of the lesson.
2. Demo the process.
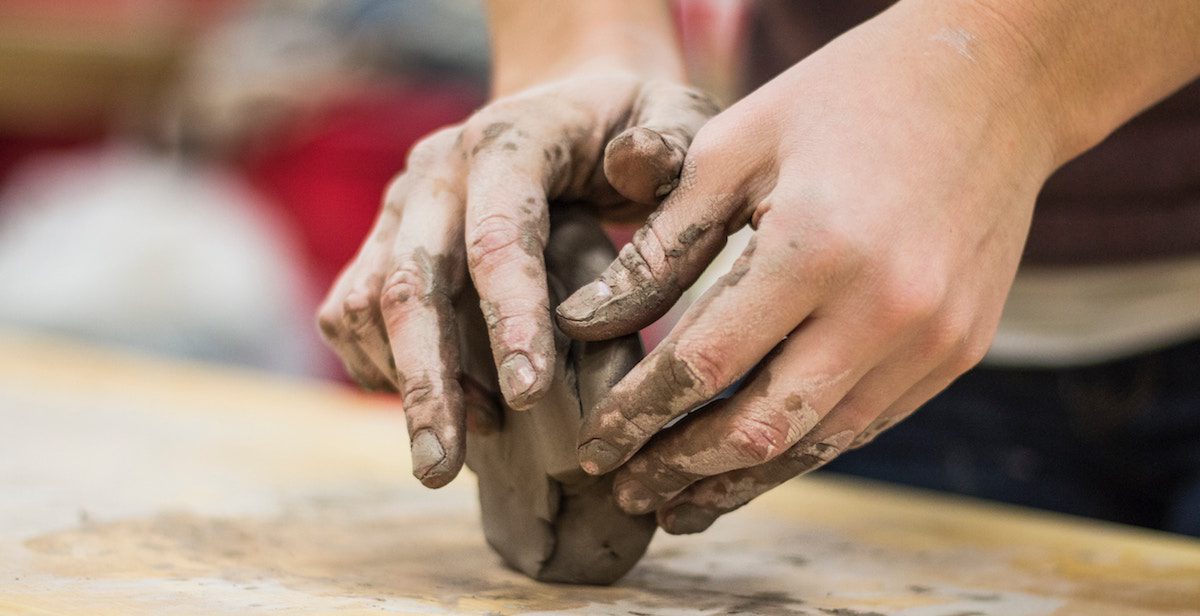
I always start by demonstrating how to wedge the clay. This is an important part of the clay process and should not be skipped! I always have students gather around my table so they can see me, especially my hands. I find they are super engaged this way. However, if you have access to a document camera, you could use that as well.
After the clay is wedged, demo the rest of the process, including how to form a pinch pot and how to slip and score.
3. Pass out the clay and tools.
I have found the quickest way to distribute clay is by cutting slabs with my wire cutter and tossing it to the kids! They love this high-energy part of the lesson, and the fact that I don’t throw well adds to the excitement! I also give my students a list of clay terms so they can learn and use the correct terms.
If you’re interested in learning even more about hand-built ceramics, be sure to check out the Essential Steps for Teaching Hand-Built Ceramics PRO Pack. You’ll brush up on everything from basic construction methods to how to successfully finish pieces. Plus, there’s a helpful vocabulary list download to grab!
Students also receive 10” x 10” pieces of cut burlap, water cups, forks, paper towels and clay tools to decorate their final piece.
4. Wedge the clay.
I teach students to wedge clay by pressing the edges of their palms into the clay and pushing up, creating a “ram’s head” effect. I remind students that it’s imperative for them to remove the air bubbles. The last thing they want is for their rattle to explode during the firing process. They love mastering this, and they think the term “wedging” is hilarious!
I also remind them to keep the clay on their burlap, so the clay doesn’t stick to their table. Once the clay has been wedged well, they move to the next step.

5. Create two pinch pots.
Have students divide their clay into two separate pieces and begin making a simple pinch pot out of one of the pieces. Some students grasp this technique quickly while others need a bit more time. I remind students to keep the thickness of the pinch pot consistent. A good rule of thumb is to keep the walls about as thick as their pinky fingernail.
Once the first pinch pot is made, have students create another pinch pot with the remaining clay. Remind them to work hard to keep the pots similar in size.
6. Select the sound.
This step is fun for students because they get to select the sound their rattles will ultimately make. In my room, students can choose to include large or small clay balls, metal tacks, paper clips, and staples.
Larger clay balls make a deeper sound while tiny clay balls make a higher pitched sound. Have students wrap each clay ball or metal piece individually in small pieces of paper towel and place them into one of the pinch pots. They can add as many as they want, but generally, ten works well.
7. Scratch to attach!
Now that the pinch pots are full of their “rattles” it’s time to put them together! Make sure your students slip and score well before forming a ball out of their two halves. Have students use their damp fingers to smooth the seam.
8. Store projects properly.
In my room, I’m happy if we can get through steps one through seven on the first day. However, you may find yourself at a different stopping point depending on your class time and your students. Regardless, it’s imperative to give students at least ten minutes of cleanup time. If students don’t wrap their in-process rattles up each day, they will have to start over again.
I’ve found wrapping the pieces in damp paper towels and placing them inside plastic grocery bags works well. Remember to remove all the air and label the bags with students’ names.
9. Make the rattle decorative.
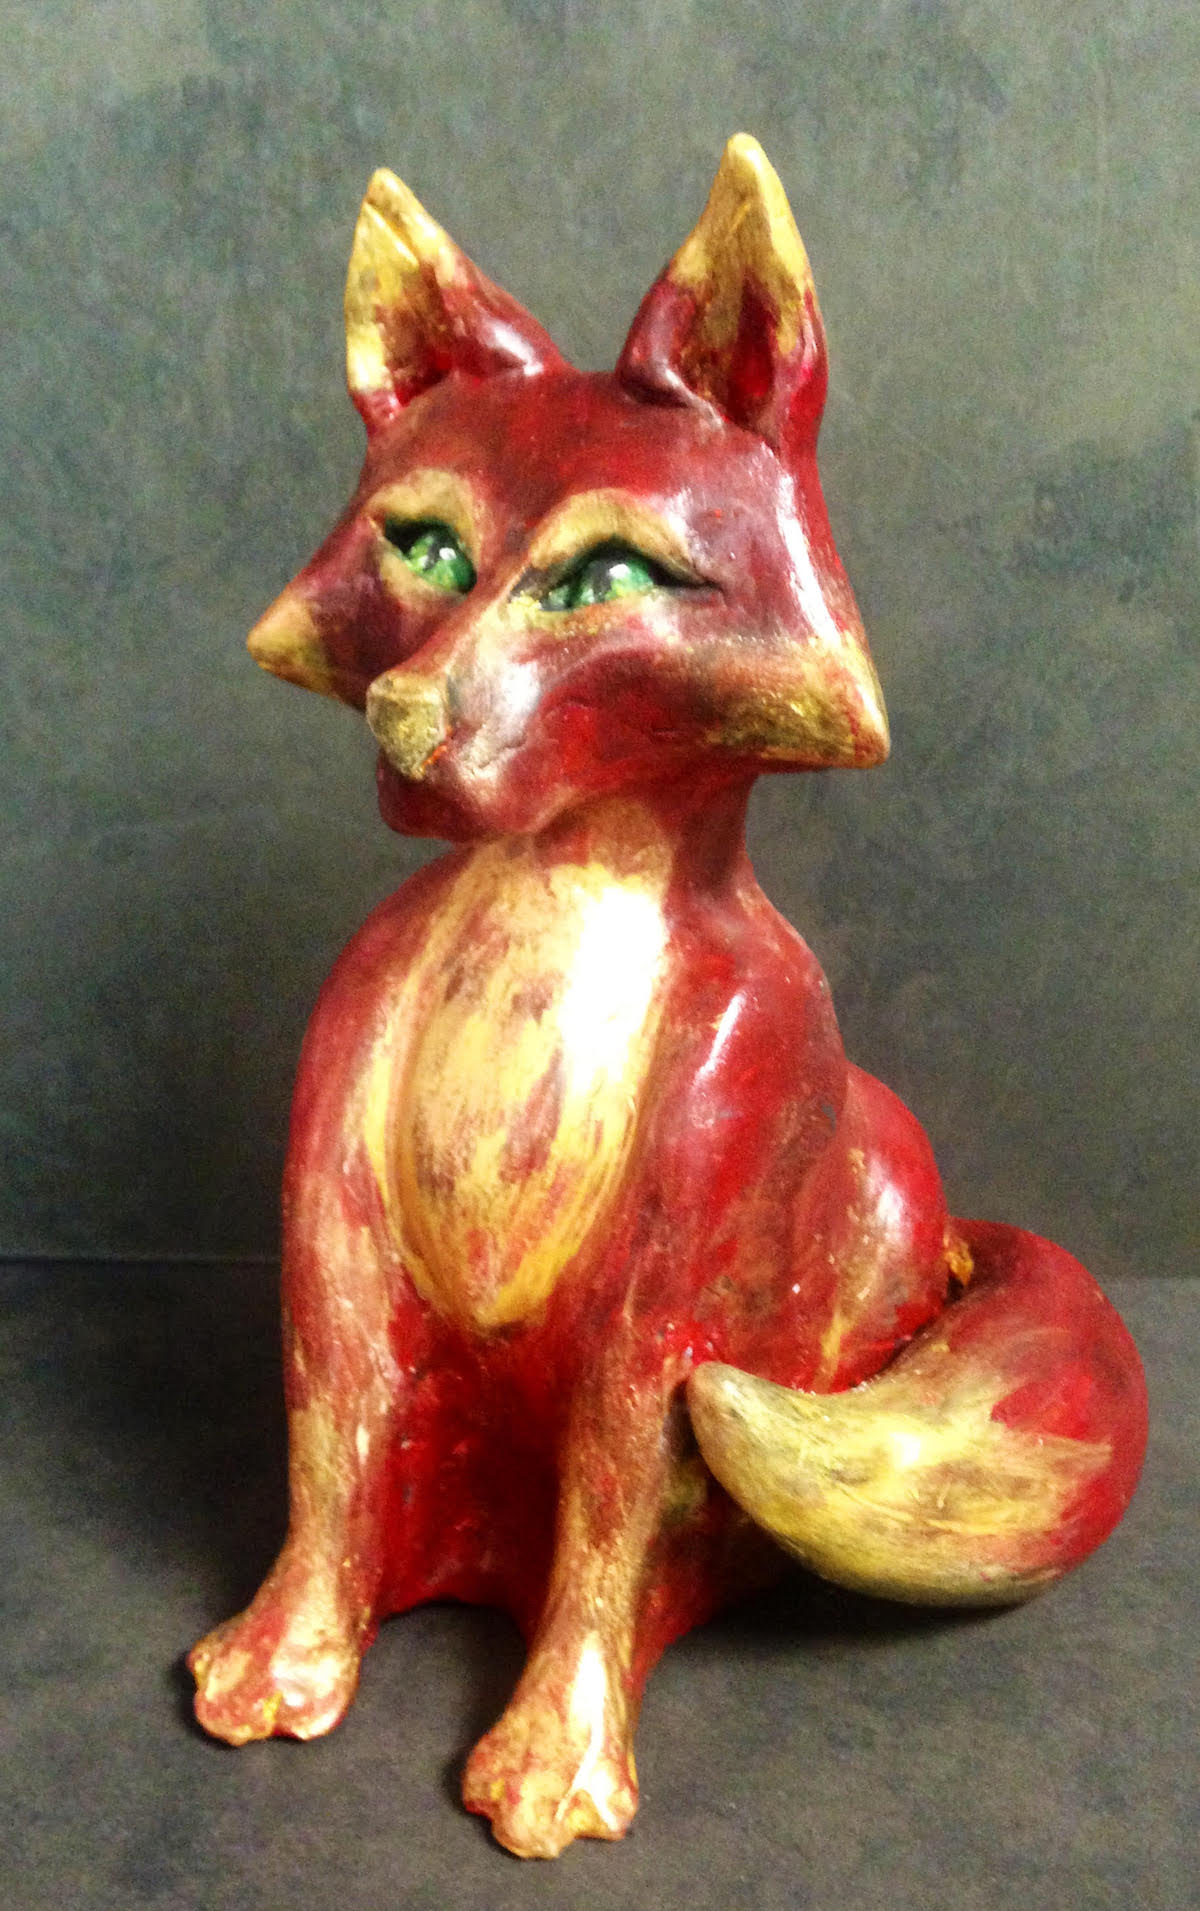
After the rattle base is created, students are challenged with turning it into something personal and artistic. You’ll want to model ways they can add or subtract clay as well as show them various ways to use slab and coil techniques. I have had some incredibly creative rattles over the years such as Kermit, a fox, hearts, elephants, and even a baby dinosaur breaking out of its shell! There is no telling what finished rattles will emerge!

10. Add air holes and fire.
Make sure each student adds at least two air holes to their rattle and that the clay is bone dry before firing.
11. Shake and paint and shake some more!
Once the rattles have been fired, students are excited to see the paper towel ash fall out as they shake them! This is a great time to discuss the science behind firing clay. The students love comparing the sounds of their rattles.
Then, students paint their rattles. You can use whatever technique you like, but giving them a coat of black first and then adding color and quickly rubbing part of it off, gives an exciting distressed look. You’ll want to let students experiment with paint and various brushes and might even allow collaging and oil pastel if they’re interested.
Finally, it’s time for students to reflect on the beautiful clay rattles they have created! From a slab of clay, a truly beautiful and functional artwork has come to life created by their hands. That is some seriously awesome art history in the making!
What clay lessons have you done with your students?
How do you teach form and function in your art class?
Magazine articles and podcasts are opinions of professional education contributors and do not necessarily represent the position of the Art of Education University (AOEU) or its academic offerings. Contributors use terms in the way they are most often talked about in the scope of their educational experiences.