
Using Photoshop can be overwhelming; using it with students can be even scarier. It’s not uncommon for a student to make one wrong click of their mouse and not have a clue what they’ve done. As with anything new, there is a slight learning curve when first using Photoshop. It takes some time, but you will be amazed how quickly your students catch on.
There are so many features to learn about Photoshop. These 10 Photoshop features and tricks will help make a better experience for both you and your students!
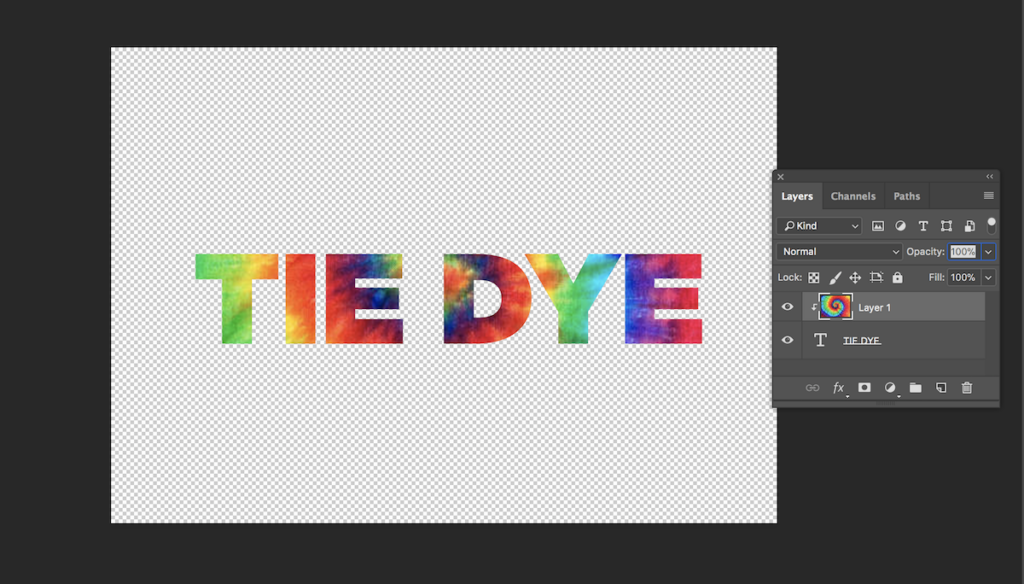
1. Image Overlay
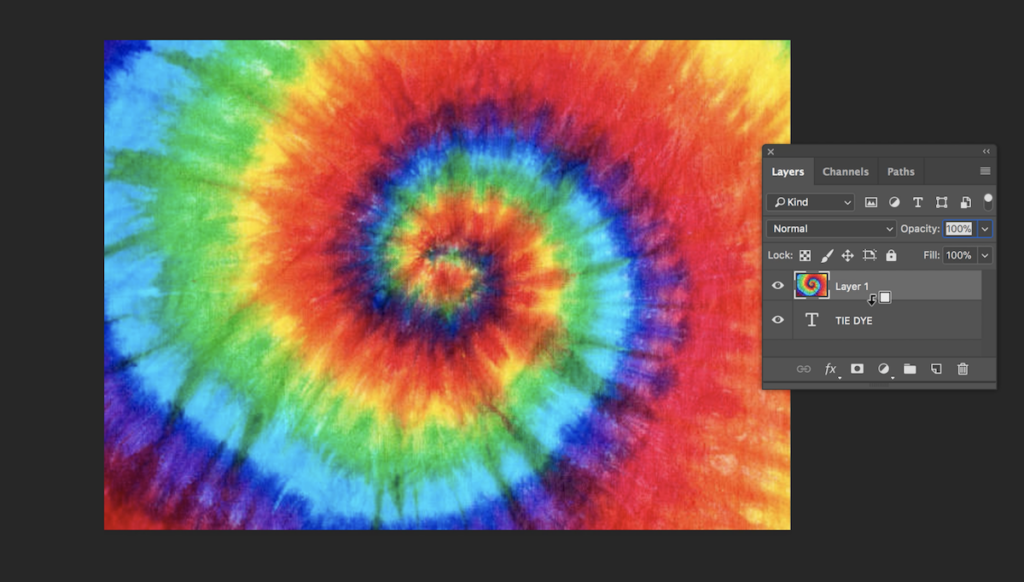
This feature is an easy way to merge text with background images. First, drop an image layer over a type layer. Then, hold down the “alt” or “option” button on your keyboard. You should notice the mouse change to a down arrow shape. Finally, click the link between the two layers in the Layers Panel. The image layer will automatically be added to the text.
2. Hue Jitter
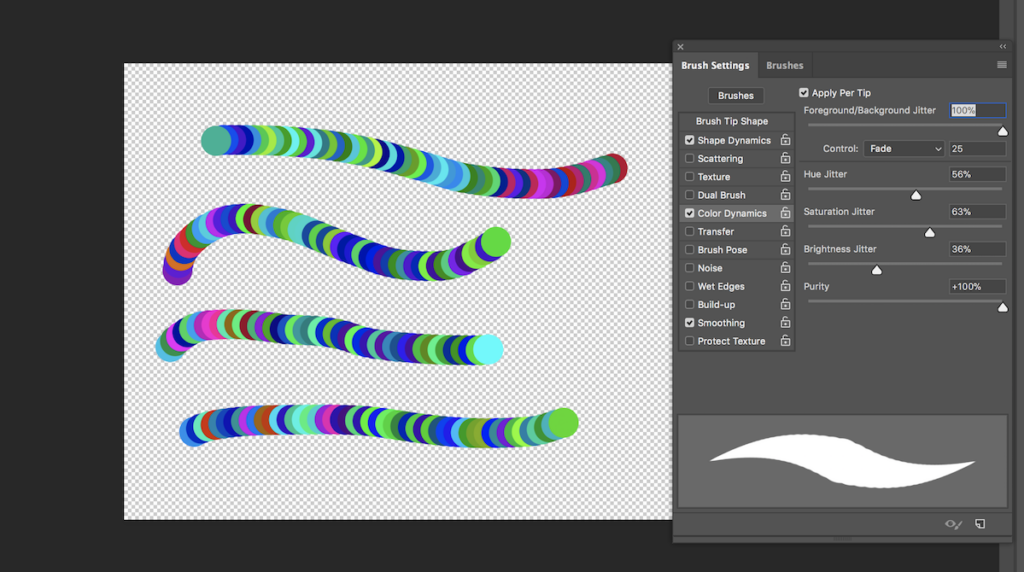
There are a variety of features held by the Brush Tool. One of the most fun is the the Jitter feature. You can find this feature in Brush Settings under Color Dynamics. The fun thing about this tool is that the brush changes colors over the course of a single brush stroke. This leaves behind a multicolored pattern that can be used to create exciting effects. Have your students try out different settings to see how they affect the tool.
3. Layers Panel Options
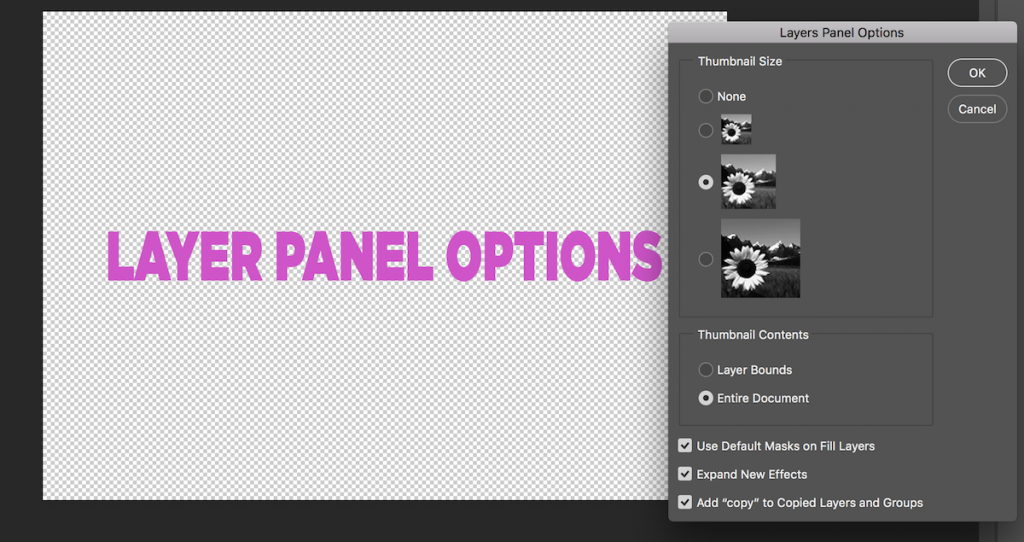
The Layers Panel is one of the most important spaces to understand. Working in layers is one of the most significant features in Photoshop, but it does take some time to get used to. One of the best things to show your students is how to resize the way layer thumbnails are displayed. By going to the Layers Panel Options, you can determine how big the layers in the workspace will appear. This feature will help students personalize their workspaces to fit their needs.
4. Transform Selection
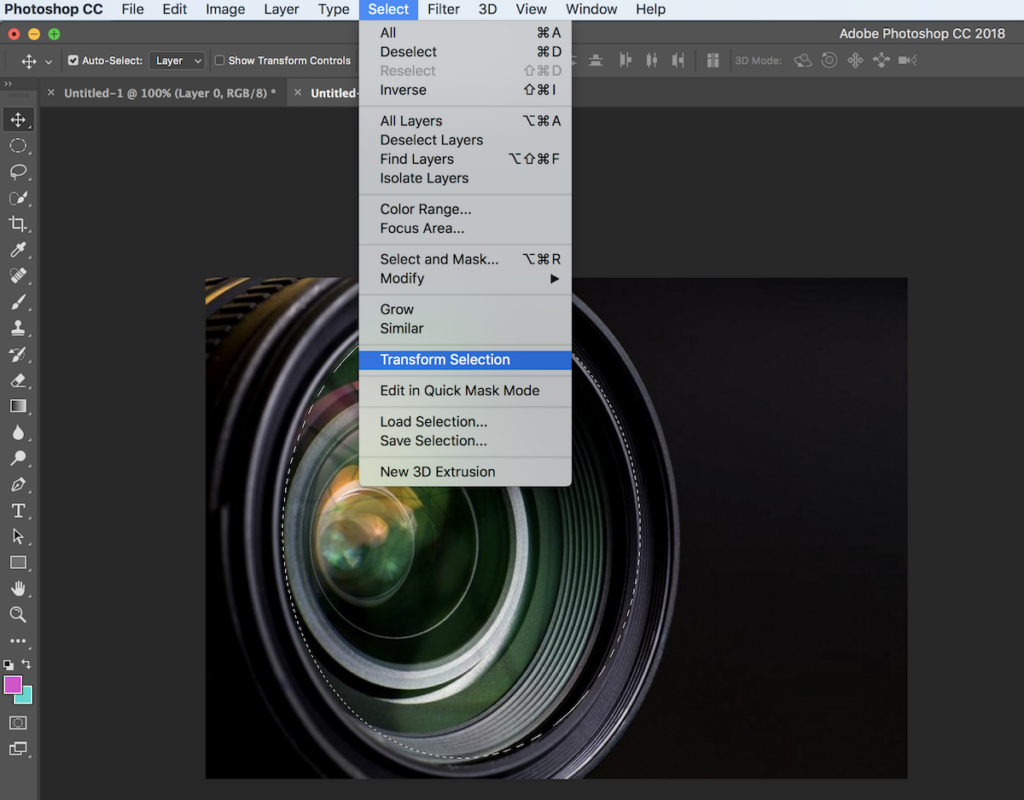
Using the Marquee or Lasso Tools are great ways to select specific areas on an image. However, they can be challenging to work. Just as you would use the Transform Tool to resize an image or layer, you can utilize the Transform Selection Tool to alter only the selected area. To do this, select the desired area, go to Select>Transform Selection. Now you will be able to resize your selection.
5. Select Color Range
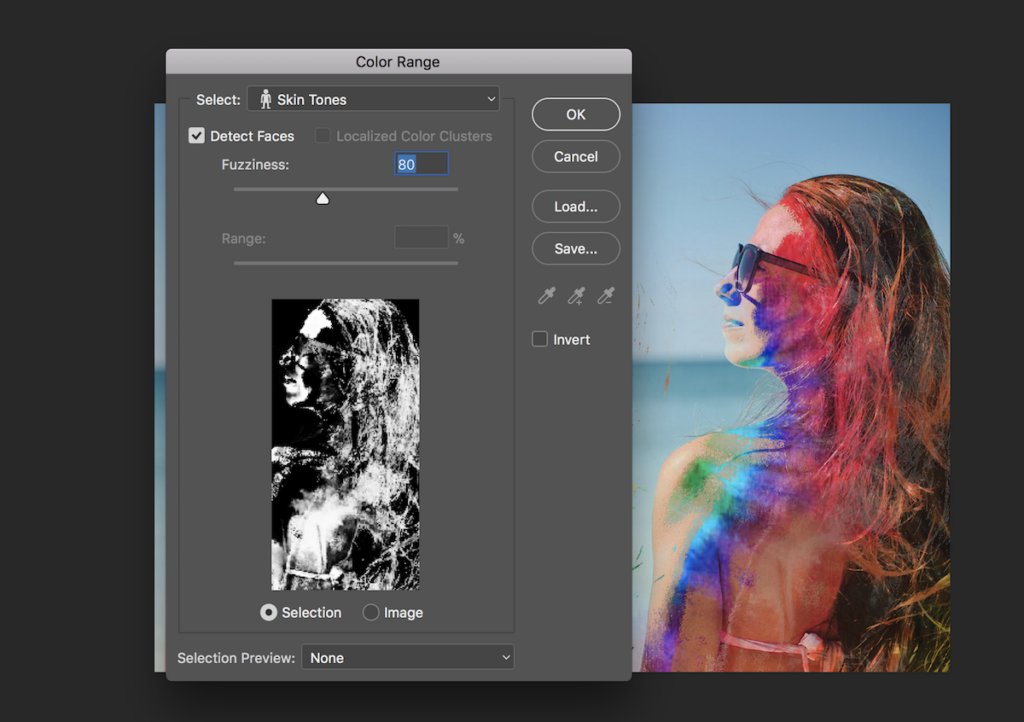
Working with images of people in Photoshop is exciting. There are so many editing tricks to explore. A simple process that will thrill your students is working with color ranges. This process can add fun effects to a photo.
To get the effect seen in the image above, first create two layers. Place a gradient, pattern, or photo on the first layer. Whatever you put here is what will show through the photo. Then, place your photo on a second layer. While your second layer is selected, go to Select>Color Range and choose “skin tone” from the drop-down box. The background image will replace the skin tones selected to create a new effect.
6. Color Replacement Tool

The Color Replacement Tool is easy to use but is often forgotten. You can find it by clicking on the Brush Tool in the toolbox and holding down. This tool creates a natural looking color replacement for any image. It’s used much like the regular Brush Tool, but it will leave the shadows and highlights of the original image. The tool will look like the Brush Tool with a small dot in the center. The small dot is for precision and will only replace the color in those areas.
7. Check Spelling
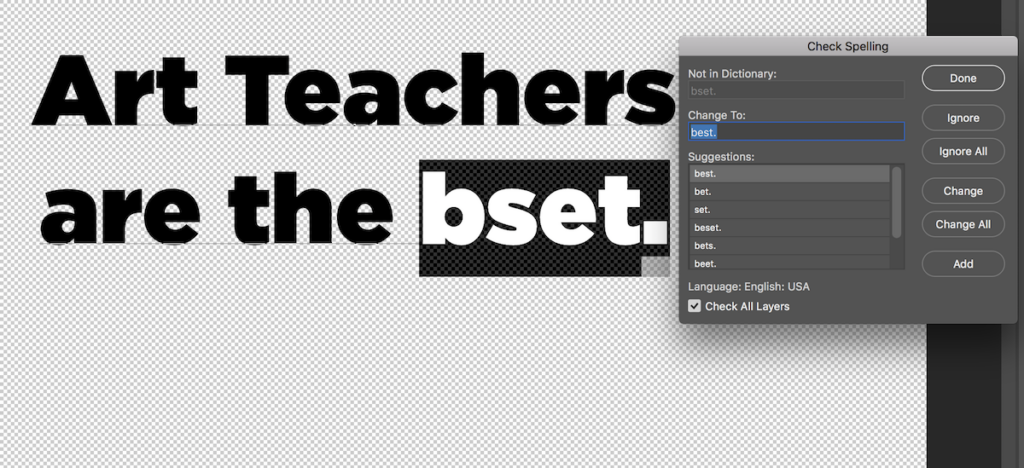
Living in a world of autocorrect, it’s not often we go without a spell-check feature. Unlike word processing platforms, Photoshop does not highlight or underline misspelled words. However, the function does exist. To check for misspellings select a text layer and go to Edit>Check Spelling.
8. Create Straight Lines

To create straight lines, simply hold down the “shift” key as you use certain tools. This works with a Drawing Tool like the Brush, with the Eraser Tool, and, of course, with the Line Tool. Clock, hold down “shift,” and then draw to the desired point. Finally, unclick, and voila! A perfectly straight and precise line!
9. Utilize FX
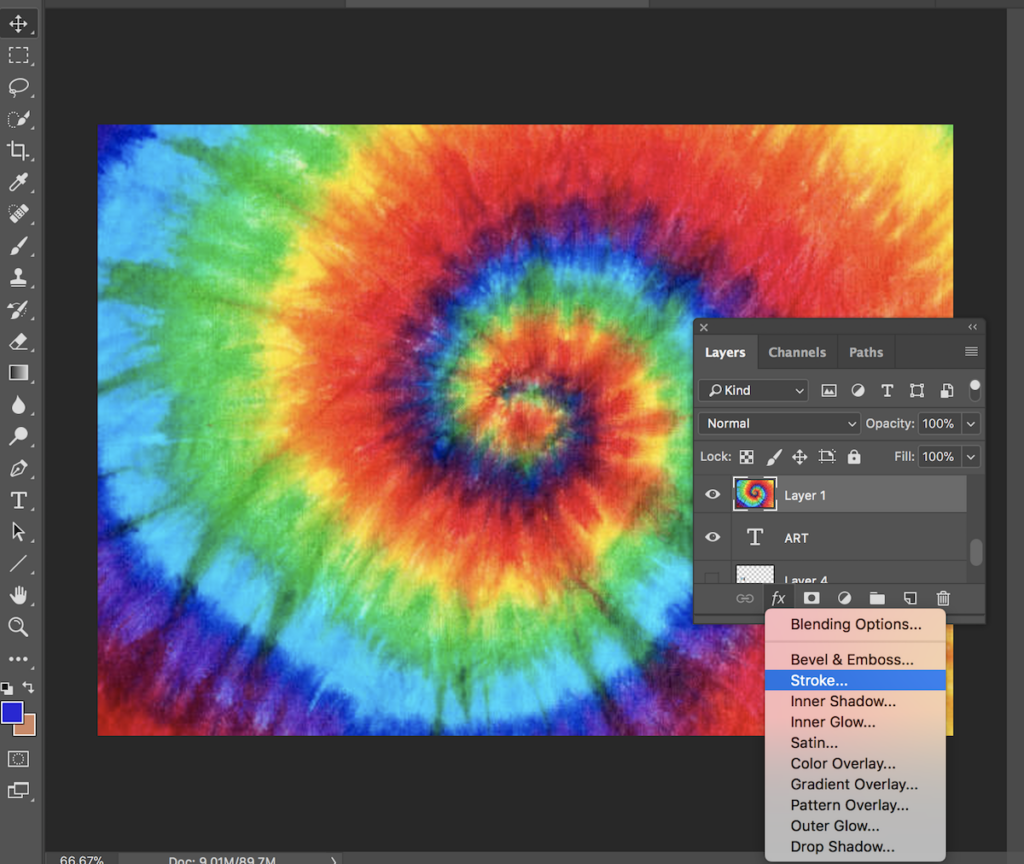
Using the Layer Effects, marked as “FX,” in the Layers Panel, is one of the best-hidden features in Photoshop. To an intermediate or advanced Photoshop user, this isn’t an uncommon feature. However, it can often go unnoticed by students. The FX feature can create many edits to an individual layer such as overlaying color or providing an outline to an image. There are thousands of possibilities to explore, and you will be amazed at what your students discover.
10. Eyedropper Tool
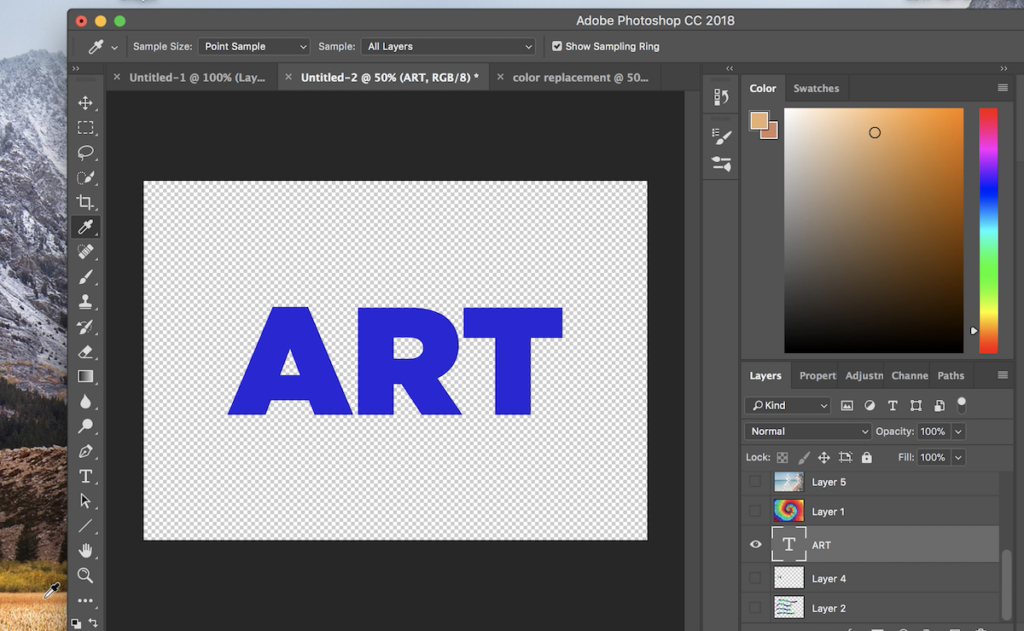
The Eyedropper Tool is excellent for selecting colors. At first, it appears you can only use this tool to select colors inside Photoshop, but it can also be used to choose colors in other areas on your computer. To do this, start in Photoshop with the Eyedropper. Then, click and drag outside of the workspace. From here, the Eyedropper will select any color on your screen. In the above image, notice the Eyedropper in the bottom left is off the workspace, but the color chosen in the top right matches the selection.
The next time you start using Photoshop with your students, keep these ten tricks in mind. You’ll be surprised at how helpful these features can be!
What is your favorite Photoshop feature?
What other Photoshop trick would you add to this list?
Magazine articles and podcasts are opinions of professional education contributors and do not necessarily represent the position of the Art of Education University (AOEU) or its academic offerings. Contributors use terms in the way they are most often talked about in the scope of their educational experiences.


