Do you remember the first time you used a pottery wheel? I sure do. I remember leaving class as if I had just run my first marathon, covered in sweat and dirt. It was challenging, but I made something! And, even though it was little more than a lump of clay with a hole in the center, I was proud.
If you have the chance to allow your students to have similar experiences, I promise it will be worthwhile. It is truly an experience they won’t forget! However, teaching throwing to your students is no easy feat. Plus, most of us have more students than equipment which provides an even greater challenge. In my classroom, I only have two throwing wheels for 200 students, but we find a way to make it work!
4 Tips to Make Throwing Run Smoothly in Your Room
1. Make sure to thoroughly demo the process.
Take an entire day to demo the throwing process. Position a throwing wheel in such a way that all students can get an up-close view. (This may mean breaking a large class into smaller groups.)
Make sure you start at the beginning of the process with how to prep the clay and gather materials. Explain what you are doing in detail, because your students will have lots of questions!
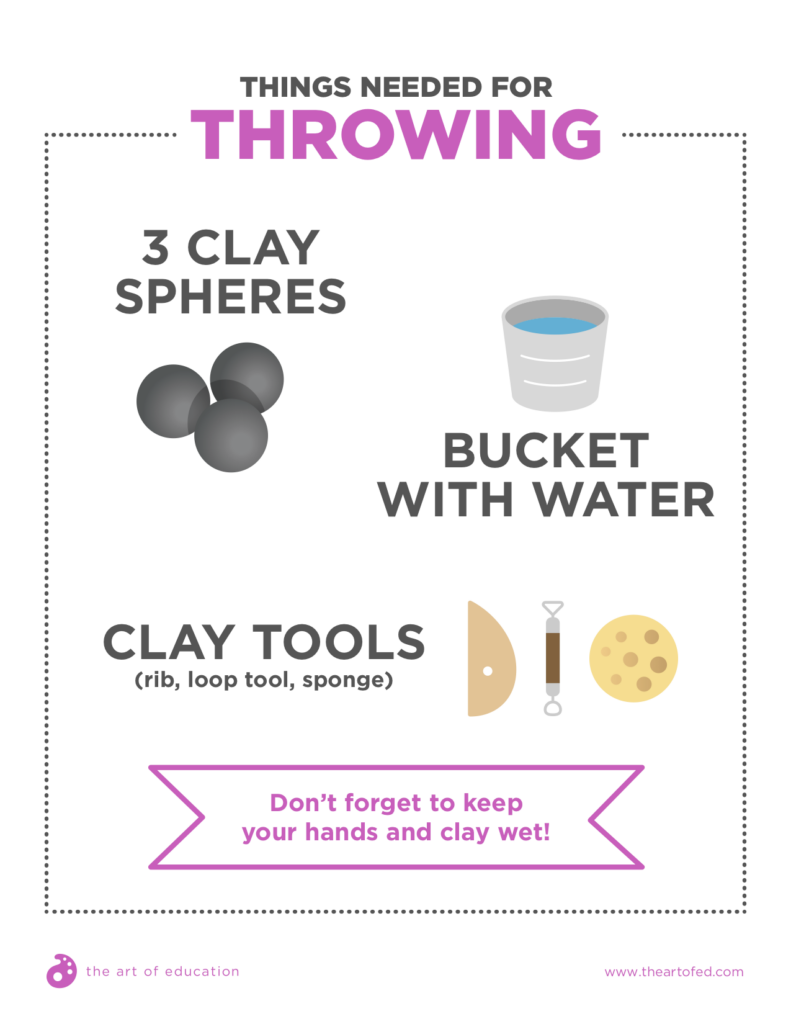
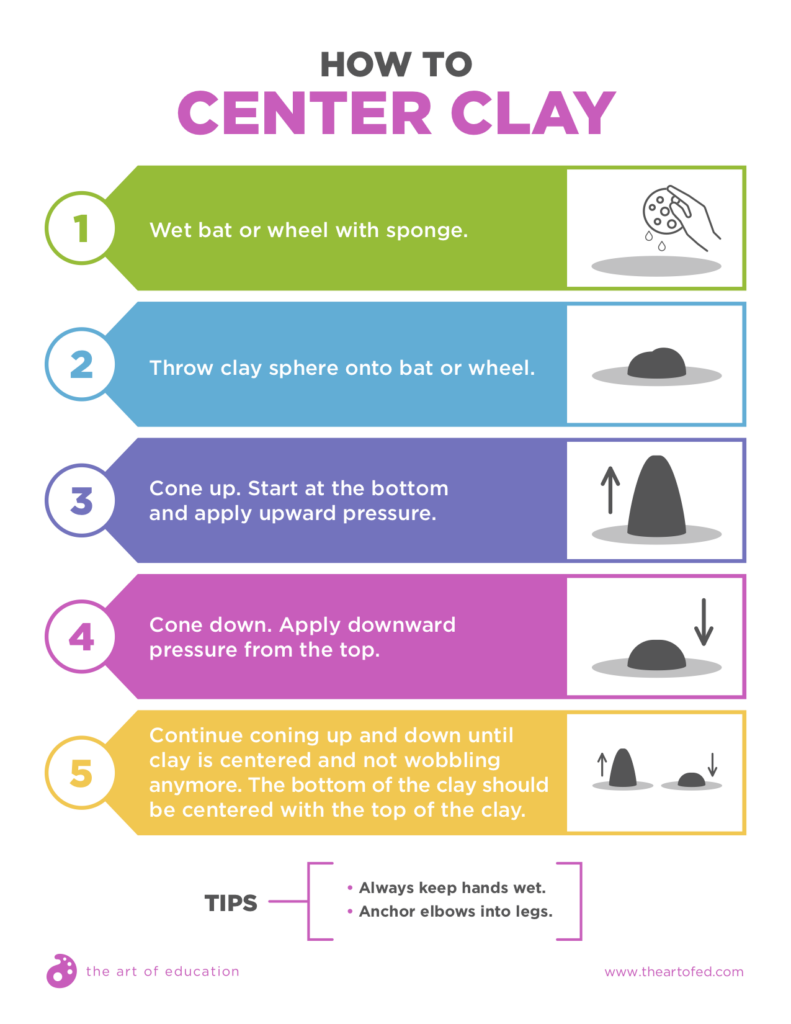
Of course, your students won’t remember all the throwing steps and procedures, so it is beneficial to have visuals to remind them. Download the anchor chart below to hang in your room. This visual aid will help students become more autonomous as they learn the process.
2. Create a throwing schedule and post a corresponding calendar.
To make sure all students get a chance to throw on the wheel, you will need to make a schedule. After you have demonstrated the process, post a throwing calendar for your classes. This way each student will know what days they will be throwing on the wheel.
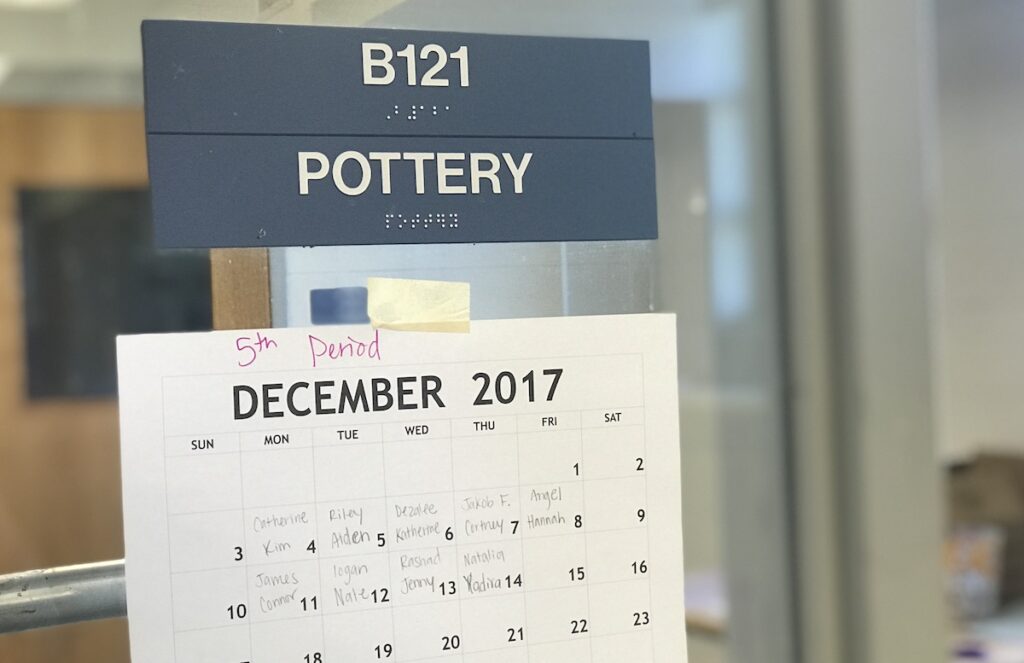
Scheduling students for two days in a row is ideal. If they are not successful the first day, they will have another opportunity to try on day two. Providing two days will also allow students to trim any pieces made the day before.
3. Consider flipping your demos.
Because it can take quite a bit of time to get all of your students their opportunity to throw on the wheel, consider flipping the process. Having a five to seven-minute video for students to watch as a review will empower your students and reduce the number of questions you have to answer. This can be made available online so that they can watch it at home. Or, you can have it available on a device at school.
4. Assign multiple projects at once.
Because only a few students will be throwing on the wheel at a time, it is essential to have other projects for your students to work on. You might want to consider introducing your students to the concept of working on multiple projects at once. Try having your students work on a larger hand building clay project while they are waiting their turn for the wheel. You might also want to have an in-progress drawing or painting project students can work on when that is complete. This will ensure your students are engaged even when it is not their day to throw on the wheel.
For more info about finishing your student’s awesome pieces, don’t miss the Critical Kiln Safety and Firing Techniques for Every Art Room Learning Pack. You’ll walk away with the ability to safely set up and fire your kiln successfully every time!
How to Teach Your Students the Basics
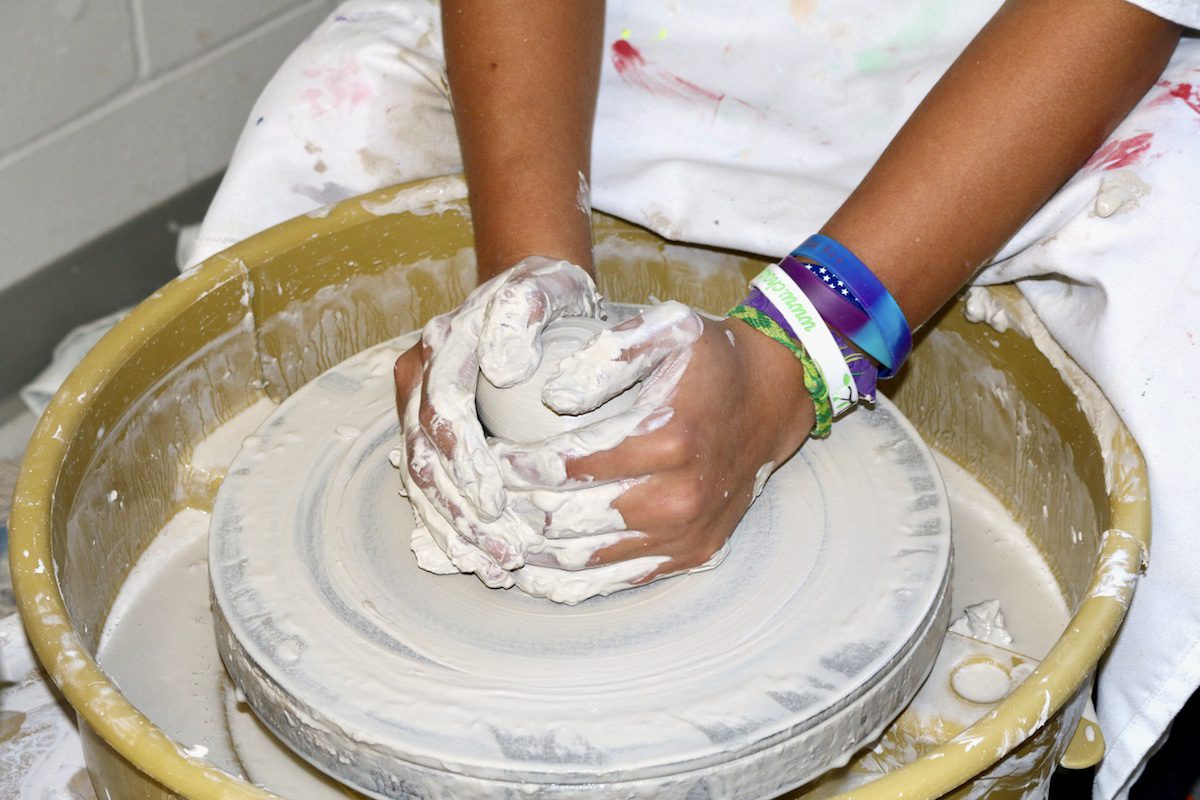
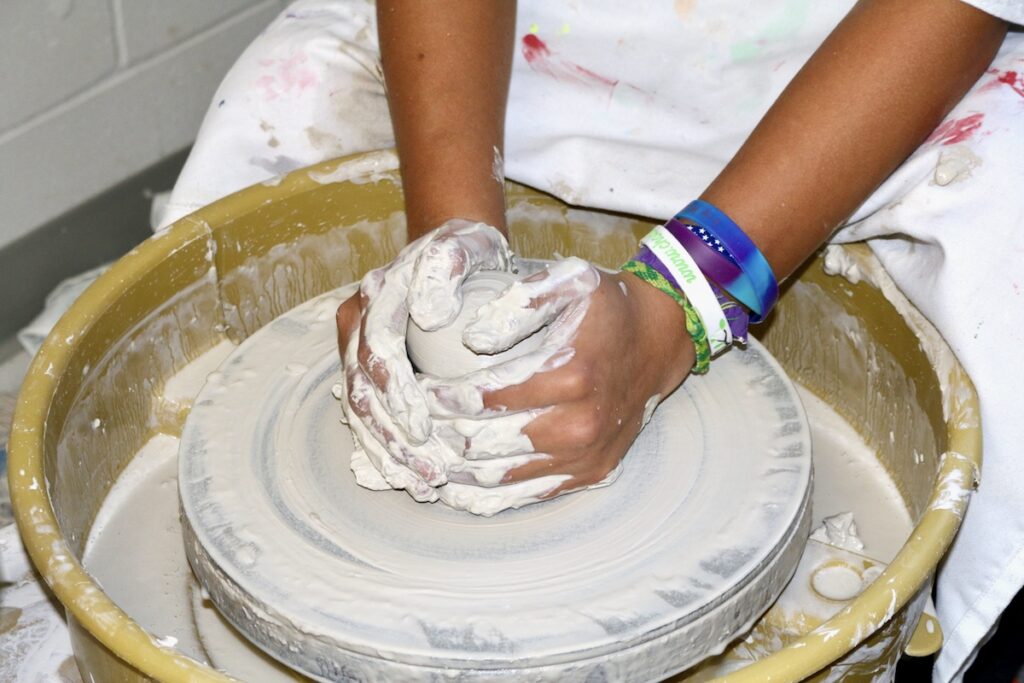
The actual throwing process for first timers is intimidating, so it is important to be supportive while keeping it simple.
Have your students focus on these 3 essential steps of the throwing process: centering, opening, and pulling.
The set of 3 helpful anchor charts below will help your students, even when you can’t be with them one-on-one.
Here are 3 more tips to help your students as they begin to learn this skill.
- It’s OK to let students struggle.
Centering clay is often the most challenging part for students. Avoid rushing in to help right away. Let them try and figure it out a bit before providing guidance. - Make sure your students feel comfortable asking questions.
It’s important to tell your students if they are in doubt, they can always take their hands off the clay and ask you a question. You can even direct them to check in with you at the different stages of the throwing process to make sure they’re on the right track. - Consider removing finished pieces for beginners.
If your students are throwing on the wheel for the first time, you might want to consider taking the pieces off the wheel for them. Your students will be disappointed if their pieces are ruined during this last step. You can use a wire cutter and pot lifters right away or take the bat off the wheel and remove it later using the same process.
Although throwing on the wheel is an exciting process, it does take a lot of instruction and support. However, it is an experience your students will enjoy and love. If you’ve been struggling to find ways to make it work in your classroom try out these ideas to create a successful experience for your students!
What tips would you add for students throwing on the wheel for the first time?
How do you manage throwing on the wheel in your classroom?
Magazine articles and podcasts are opinions of professional education contributors and do not necessarily represent the position of the Art of Education University (AOEU) or its academic offerings. Contributors use terms in the way they are most often talked about in the scope of their educational experiences.


