There are so many mediums students need to explore. This is true in both choice-based and traditional classrooms. While some mediums are easy to introduce, printmaking has a variety of tricky components. This idea especially holds true when students need to be self-directed. The last thing you want to do is give your students messy materials when they don’t know how to set them up, use them, or put them away properly.
But don’t let that stop you! Printmaking in a choice-based space can be done. It’s all in how you present and set up your center. Let’s take a look.
How to Open a Printmaking Center in a Choice-Based Classroom in 5 Easy Steps
1. Choose the right space for your printmaking center.
Make sure your students can easily access whatever space you choose. Depending on your classroom setup, printmaking can be a permanent center or a pop-up center only open occasionally.
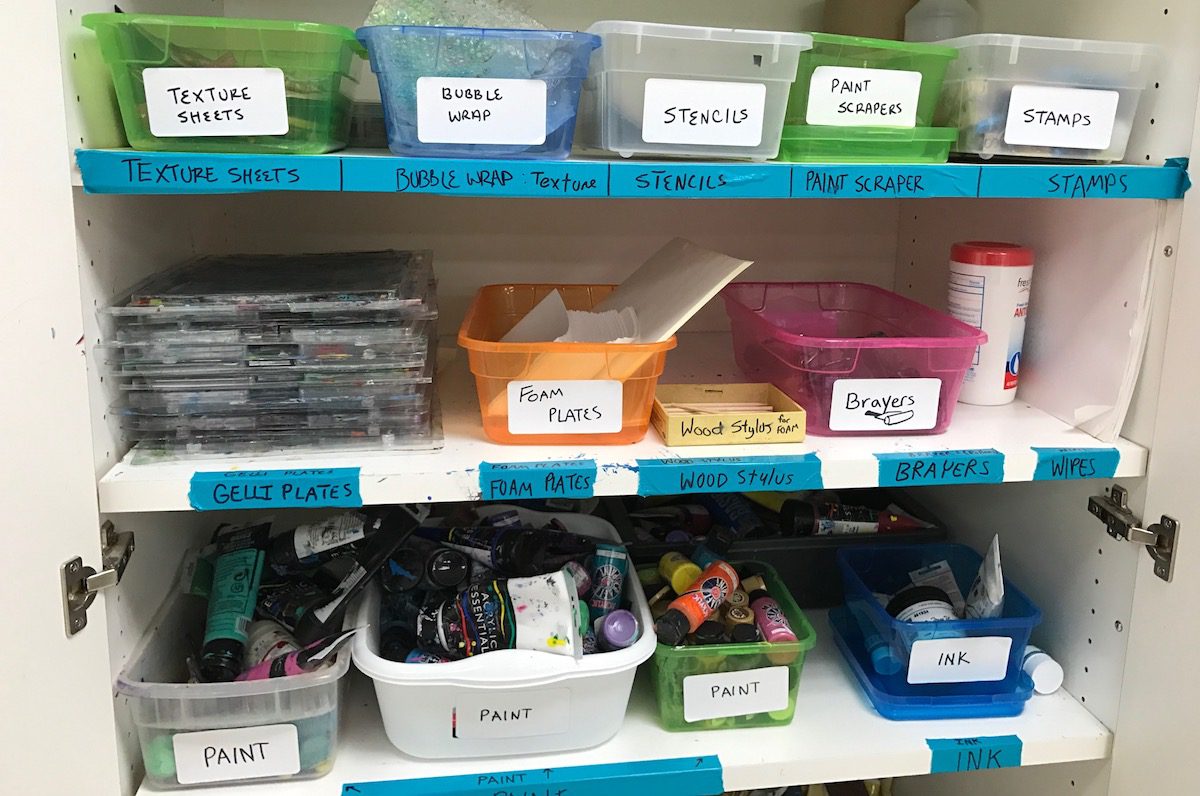
In my room, I don’t have counter space to devote to printmaking materials. So, I house mine in a clearly labeled cabinet so students can get the materials themselves. If you don’t have enough counter or cabinet space, a large plastic tub is another great way to organize materials. Whichever method you choose, be sure everything is clearly labeled.

2. Create an intentional organizational system.
A good organizational system is vital for a functional printmaking station. It will allow students to easily identify, gather, and clean up tools and materials. I would suggest organizing similar tools together and labeling everything. If you can, add a graphic to each supply label- it’s extremely helpful.
The following list contains a variety of materials to consider including. Choose what you need based on your grade level. For instance, you would not want to give young elementary students access to linoleum cutters.
- Printing plates (Gelli plates, styrofoam, linoleum, etc.)
- Carving tools (dull pencils for styrofoam, linoleum cutters for linoleum, etc.)
- Printing ink
- Acrylic paint
- Brayers
- Stencils
- Q-tips
- Texture materials (bubble wrap, texture sheets, paint scrapers, etc.)
- Barrens
- Paper
- Cleaning materials (baby wipes or a spray bottle and paper towels)
3. Create anchor charts.
Anchor charts are an important part of any choice-based center. An anchor chart is a visual reminder of how to use the center and supports students in their learning.
Depending on your center, you may have more than one anchor chart. For example, let’s say you want to provide students the choice to create monoprints with Gelli plates and experience relief printing with sheets of styrofoam. In that case, you would want an anchor chart for each method so students could be self-directed with both processes.
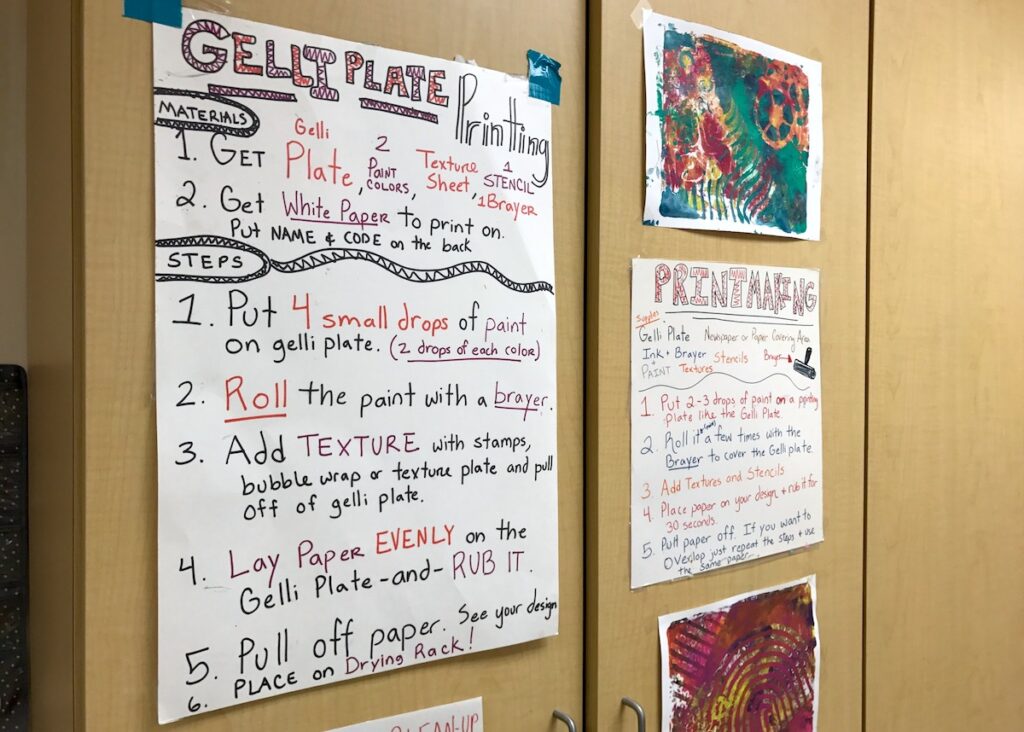
When creating any anchor chart, you should include:
- A list of necessary materials
- Setup instructions
- Steps of the artmaking process
- Cleanup instructions
This information can all be on one menu. Or, you can separate the information as long as all of the anchor charts are displayed in close proximity to the printmaking center area.
4. Introduce the center to your students slowly.
Giving your students a demonstration of how to properly get their supplies, perform the printing process, and clean up their materials is vital to the success of this center. Starting slow is key. Choose the type of printing you want your students to learn first, then add others as students get comfortable. This way you keep things simple rather than overwhelming students with too many printing options.
You will also want to limit the number of students at the center at first to observe how students are using it. Having a rotational system, so everyone gets to try the station, will also combat overcrowding.
5. Officially open the Printmaking Center.
The big day has come, and you are ready to open your center. Here is a list of things to remember.
- Make sure everything is labeled in the printmaking center or labeled in containers if using a large tub to store supplies.
- Have your anchor charts displayed in close proximity to the printmaking supplies.
- Reference the menu during your demonstration.
- Choose a limited number of students to begin and rotate students throughout the class.
- At the end of class, reflect on what was done correctly and what students need to work on.
- If time allows, have students share what they enjoyed about printmaking to the class.
Choice in the classroom allows for students to work as artists in their own right. It is amazing to see what students create when they are using their ideas as they explore new materials.
To learn more about choice in the classroom check out these great resources!
- Engaging Learners Through Artmaking: Choice-Based Art Education in the Classroom by Diane B. Jaquith and Katherine M. Douglas
- The Facebook Groups Midwest TAB-Choice Art Teachers and Choice-Art Educators
- The Teaching for Artistic Behavior website
- The AOE articles 5 Essential Centers for Choice-Based Classrooms and How to Take Monoprinting to the Next Level
What type of printing do you like to do in your room?
Have you done printing in a choice-based classroom, what advice would you add?
Magazine articles and podcasts are opinions of professional education contributors and do not necessarily represent the position of the Art of Education University (AOEU) or its academic offerings. Contributors use terms in the way they are most often talked about in the scope of their educational experiences.