Do you remember the first flip book you made out of a pad of Post-it notes? We’ve all done it, and you’ve probably seen your students do it, too. Why not tap into that interest?
Our students spend their days immersed in animation via social media, television, apps, movies, and video games. Because of this, when you teach them how to animate, it blows their minds. They’re amazed at what they can create with such a simple process!
If you’re looking to explore animation with your students, try bringing everyday objects to life!
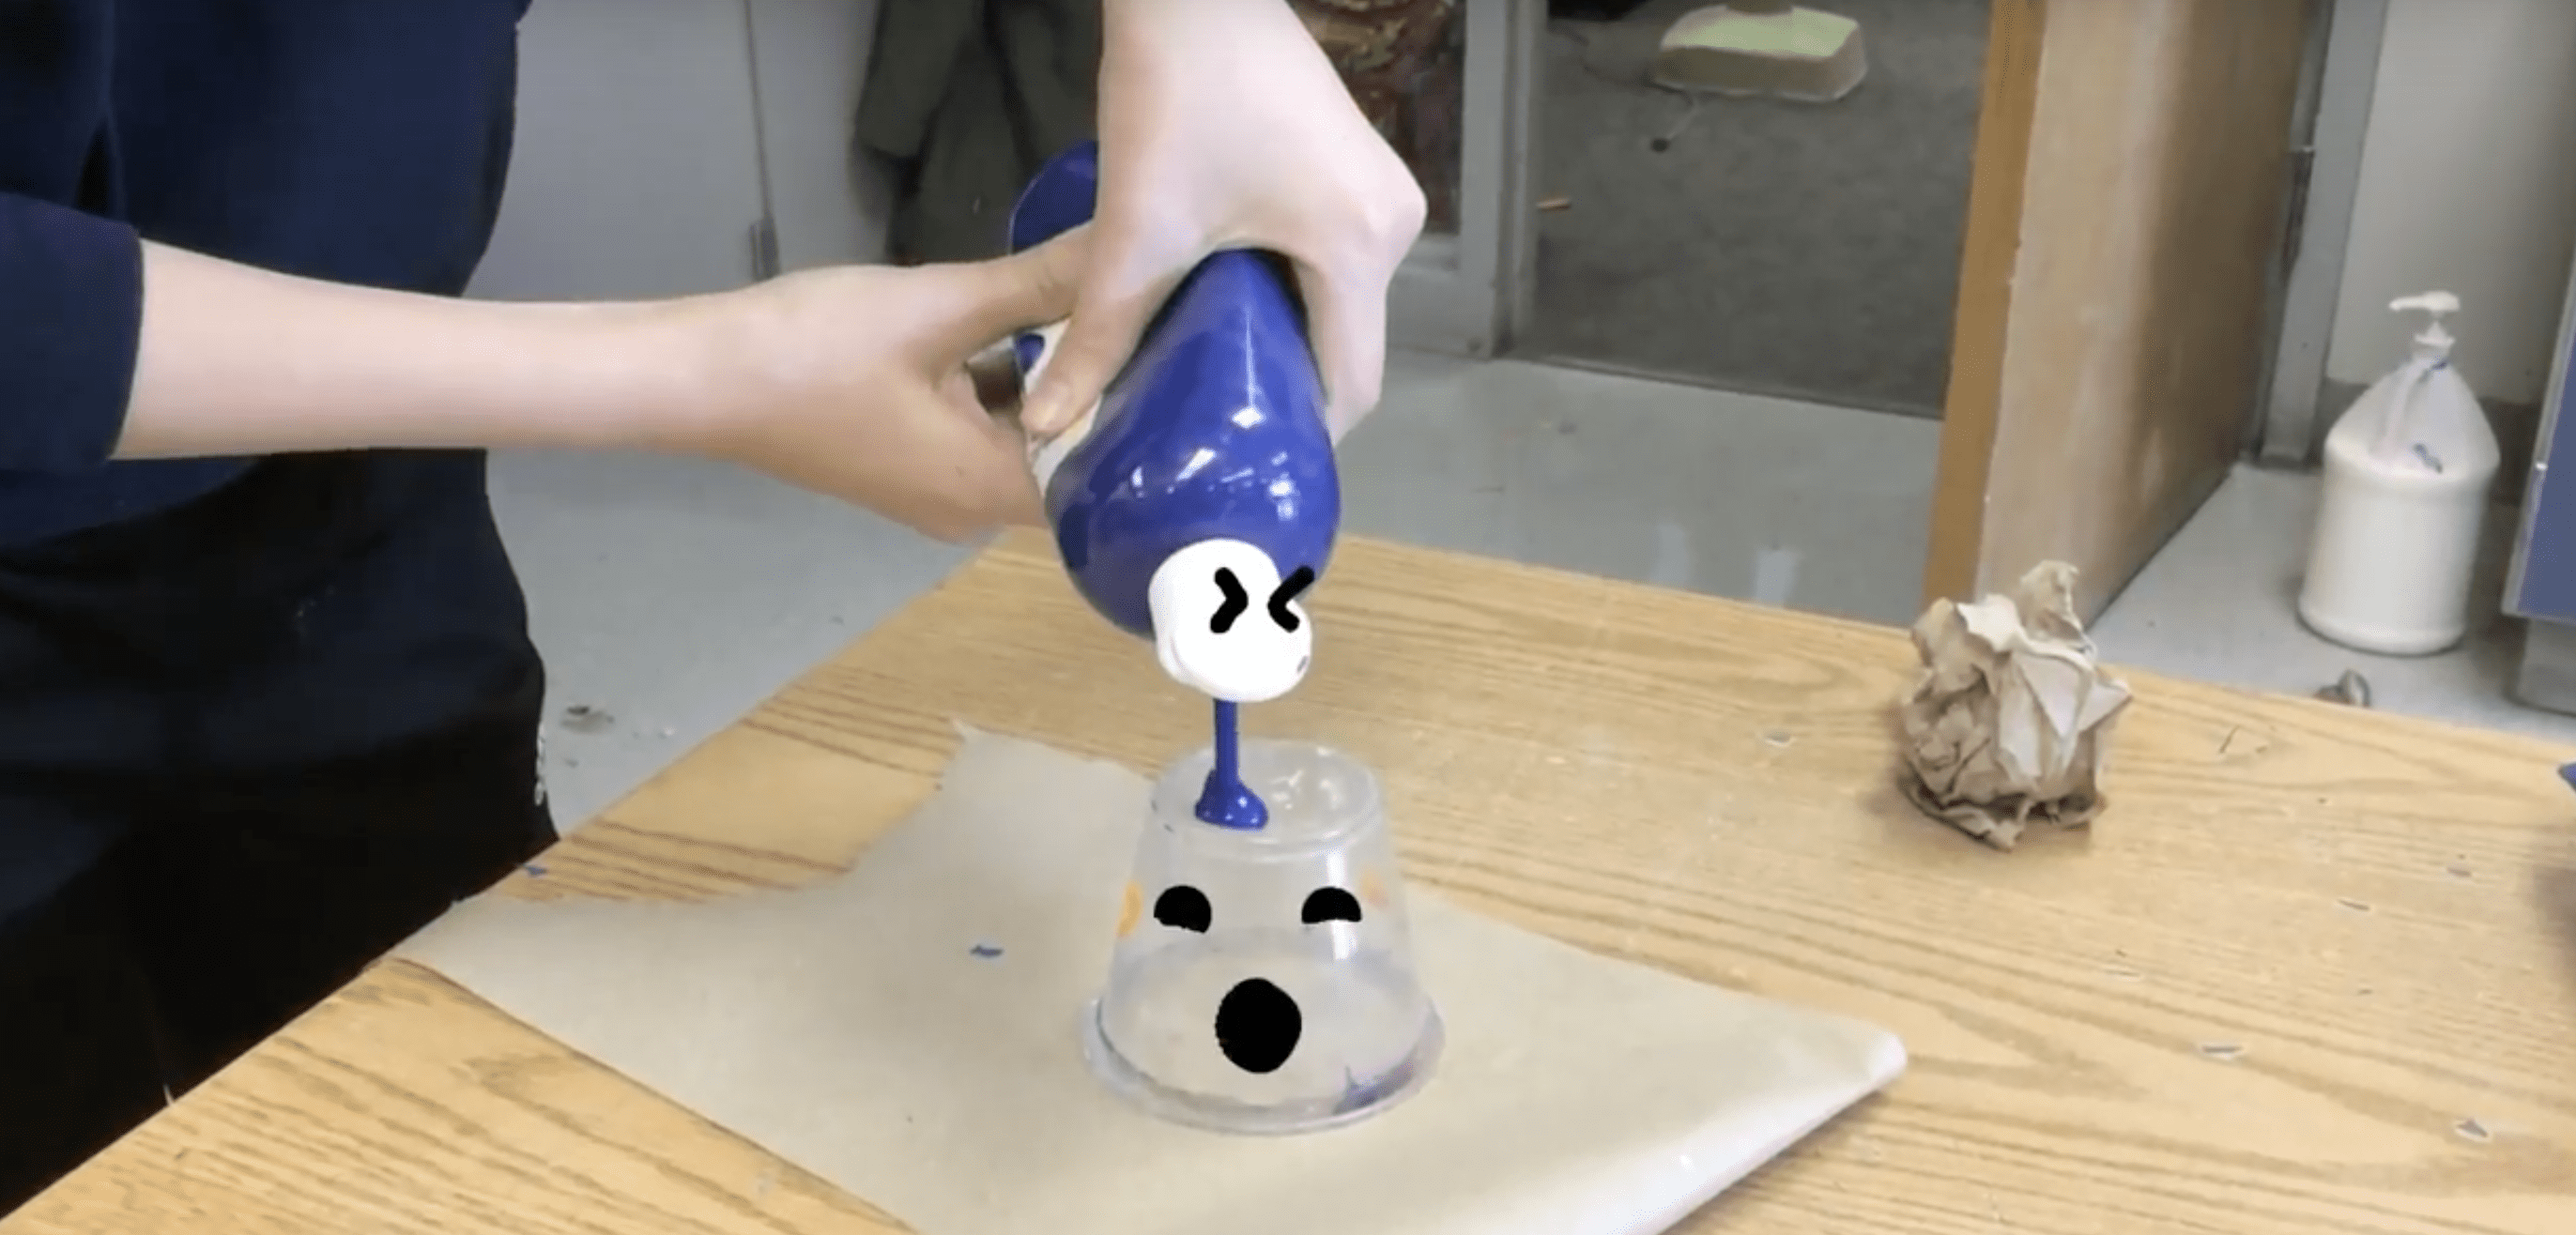
In this project, students will record a video clip of an everyday object, then add drawn elements on top in each frame. In this way, they’ll use the idea behind stop-motion animation to make their objects “come to life.” Note: it’s important for your students to have a good working knowledge of Photoshop before beginning this project. They’ll be asked to use layers as well as the brush tool. Check out a finished student example below!
Follow these 4 easy steps to get started.
1. Get Inspired
If you don’t follow Sean Charmatz on Instagram, you should start. He is the true master of bringing everyday objects to life. Before you begin this project, inspire your students by watching a few of his “Secret World of Stuff” videos. You’ll find your students laughing along with the videos while developing great ideas for their projects.
2. Record Video Footage
Before students can start bringing their objects to life, they must record a video clip of an everyday object. Using a classroom set of iPads or tablets will do the trick. Allow your students to explore your art room looking for things they never seem to notice. Challenge your students to develop a creative story for an otherwise mundane object like a tape dispenser or stapler.
This type of silly prompt is perfect for middle schoolers. If you’re looking for even more strategies to engage your kids, check out the Pro Learning Pack, “Strategies for Managing Middle Schoolers!”
Once students have chosen their object, they will need to film it doing something. Encourage your students to work together. One student can record while the other manipulates the object. For example, students might film a paint bottle getting squeezed, a paintbrush painting, or a sponge wiping a table. Video footage should not be very long. A 5-10 second clip is ideal. Once the video clip is recorded, have your students export the file to a computer to get ready for editing.
3. Add Animated Drawn Elements in Photoshop
Once the file is exported to the computer, students can begin adding their animated, drawn elements using the following steps.
Step 1
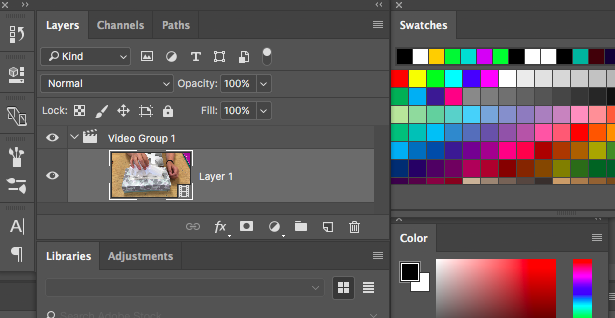
To begin, open the video file directly in Photoshop. The video will open as a video layer with an icon that looks like a small filmstrip on the bottom left corner. Make sure your students do not rasterize the layer, so it remains a video file.
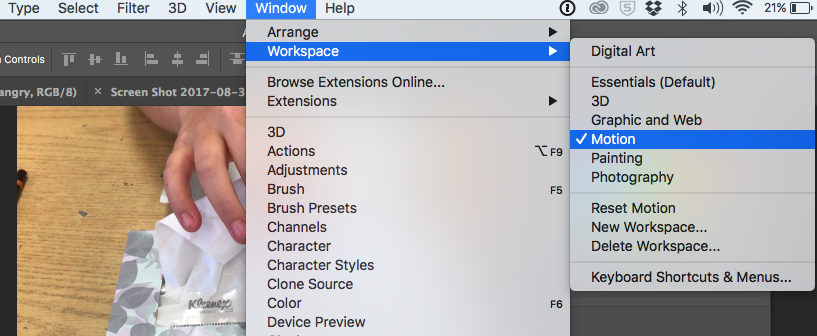
Step 2
To edit in animation mode, you must open up the Motion workspace. To do this, go to the toolbar and click the “Window” drop-down feature. From here select “Workspace” and click “Motion.”
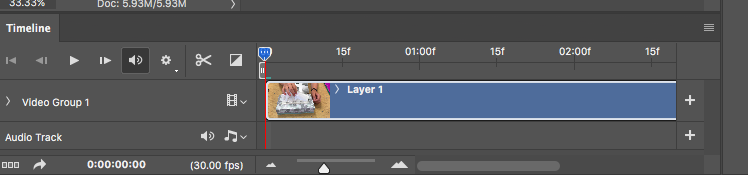
After the Motion workspace is selected, a timeline window will open below the main workspace. See the image below to make sure you have opened the animation timeline correctly.
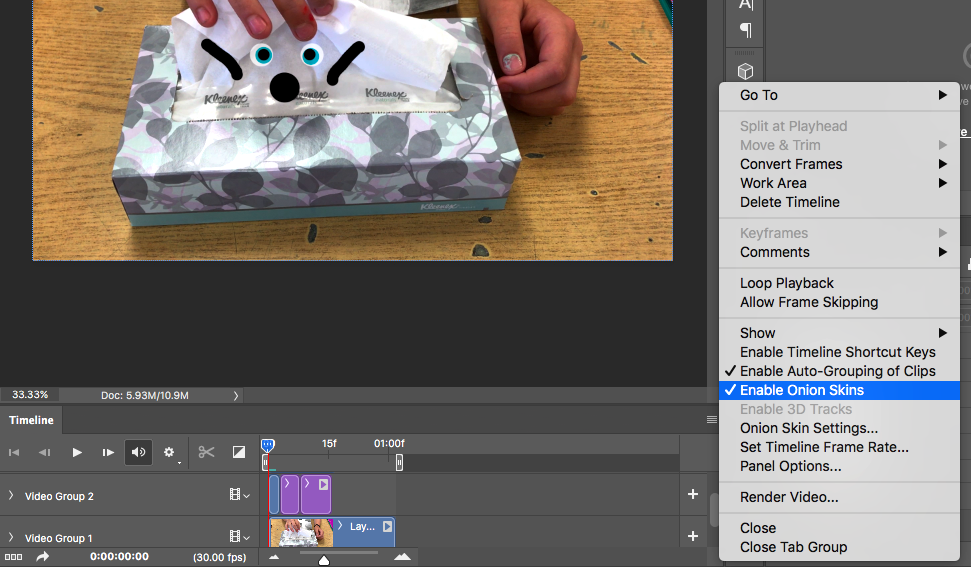
Step 3
Before students begin editing, go to the options panel in the top right corner of the Animation timeline window. From here, have your students select “enable onion mode.” This will allow students to see the drawings they made on the previous frame. From here, your students will be able to edit the video file.
Step 4
To begin editing, create a new layer. Because it is not a video layer, the layer will show up as purple in the animation timeline, whereas any video layers will be blue. Make sure the purple layers are above the blue so no parts of the drawing are hidden.

Start drawing on the new layer directly above the segment of the video. When you are ready to move onto the next frame of the video, click the “next frame” button located by the “plan” button. From here, students can use the brush tool to continue drawing over the next frame of the animation. For a quicker result, encourage your students to simply duplicate the previous layer and make slight edits on the next frame, just like they would in a stop-motion animation. Students will repeat these steps to finish their video animation.
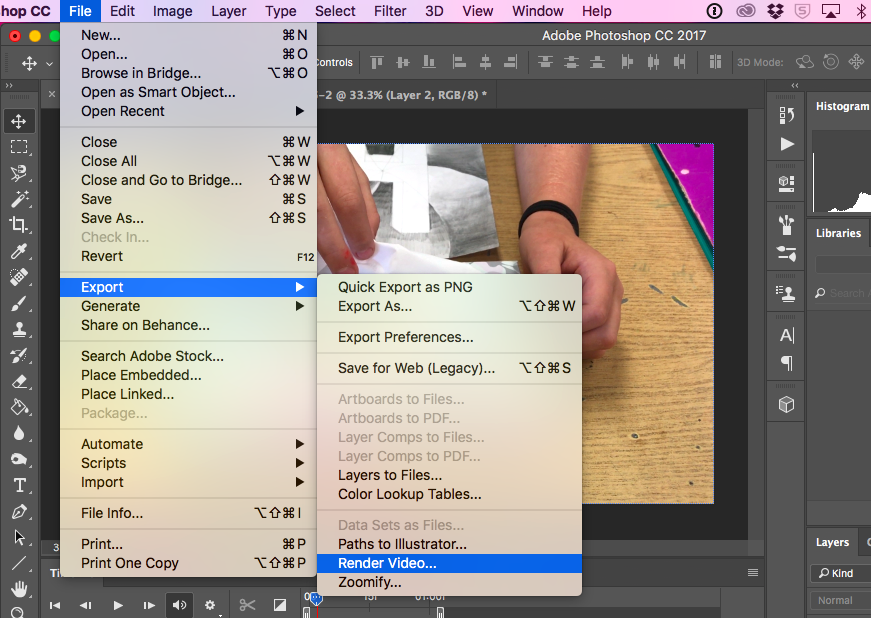
4. Export and Enjoy
Finally, students will need to export their video file. To do this go to File>Export>Render Video. From here, select “render” and a progress bar will appear. Depending on the file size, this can take a bit of time. Following these saving steps are very important so students have a moving video file! For an added bonus, encourage your students to add sound. They can do this through the Photoshop feature or by uploading their file into iMovie.
Teaching your students to animate is a wonderful way for students to think methodically and critically. You will be shocked with the creative ideas your students develop. To see more examples of how this project can work in your classroom, check out these student examples!
Do you teach animation in your classroom? What method do you use?
Have you ever animated in Photoshop? What tips can you add?
Magazine articles and podcasts are opinions of professional education contributors and do not necessarily represent the position of the Art of Education University (AOEU) or its academic offerings. Contributors use terms in the way they are most often talked about in the scope of their educational experiences.


