If you are looking for a fun and creative way to start your school year, look no further! The project I’m sharing today will set your students up for success, build their self-esteem, and allow you to get to know them as individuals.
Introducing Narrative Necklaces!
This is a lesson I’ve used successfully at all different grade levels. Not only is it a great way to introduce some basic art techniques, but it also is a great way to up your students’ confidence right from the get-go.
Here’s what to do:
Step 1: Brainstorm
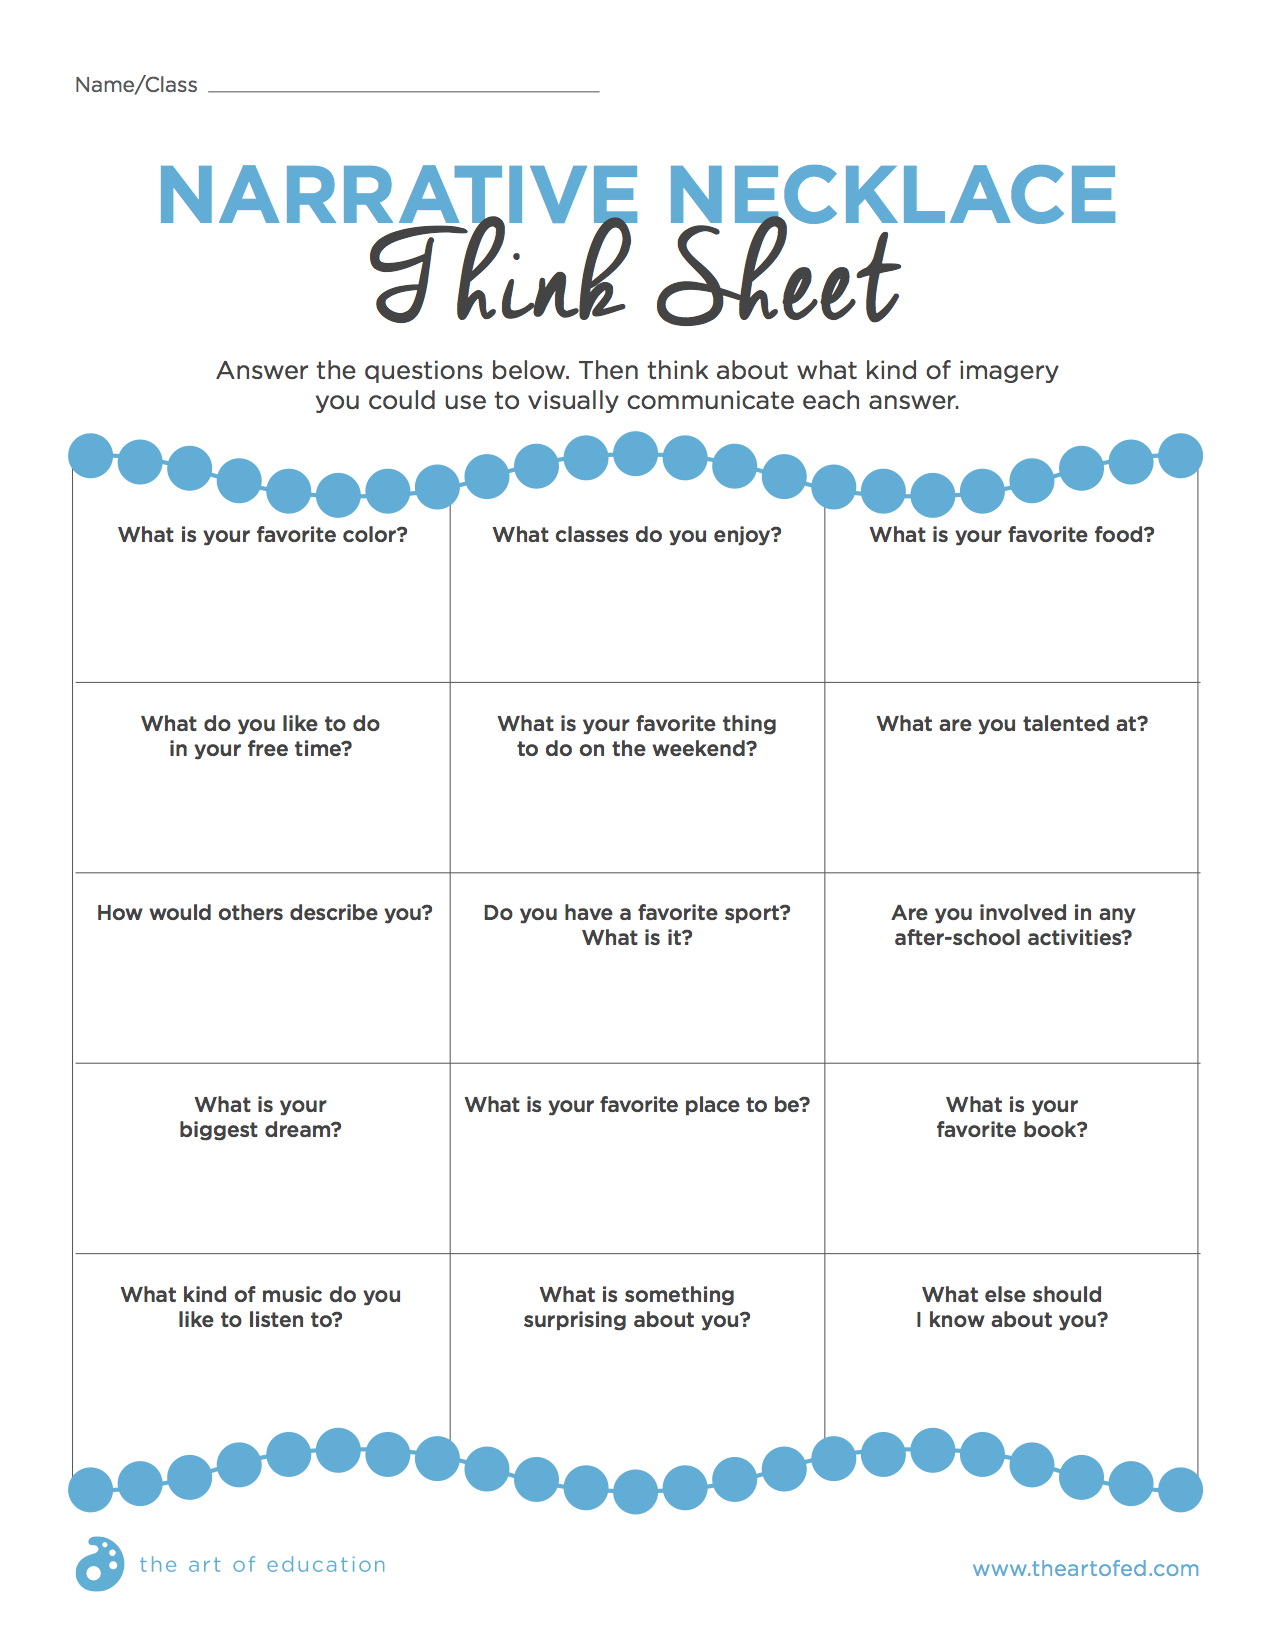
Our students honestly don’t care what we know until they know we care. Having them fill out an interest survey to communicate their likes and interests shows we are invested in who they are. In this case, it does double duty as it helps them brainstorm what types of things they might include on their necklaces!
Download the think sheet below to use with your students.
Step 2: Look at Examples
Once students have had time to reflect and brainstorm, show them some examples of jewelry throughout the ages. I like to show a variety of necklaces, pendants, dog tags, and other pieces that people have worn at different times and places. It’s a wonderful time to share some pieces from art history and from different cultures which showcase the way people use adornment.
I have found the key to getting my boys excited about this project is really honing in on the dog tags. Once they realize these tags represent someone’s identity it’s amazing how excited they are to wear the beautiful pieces of work they create!
Step 3: Collect Collage Materials
Once you have had a class discussion about necklaces, it’s time for the artmaking to begin! I like to tell students how cool it is to collage because it’s like “drawing” with images and symbols. Most kids are excited they won’t be judged on their drawing skills early in the school year.
Do a quick demo of how to search for imagery by opening up a magazine and tearing out images, symbols, colors, textures, and whatever else inspires you. In my room, I like to explain I pick something because of an “aesthetic a-ha!” I’m not often sure exactly why I love the image, or the texture, or the word, but something about it makes me happy.
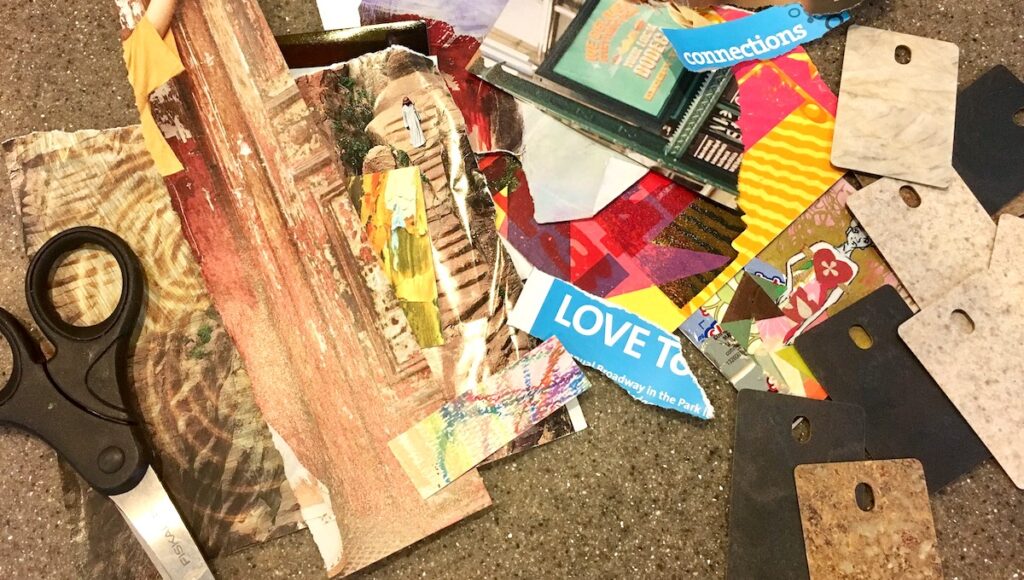
After you demo, let your students have at it! I generally give my students a full art class or two to do their “collage search.” This way, they can really invest in the collection of collage pieces. Kids today are so used to running to Google Images to find exactly what they’re looking for. This little art adventure magazine search is new for them and they’re are often amazed at their collections by the end of the class.
Once finished collecting images, have your students put them into envelopes for safe keeping.
Step 4: Cut and Compose
After gathering their images, the students are ready to neatly cut all of their pieces and begin arranging them into an interesting narrative visual story to showcase who they are. As students are cutting, remind them neatness counts, so they must pay attention to their edges. In addition, it’s helpful to recommend your students rearrange their pieces to come up with various compositions before gluing anything down.
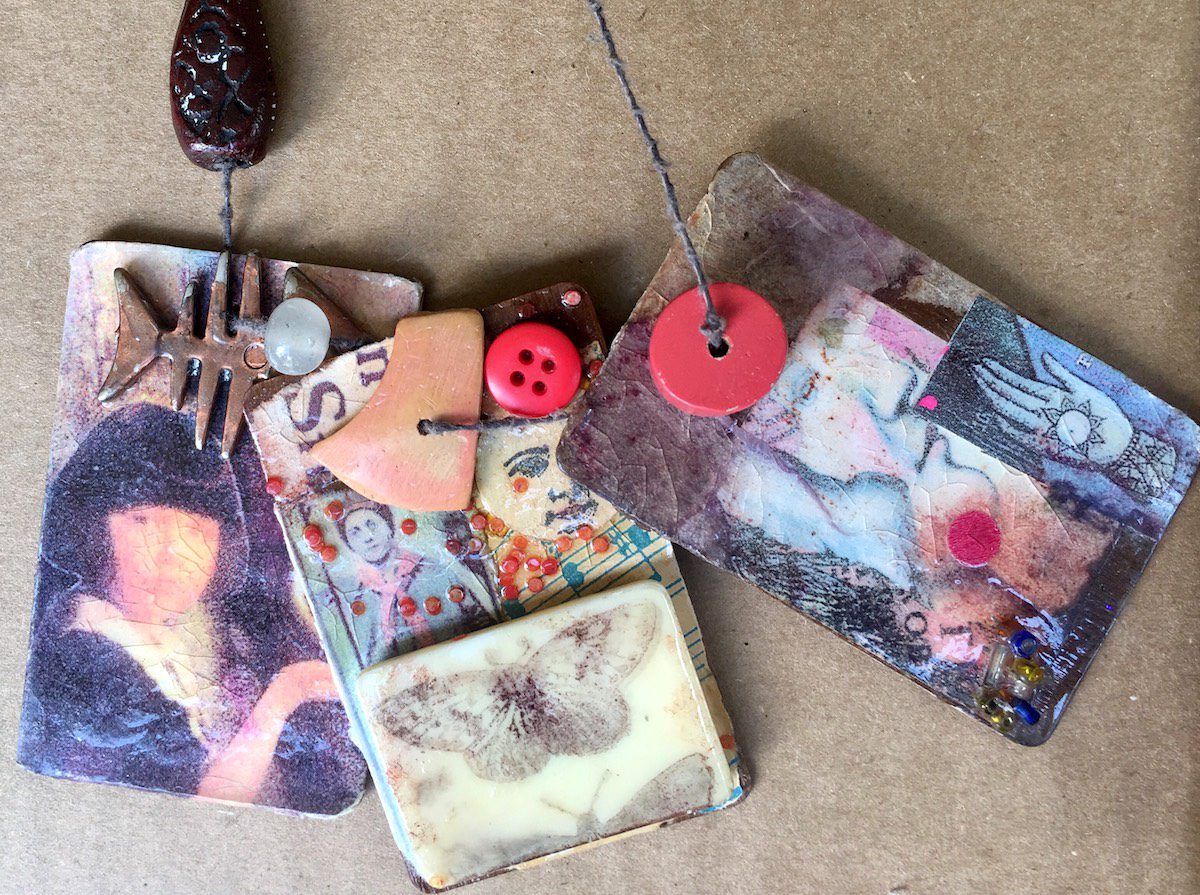
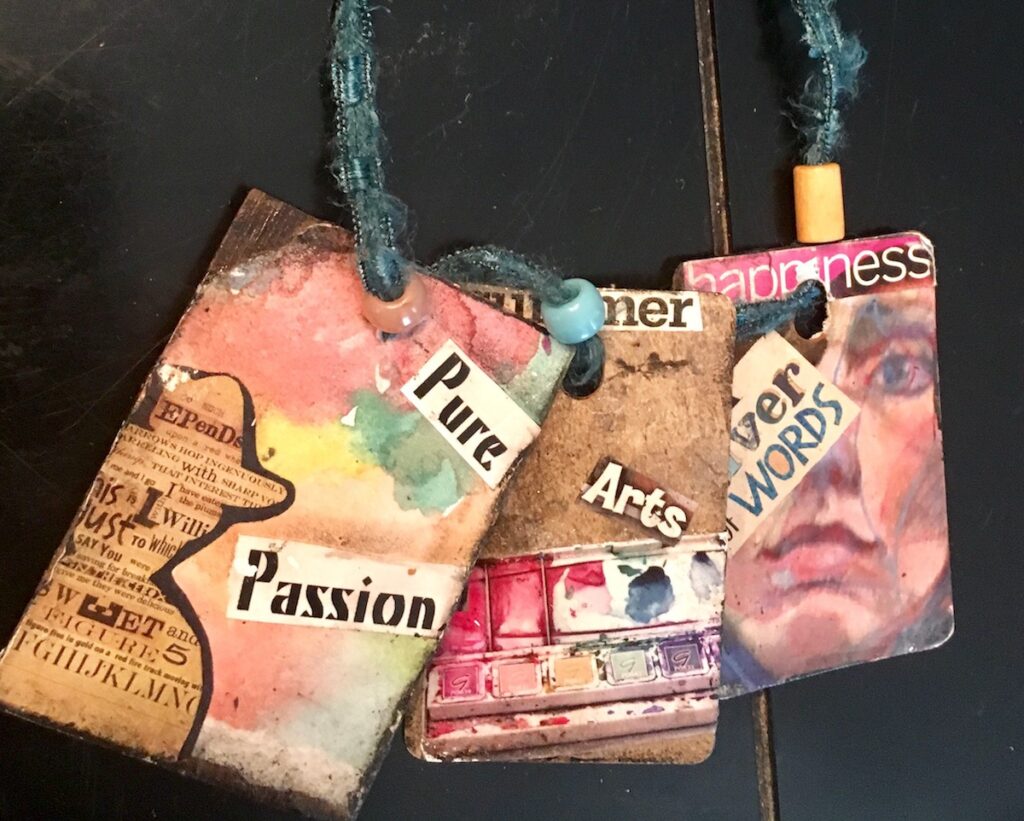
Step 5: Create the Pendants
Once students have a clear idea about what they want their pendants to look like, you can pass out the tiles. These are the backgrounds on which students will glue down their visual stories. In my room, we use the small laminate tiles that you can get for free from various hardware stores. They’re small, sturdy, and have great texture for negative space. Plus, there’s already a hole for hanging!
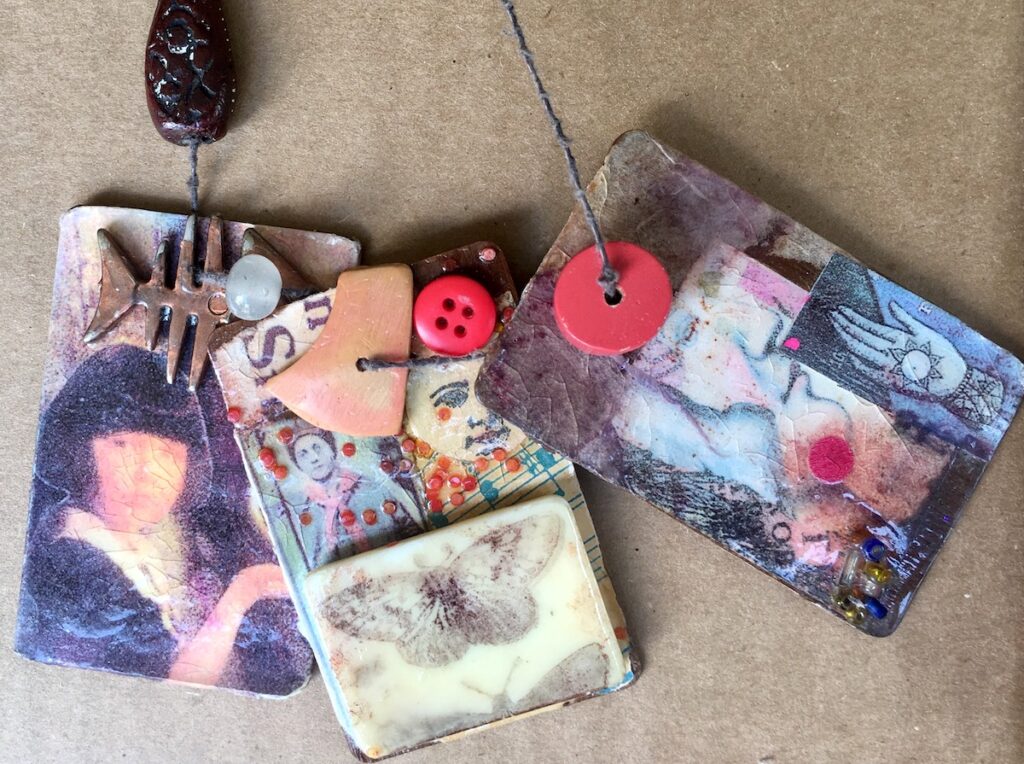
If you don’t have access to a hardware store with free samples, cardboard or matboard also work well. You can also experiment with giving students the freedom to use other materials they think will work well. For example, some students may want to work larger, which is great!
Remind your students to decorate both sides of their tiles. I find students often want to create more than one tile because they have a lot to share. It’s wonderful!
Step 6: Turn the Pendant into a Necklace
At this point, your students will be ready (and excited) to turn their pendants into necklaces. You can provide a variety of types of string or chain for your students to do just that. Encourage them to add raffia, beads, or any other cool material they’d like. You could even go so far as to create handmade clay beads! The possibilities are endless when you give students some freedom and a box full of fun materials to get creative with!
Step 7: Add Finishing Touches and Seal
Over the years, I have used various techniques to change the lesson up. Most recently, I had my students add a touch of oil pastel around the edges to soften the magazine images. Whatever finishing touches you add, it’s a good idea to seal the pendants so they keep students’ clothes clean and so they last longer. I have found that Triple Thick sealer and Mod Podge both work well. Paint the sealer on after students have added their string so the pendants can hang to dry!
What I love most about this lesson is how much my students enjoy it. I absolutely adore seeing them share a part of who they are with me. The smiles on their faces as they wear their art proudly around their necks shows me it’s going to be another successful year in art – kids now know I truly care about who they are, and through art, they can share this with their world!
Have you incorporated jewelry making into your curriculum?
How do you get to know your students better at the beginning of the school year?
Magazine articles and podcasts are opinions of professional education contributors and do not necessarily represent the position of the Art of Education University (AOEU) or its academic offerings. Contributors use terms in the way they are most often talked about in the scope of their educational experiences.