Balancing the amount of technology in the art room can be tricky. Sometimes introducing tech to your students comes at the expense of teaching more traditional artmaking processes. We don’t want technology to take the place of traditional artmaking methods, however, it can be used to enhance practices. One of the easiest ways to do this is by creating simple circuits with LED lights.
Here are some tips to incorporate LED circuits in your art room.
Step 1: Gather Your Materials
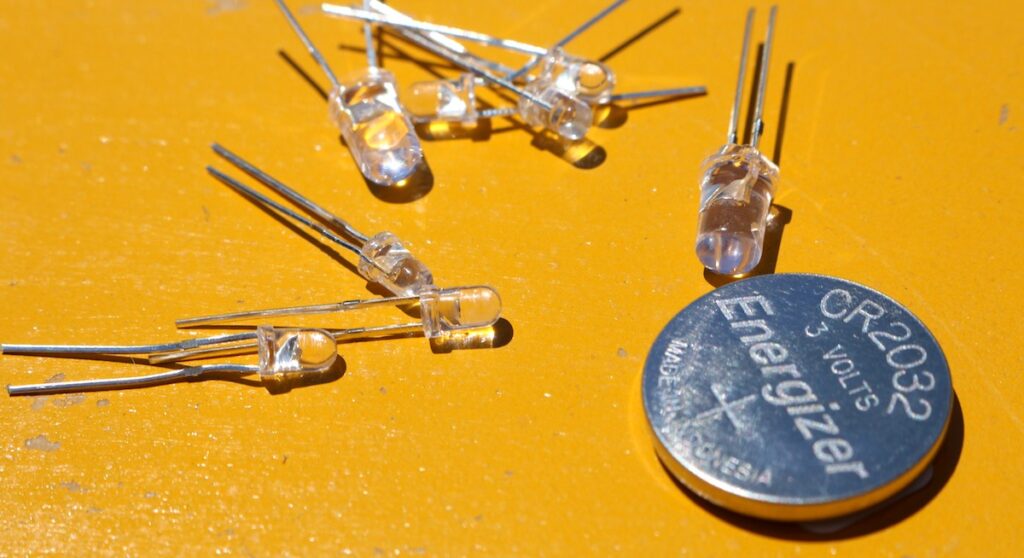
To begin building the circuit, students will need the following materials:
- Copper Tape
- 5mm LED Lights
- Electrical Tape
- Lithium Coin Batteries
- Binder Clips
Step 2: Create an Artwork
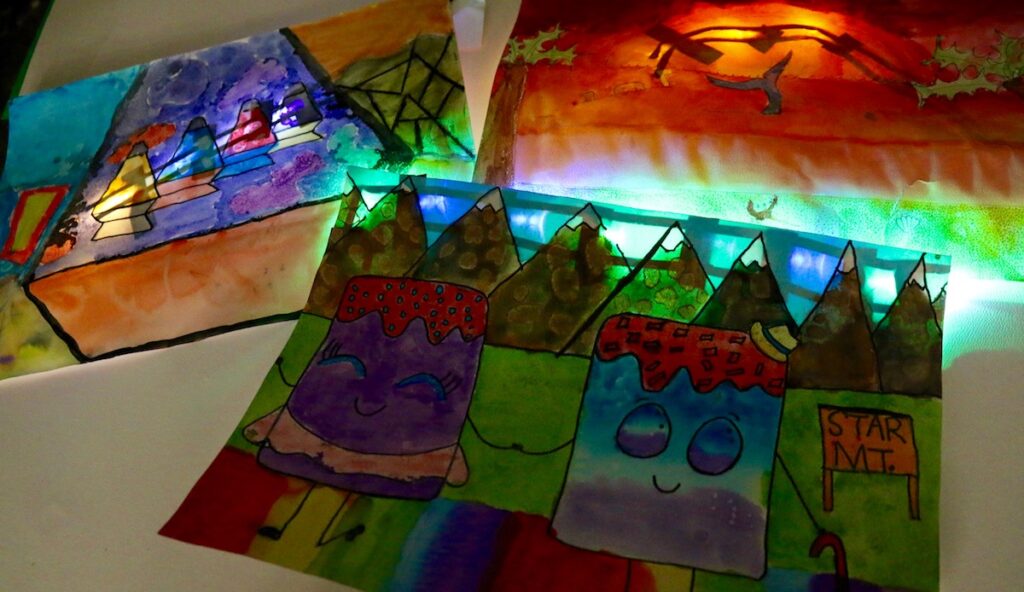
You can use LEDs with a variety of artwork. However, works on paper are especially effective because the light shines through more brightly. For this same reason, graphite and watercolor are excellent choices when it comes to media.
Step 3. Mark the Areas to be Lit

You’ll want to have students think about where their lights will go as they create their work. When they’re done, simply have them mark the backside of the artwork where each light will go. This will make it easier to set up the circuit.
Step 4: Place the Copper Tape
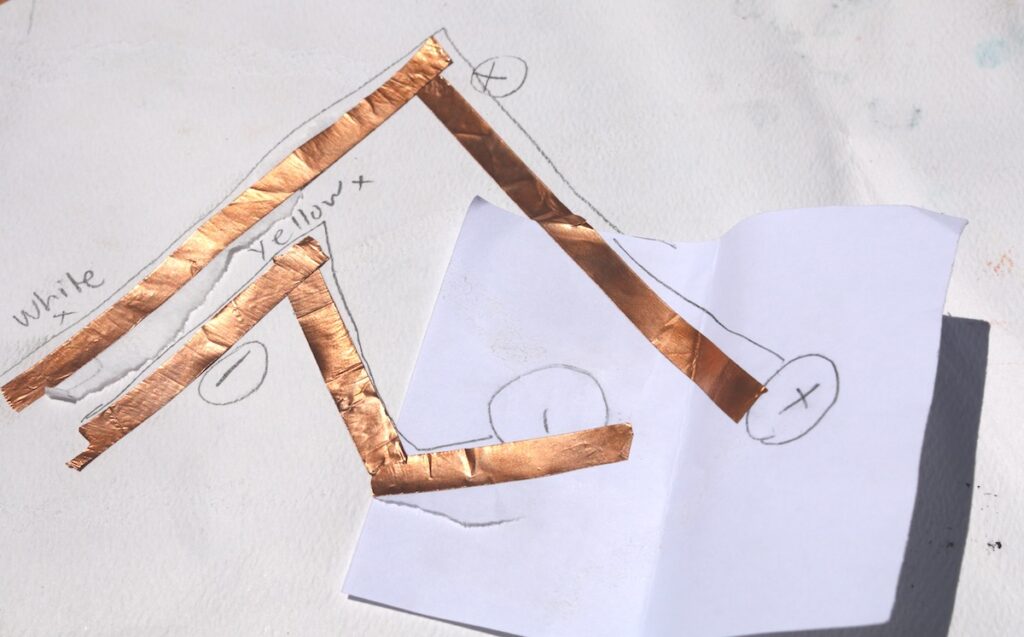
Once the placement of the lights is marked, the copper tape can be added. Encourage students to draw lines where the tape will be placed. This will allow the LED lights to be placed in a more accurate way. If the copper tape lines are too far apart, it will be difficult to add to the circuit. Label the lines, one as positive (+) the other as negative (-), to ensure proper placement of the battery.
Step 5: Test the LED Lights
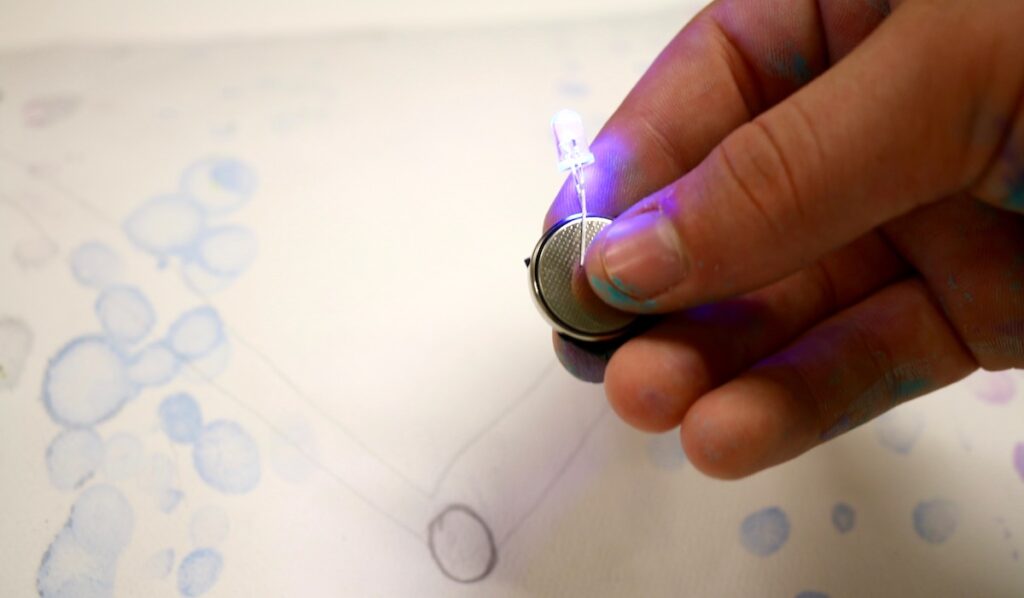
Before attaching the lights and battery in place, it is essential to make sure the lights and battery work! To test the lights, simply place the anode (the longer side of the LED lead) to the positive (+) terminal and the cathode (the shorter side of the LED) to the negative (-) terminal. If placed correctly with a functioning battery, the light will shine.
Step 6: Attach the Battery
Once the battery and lights have been tested it is time to place the battery. It is essential that the positive side of the battery is only touching the positive line of the copper tape and the negative side of the battery is only touching the negative line of copper tape. To make sure this happens, create a foldable paper tab so the positive and negative sides do not touch. Secure the battery with a binder clip. The binder clip will act as the on and off switch. When you want to turn the circuit off, simply clip the battery on the side of the artwork with the binder clip. This way your battery will last longer.
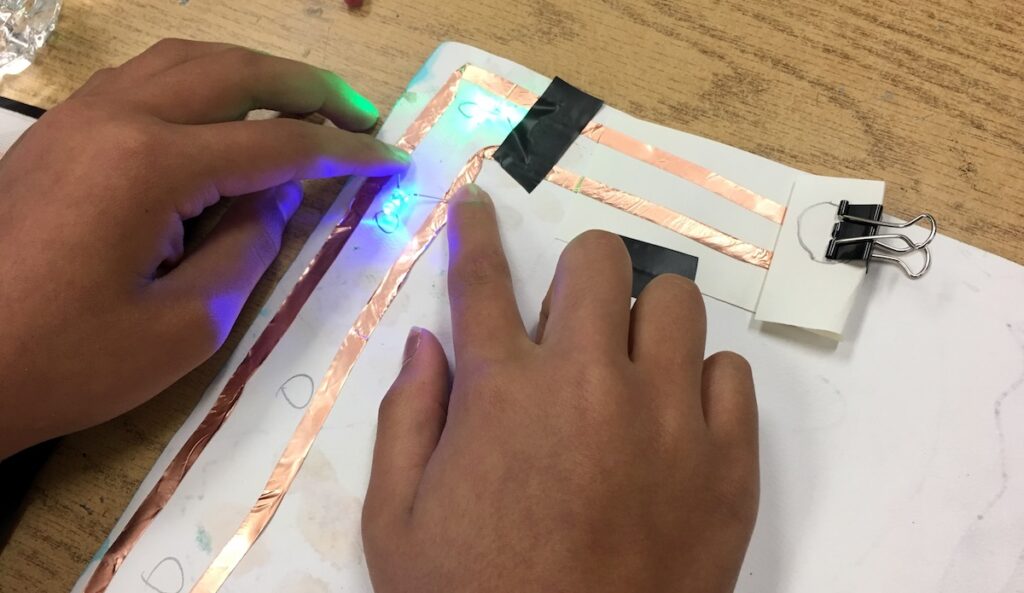
Step 7. Place and Attach the Lights
After the battery is attached it is time to attach the lights. This part is simple. Once again, make sure the anode is touching the positive side and the cathode is touching the negative side of the copper tape. Place the lights and secure them down with electrical tape. The less the cathode and anode are stretched out the easier it will be to secure the lights.
When placing lights, it is important to note some color combinations of lights will not work. For example, a red LED light has a lower voltage than a blue LED light. When combined, the blue light won’t work. Avoid this by setting up multiple circuits with each circuit having its own battery. Make sure your students test color combinations before attaching their lights with tape.
Step 8: Turn the Lights Off and Enjoy!
When the circuit is complete, the creations are best enjoyed in a dimly lit area. The best part about incorporating LED circuits with any artwork is that the piece can be enjoyed with or without the circuit on. The added effect of turning the lights off makes the process much more exciting!
Using this simple circuitry technology is a perfect way to enhance a traditional art project. This is a perfect example of how technology does not simply take the place of art but can be used with traditional practices to create a new exciting experience. Follow these steps to see your students’ critical thinking and problem-solving skills at work!
If you’re looking for even more ways to marry traditional projects with technology, join me at the Summer 2017 Art Ed Now Conference. You’ll be introduced to specific programs and devices you can easily implement to pique your students’ interest!
Have you ever created LED circuits in your art room? What are your best tips?
How do you use technology to enhance traditional artmaking methods?
Magazine articles and podcasts are opinions of professional education contributors and do not necessarily represent the position of the Art of Education University (AOEU) or its academic offerings. Contributors use terms in the way they are most often talked about in the scope of their educational experiences.