Are you looking for a fun way to bring sculpture to your students for under $20? If so, the answer can be found at your local dollar store! Papier-mâché masks are a cheap and easy way to explore the realms of sculpture. Here are the steps to shop for and make papier-mâché masks.
1. Find Your Local Dollar Store
Called by several different titles, the “dollar store” is a place where most everything is priced for a dollar or less. These stores can provide the essential supplies for this artistic endeavor while being gentle with your budget. The name or type of dollar store is not important, as long as it has the supplies you need.
2. Purchase the Key Materials
Here is your shopping list:
- One small (8″ diameter) paper plate per student plus a few extra.
These will become the bases for the sculptures. They are often found in packs of 20 for a dollar. - 3-4 rolls of tin foil to mold the forms of the face.
- At least 3 hot glue guns.
- At least one glue stick for every 5 students.
- A bag of flour to hold the paper mache mix together.
- A pitcher with a lid for mixing.
- Small cups to distribute the paste.
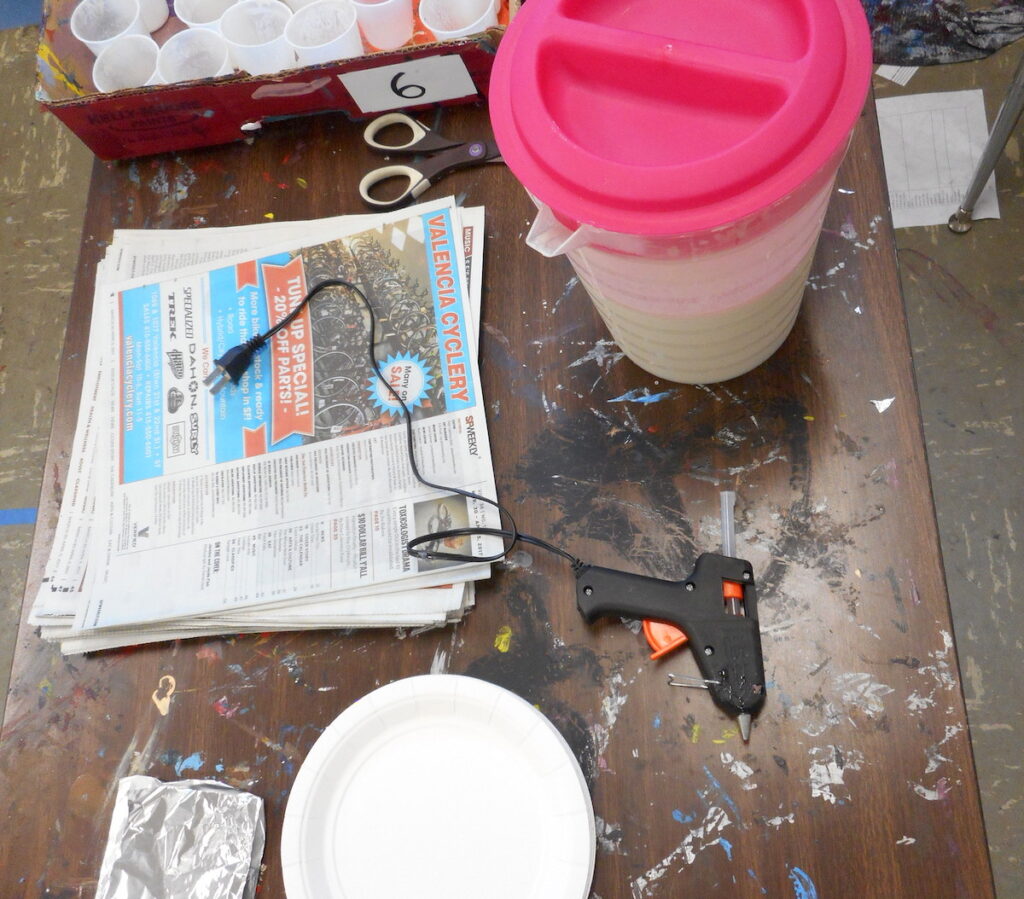
The last supply is newspaper. The best newspaper is free newspaper. If you have access to free newspapers, such as local publications or advertisements sent to your home, use those. If not, one purchased newspaper publication should be enough for your class to make one set of paper mache masks.
3. Mix Up the Paste
It is only necessary to use flour and water to make paper mache paste. Some folks like to throw glue in there, but it works fine without. Start by mixing the flour and water directly into your pitcher with the lid on. Everyone has their own personal preference on ratios, but start at a 1:1 flour to water ratio and adjust after mixing it thoroughly. Finding just the right consistency is important…make sure it is not too thick with flour or too thin with water.
4. Draw on the Plates
Before jumping into the paste, have students design a face on a paper plate. Students can plot the eye and nose lines, where they would like to place their nose and lips, and any other facial feature that they wish to design. Some students may want to add a form somewhere, such as horns or a beard.
5. Create a Tin Foil Base
Give each student four small (2” x 2”) tears of tin foil. Tin foil is easily manipulated and can be pressed over facial features in order to create form. Have students tear one square in half and wrap each half around their eyebrow bone. Press one square on top of the nose and form the tin foil to the shape of the nose. Press another square directly over the lips and pucker up! Tin foil can make these facial features quite easily and provides instant form for masks.
6. Attach the Tin Foil Forms to the Plates
A little bit of hot glue goes a long way. Whichever way you choose to demonstrate using hot glue, be sure to emphasize that hot glue is exactly that: Hot.
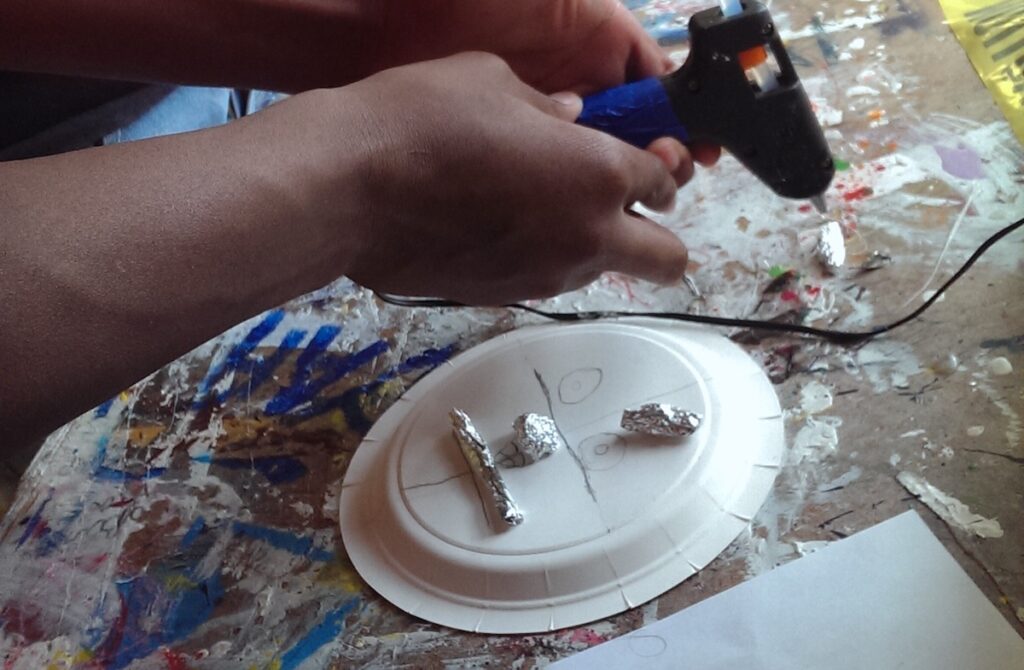
Students can get serious burns if not paying attention, so be clear and warn students accordingly. One drop on each side of a tin foil form will easily hold it to the plate.
7. Rip Newspaper Strips
Every newspaper has an inherent grain. Holding the newspaper one way can create easy, natural strips when torn. Holding the newspaper the other way can go against the grain and produce insufficient, aggravating strips. Find the correct orientation and have students rip several strips. These strips can then be ripped down again into halves and quarters, as well as into various widths.
8. Papier-Mâché!
The final step is to have students apply the newspaper strips to their plates using the papier-mâché paste. Have students pour a small amount of paste into a personal-size cup and get to work.
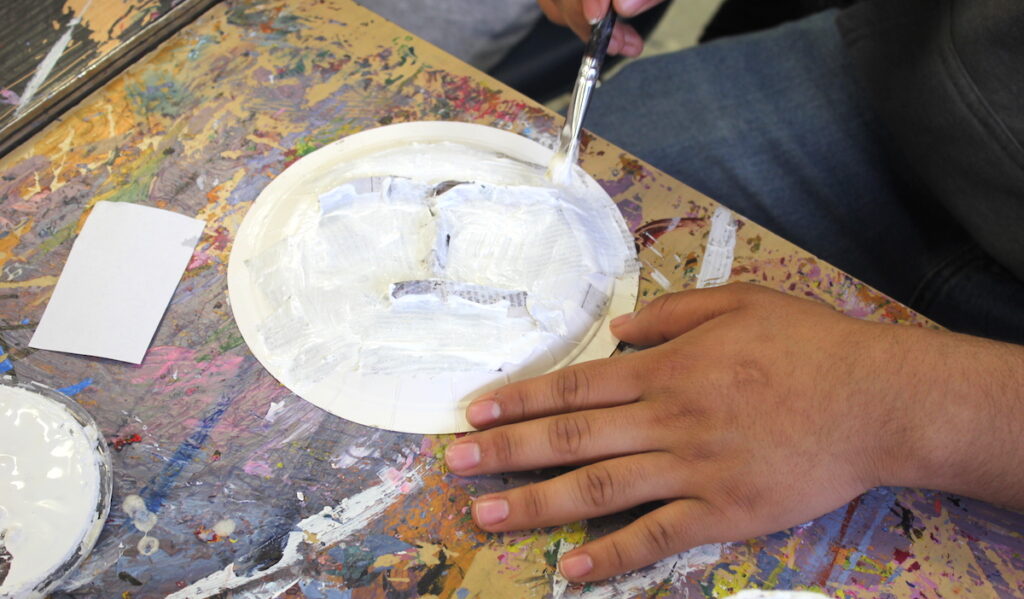
Remind students that it can be tricky to get the first layers of newspaper to stick to the surface. In fact, they may need up to four layers of newspaper before an area will stick down. When trying to wrap newspaper around curves, slender strips will wrap and hold much better than thick strips or square strips. A crisscross pattern can also be useful on those difficult-to-stick-to areas. In some cases, extremely small patches of newspaper might be needed to cover a small hole or hold down some previously applied strips.
9. Clean Up
When students pour some of the papier-mâché mix into their tiny personal cups, they generally will not use the entire batch in one class period. When cleanup time comes around, have students pour their unused mix back into the pitcher. Students should rinse their cups out and put them back to be reused as well. At the end of the day, place the pitcher in a refrigerator. The flour and water mix will separate but can be remixed and used again for weeks if kept cold overnight.
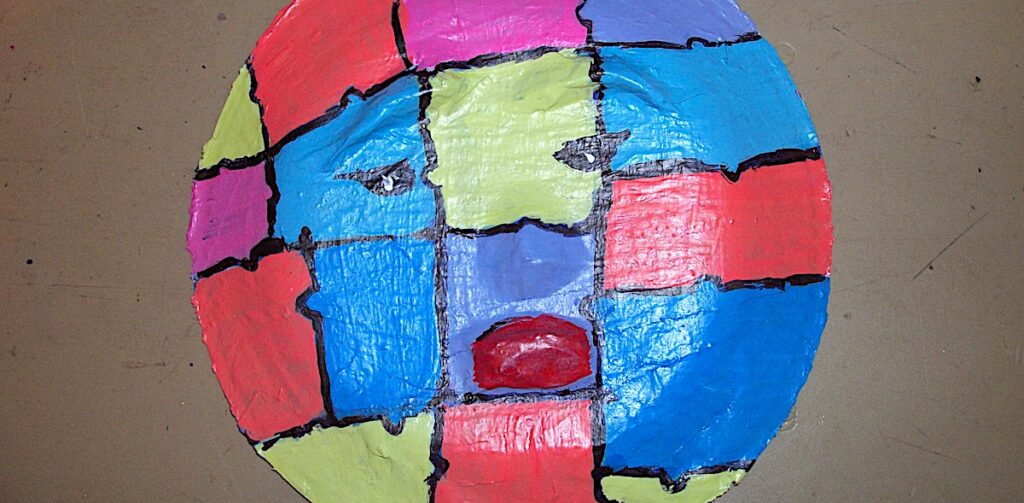
Papier-mâché mask making is an engaging, cost-effective way to introduce students to sculpture. Once the papier-mâché is applied and the mask is dry, have students paint the face to incorporate eyes and a mouth. This type of a project can easily last up to two weeks. Success relies on having students apply multiple layers of newspaper on their facial structures. One twenty dollar bill can open the doors to the third dimension and beyond.
What type of papier-mâché assignments have you done with students?
What other suggestions or questions come to mind from this article?
Magazine articles and podcasts are opinions of professional education contributors and do not necessarily represent the position of the Art of Education University (AOEU) or its academic offerings. Contributors use terms in the way they are most often talked about in the scope of their educational experiences.