
There’s nothing more engaging than using clay with students. There truly is something magical about the mess and the hands-on nature of the material. When glaze is added to clay pieces, it really is the icing on the cake! However, money and time are not always on our side. This can be disappointing to students because simply painting clay pieces does not give the same effect.
What if we combined the magic of clay and magic of printmaking into one lesson? I guarantee your students will be left with an engaging process they’ll never forget.
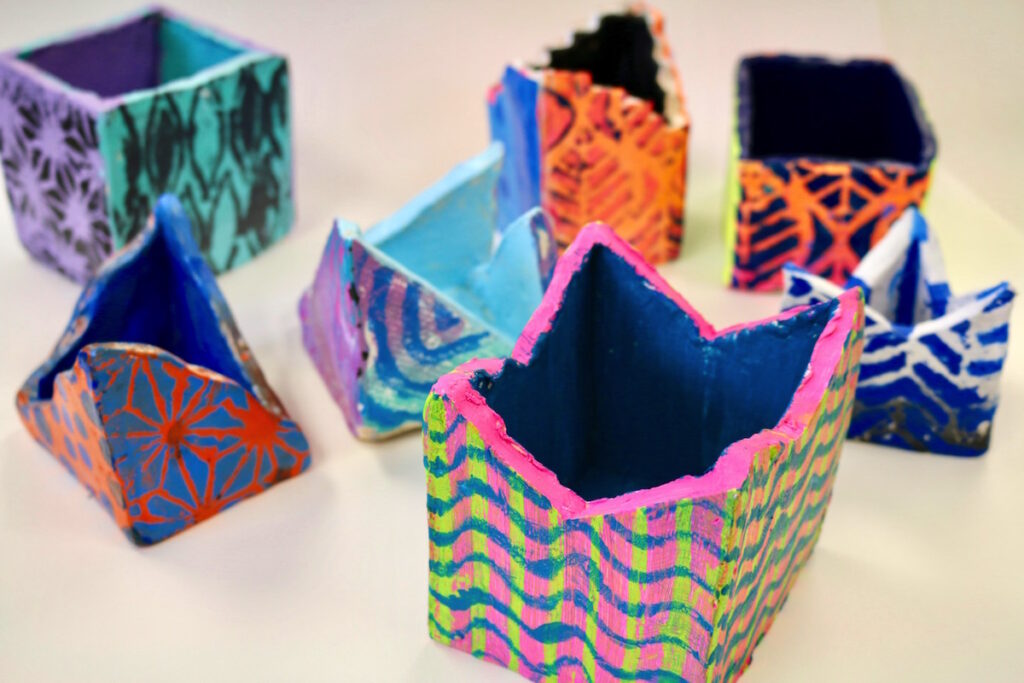
Learn how to add color to you ceramic pieces with monoprinting!
Step 1. Build the Clay Piece
Before any color can be added, your clay piece must be built. To ensure success when printing, you will want to create a piece made from slabs. The monoprinting process will not work well if extra pieces are added on. The more smooth and straight the slabs, the better.
Step 2. Use Gesso
Once the greenware has been bisqued, the clay surface must be prepped. Using gesso to prep the clay surface will prevent the clay from absorbing moisture. This primer coat will help seal the surface and stop the paint from being absorbed. It also will ensure the colors are nice and bright.
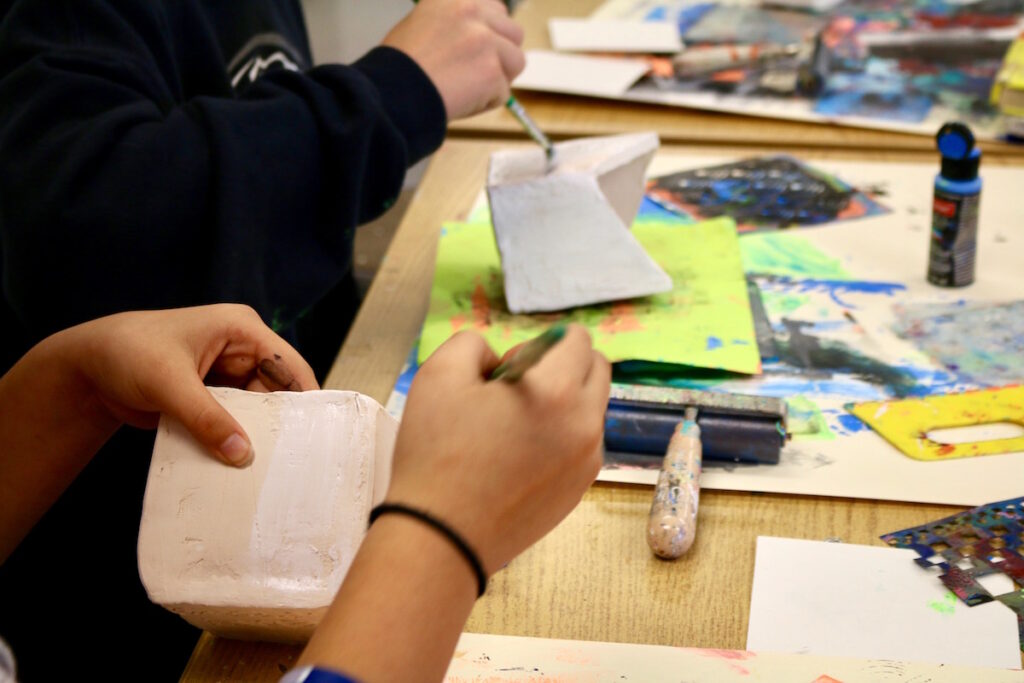
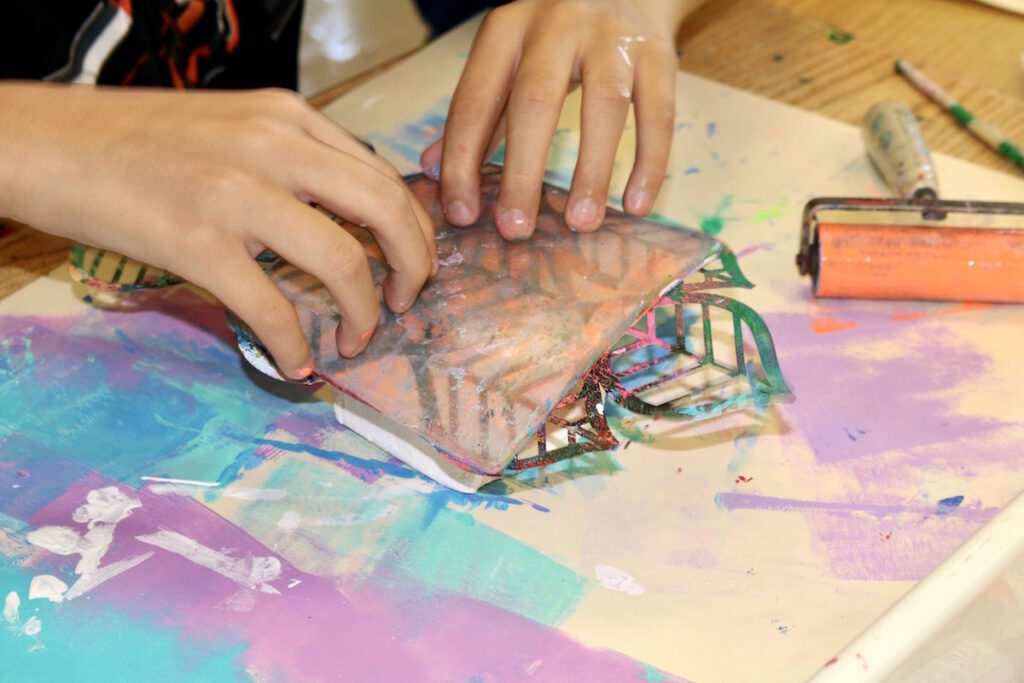
Step 3. Print!

In my classroom, we used Gelli Plates to complete the monoprinting process. The process of monoprinting on a clay surface is almost identical to printing on paper. You’re just swapping the surface of your clay for the paper!
Depending on the shape and how smooth the slabs of the clay piece are, some adjustments may be needed. For instance, for clay pieces that do not have perfectly smooth sides, the Gelli Plate can be flipped upside down to better form to the slab shape. This allows for more control and a better transfer of the pattern.
If a student is not happy with the monoprint created on their clay piece they can simply paint over it with a coat of gesso and try again. If a student is still struggling with creating the desired design, encourage them to print it onto a piece of paper and cut it to fit the clay piece. After fitting and attaching the print with a medium, such as Mod Podge, you won’t even be able to tell the difference!
Step 4. Seal with a Medium
To finish of your monoprint clay pieces you will want to seal them with your favorite matte or gloss medium. This will further protect your clay pieces and add a finished sheen.
The hands-on nature of printmaking with clay will certainly leave behind a bit of a mess. However, with that mess comes a new exploration of using different mediums to create some pretty remarkable pieces. So, if you’re looking for a new way to add some excitement to your clay pieces try out this exciting process!
If you’re looking for even more ways to add color to clay without using glaze, we have 15 additional ideas for you right here.
Other than using glaze, how do you add color to your clay pieces?
Have you ever tried monoprinting on clay?
Magazine articles and podcasts are opinions of professional education contributors and do not necessarily represent the position of the Art of Education University (AOEU) or its academic offerings. Contributors use terms in the way they are most often talked about in the scope of their educational experiences.


