Art teachers know one of the best ways to get students excited about a particular topic is to make it directly relevant to their lives. My late elementary students are just beginning to explore their identity as it relates to clothing, so there is nothing they love more than a custom t-shirt project!
Today I am going to share a strategy for a very basic freezer-paper “screen-print” shirt, in four easy steps.
Step 1: Find an Authentic Client
Instead of giving students an open-ended art making prompt, why not see what they can do with a real world design problem? Whether it’s a shirt for a school club, an intramural sports jersey, or maybe some fun spirit-wear for zany faculty members; students will LOVE seeing themselves or others wear their artwork.
Better yet, why not hijack an existing school event and turn it into a showcase fashion show for the arts? In my case, my fifth graders work hard to create t-shirts they will wear for a huge audience at their spring music program. My music teacher dictates the theme, and we create within those parameters.
As an added bonus, parent and community attendance at these music programs is high, making this an excellent advocacy opportunity.
Step 2: Gather Your “Stuff”
To create custom t-shirts, you and your students will need…
- T-shirts (I send a letter, and my kiddos bring them from home. I also pick up extras from my local thrift shop on sale days.)
- Freezer paper
- Pencils and scissors
- Heat sensitive screen printing fabric inks
- An old iron
- Old paint brushes
- Cardboard scraps (newspapers also work)

Step 3: Review Positive and Negative Space
After a few years of doing this project, here is what I’ve learned: the key to success at the elementary level is having a strong understanding of positive and negative space. Essentially, a great shirt is produced from a great stencil. This can sometimes be a difficult concept for students who have been coached to add details when they draw.
To make sure they understand, I like to pass out a box of old stencils and some crayons for them to play with. Every minute they spend experimenting with actual stencils seems to translate directly into stronger shirt designs.
Step 4: Do it!
Day 1 – Plan, Plan, Plan
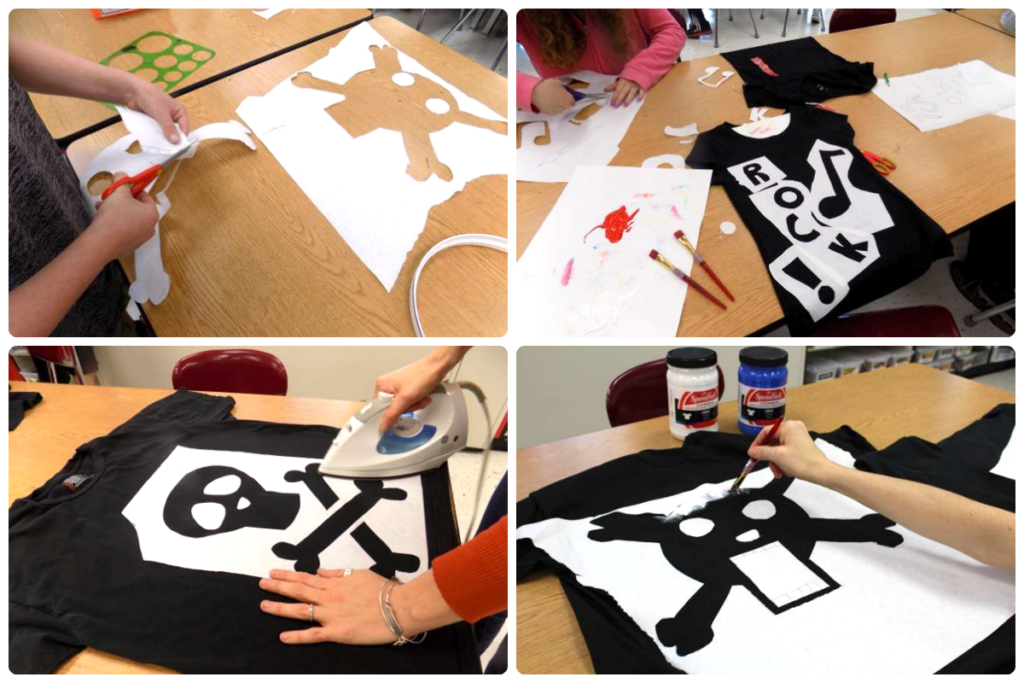
To start the project, I have my students create thumbnail sketches of potential t-shirt designs. While they are working, I informally chat about the project with each kid. This gives me time to identify any potential stencil making issues and help the students move into problem-solving mode before they get frustrated. Once a student has settled on a final design, I give them a piece of freezer paper to make the actual stencil. Students draw on the matte side of the paper, which is very forgiving and allows for lots of erasing!
Day 2 – Cut the Stencils
No one likes to see blood in the art room, so I demo how to get scissors into the center of the freezer paper by folding and making a small incision (in lieu of the stabbing and impaling technique which seems to be the default method). Students cut out all the sections of their stencils and arrange them on their shirts with the glossy/plastic side down.
As they complete the stencils, I gently iron the paper to the shirt. I have nearly eighty students (and a deep, inherent dislike for any laundry related task), so I try to go fast. This ironing process takes about 30 seconds per image. I use light to medium pressure with a medium hot iron…just long enough to get the paper to temporarily adhere to the shirt without melting.
Day 3 – Apply the Ink
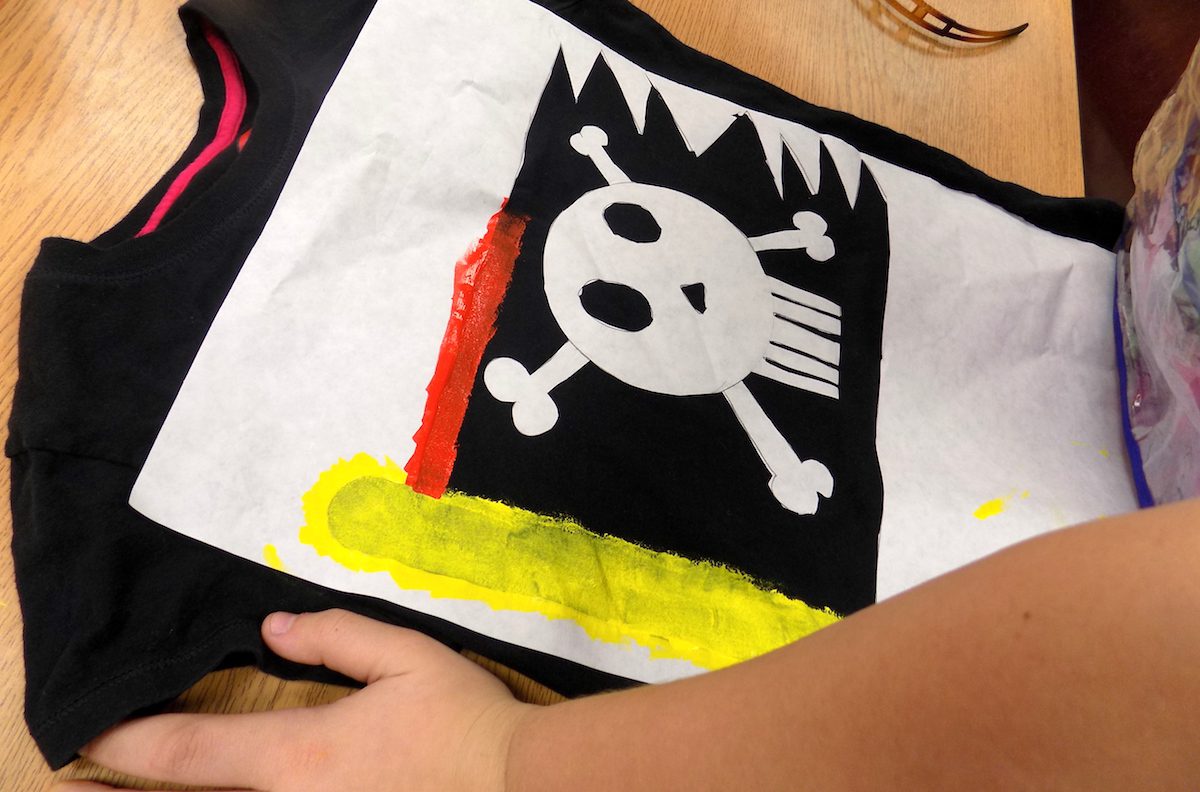
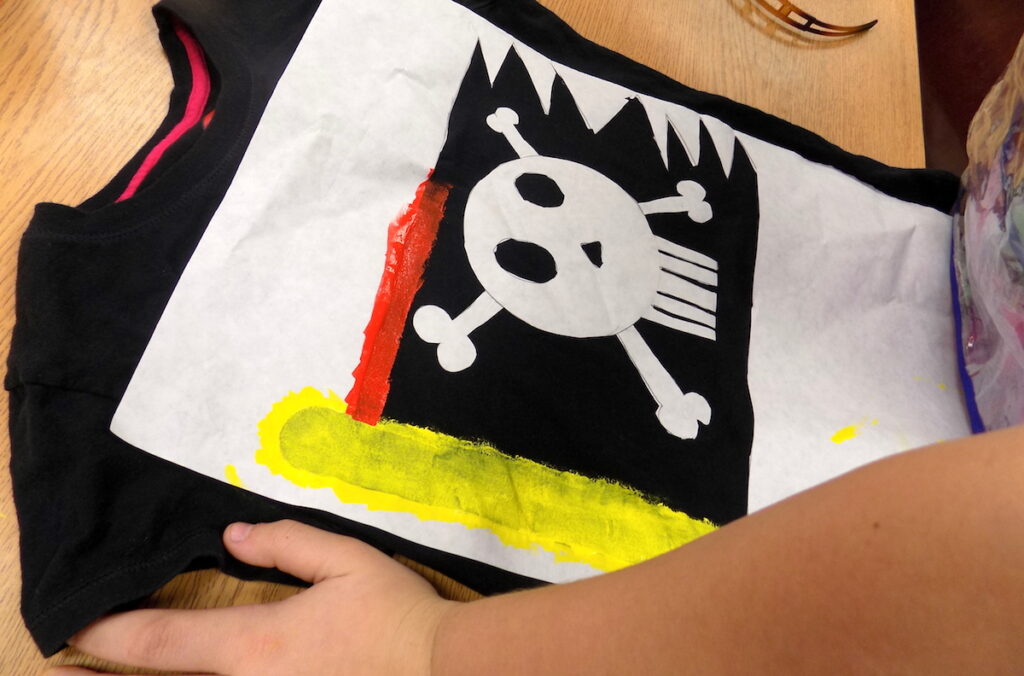
Next, demonstrate how to carefully insert cardboard or newspaper into the shirt to separate the front from the back. Using old paint brushes, I have my students paint a thin layer of the screen printing inks onto their shirts. The freezer paper makes a pretty decent seal, but I teach them to start their brush strokes on top of their stencil and move onto the shirt. Moving in the opposite direction could inadvertently force ink under the stenciled image.
Day 4 – Finish Up and Strut Your Stuff!
Unlike other art projects, I don’t typically have a lot of “stragglers” as we finish up… nobody wants to be the only one without a shirt at the music program! As the shirts dry, the students rip off the paper stencils to reveal the finished products. I follow the recommended directions on the ink to heat-set the image. Usually, this means a little more ironing, so I like to recruit my music teacher for an additional set of hands. Hey, he owes me for these great costumes!
All that remains is for my students to “dress to impress” in their custom duds.
If you’re looking for even more ways to bring printmaking into your classroom, be sure to check out Studio: Printmaking. Participants break down various printmaking processes that can be used with students at any age level without fancy equipment. Plus, you’ll earn credit while making your own art. Win-win!
Have you created any real-world wearable art with your students?
Do you have any other creative t-shirt design techniques to share?
Magazine articles and podcasts are opinions of professional education contributors and do not necessarily represent the position of the Art of Education University (AOEU) or its academic offerings. Contributors use terms in the way they are most often talked about in the scope of their educational experiences.