Mr. Stoller’s printmaking presentation at the AOE Online Conference this summer inspired me to pursue printmaking with my younger grades…even my rowdy classes.
After some trial and error, I developed a printmaking process that is efficient and engaging. It keeps students busy printing without a lot of wait time, which really cuts down on behavior issues. Best of all, it really is easy enough for my second graders and also works well with my most rambunctious older students.
I’d love to share this successful process with you today!
The Set Up
Setting up takes a little time, but like most prep work, it is SO worth it.
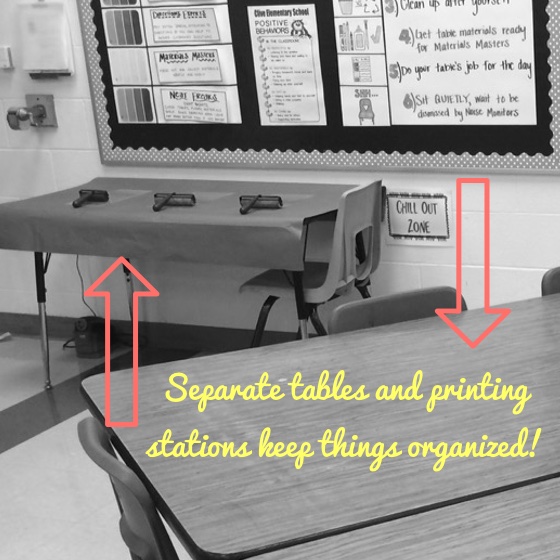
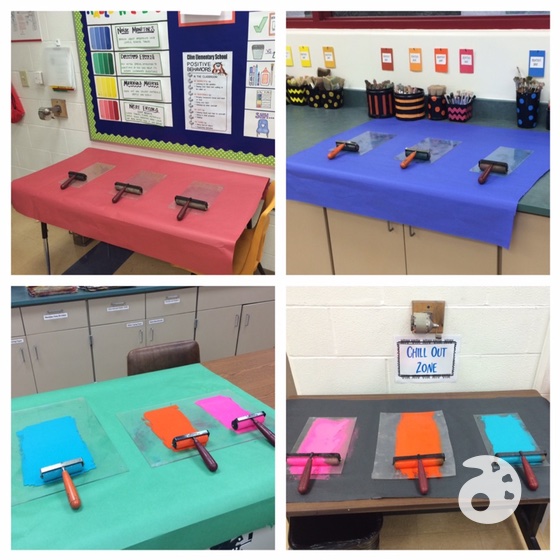
I set up four printing stations, one for each of my table groups. Each station is set up nearby the table group that will be using it.
Each station has clear plates, brayers and ink, which I set up before the class starts printing. (Side Note: There’s no shame in having students work on another task or free draw while you set up.)
Students then set up their own work stations at their seats. Each student’s station contains the following items:
- His or her foam printing block
- Papers for printing with his or her name written on the back
- Background paper for carrying prints to and from the printing station
- Placemat for placing wet prints to dry
The Demonstration
I recently talked about the importance of detailed, verbalized, and modeled instructions, so you might guess that I demonstrate this entire process. It’s the key to things running smoothly! I am very explicit when explaining what the students will do and demonstrate exactly what I expect. I stop and repeat myself any time a student is not paying attention.
The Process
As I said, this process has worked for my youngest and most boisterous students. If you’d like to try it in your room, follow the steps outlined below!
- Students take their carved foam blocks on top of the background sheets to their designated printing stations.
- One at a time, students ink their foam printing blocks. Students waiting to ink form a line until a spot is open. The line goes relatively quickly.
- Students then carry their inked foam back to their table spots, where they complete their prints using the papers with their names already on them.
- Once individual prints are complete, students lay them on their placemats to dry.
- Students then get wet paper towels and dry paper towels to wash and dry off the foam pieces (Note: Here I demonstrate squeezing out a paper towel before leaving the sink area.)
- Once the foam is dry, students get back in line and repeat the steps until the desired number of prints is completed.
- Once done, students carry their entire placemats including their prints, foam pieces, and background papers to the drying rack.
Running printmaking this way in my room has made things go much more smoothly and has all but eliminated behavior problems. Students are engaged, as they always have a job to be doing. It’s fun to channel the excitement that printmaking brings in a manageable way!
How do you make printmaking work in your classroom? What have you found to be the most efficient setup?
What has worked for your most rambunctious classes?
Magazine articles and podcasts are opinions of professional education contributors and do not necessarily represent the position of the Art of Education University (AOEU) or its academic offerings. Contributors use terms in the way they are most often talked about in the scope of their educational experiences.