Are you excited to try printmaking with your students but aren’t quite sure where to start? Well, let me recommend reduction prints! A reduction print is made when an artist creates a multi-colored, layered print using a single print block. The block could be foam, linoleum or even wood. The artist repeats the process of carving and printing over and over until the final look is achieved. Using the reduction process takes the final piece to a whole new level with depth, pattern and color.
The reduction printmaking process can be easily adapted for students in upper elementary, middle and high school. There are endless possibilities for lesson plan themes and subjects. Some of my favorites are non-object designs, portraits, animals, landscapes, and flowers.
Let’s talk through the process of creating a reduction print.
Print 1
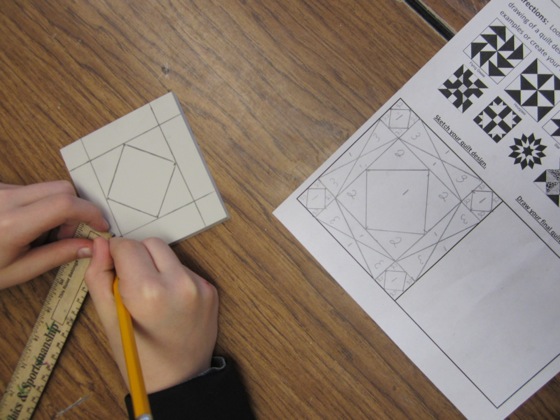
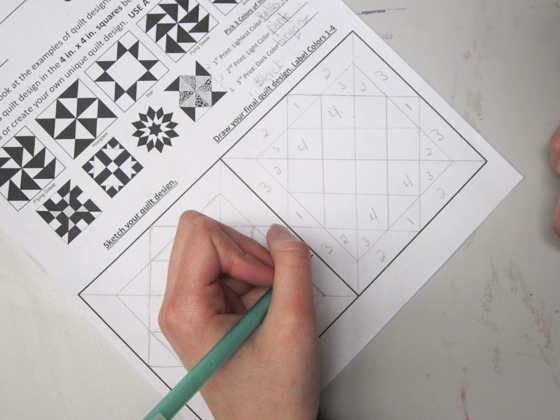
First, students draw a design on a piece of linoleum or foam.
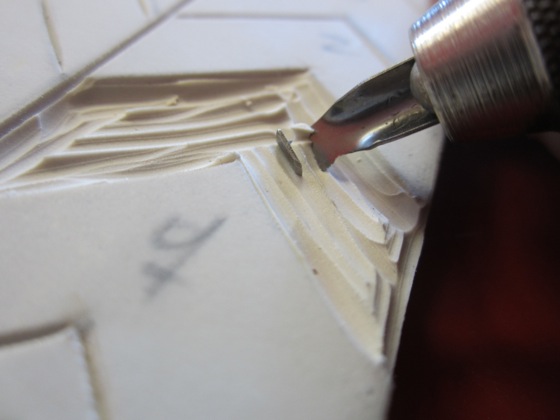
 Next, students carve or engrave a limited part of the design, such as the outline and a few details.
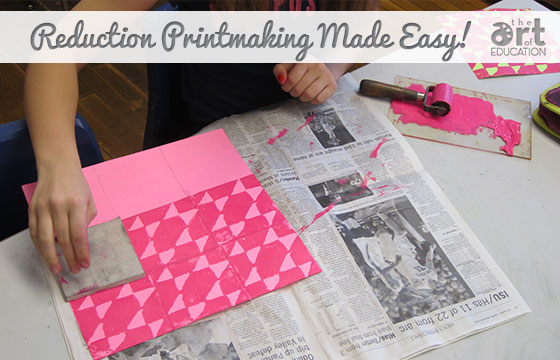
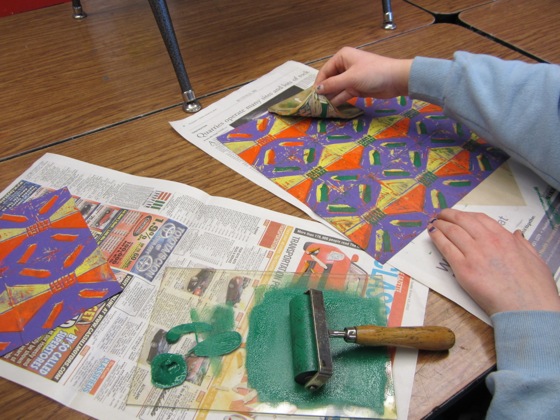
Then, students print the design, using the lightest color of printing ink.
Be sure to remind students to print extra prints because once they move onto the next step and carve out or engrave more details, the design changes. In other words, there’s no turning back! Students can print multiple prints on a page like the quilt print above or work with a single image.
When students are finished printing the first color, they carefully wash and dry their pieces of linoleum or foam.
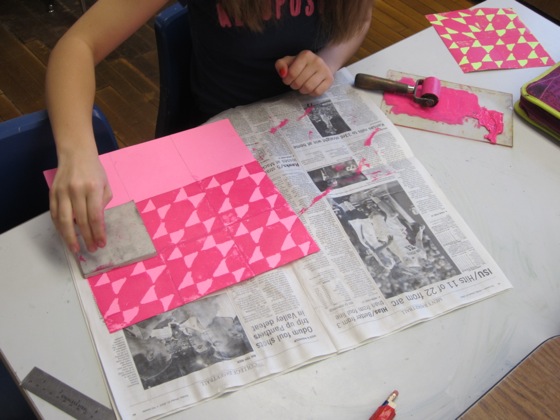
Prints 2-3
Students carve or engrave more details on their design. Once their first prints have dried, students will print using a second color. Then, students will carefully wash and dry their pieces of linoleum or foam. The process can be repeated multiple times.
Some Helpful Hints
- Have students make extra prints: you never know what could happen throughout the printing process. Each time students add a new layer, there is a chance they could accidentally place the print upside down, drop it, or have something else happen to the print.
- Have students number their designs and pieces of linoleum or foam: Students will break down their designs into sections and number them. This was a very important step for the quilt printmaking project but wouldn’t be necessary for a landscape print. For example, if students are going to use 3 different colors of ink, they will need to label their drawing from 1-4. 1 is the paper color, 2 the lightest ink, 3 the 2nd color of ink, and 4 the darkest color of ink.
- Let prints dry a day: Be sure prints are dry before students add a additional layers. Printing ink is sticky and really needs a full day to dry.
- Remind students the design will be reversed on the print: This is especially important if you’re allowing students to use letters and or words in their designs. What is on the left side will appear on the right after it’s printed.
I hope you try this rewarding and impressive project in your classroom!
What other tips do you have for teaching reduction printmaking?
What questions do you have?
Magazine articles and podcasts are opinions of professional education contributors and do not necessarily represent the position of the Art of Education University (AOEU) or its academic offerings. Contributors use terms in the way they are most often talked about in the scope of their educational experiences.


