We are back with the second installment of “How to Assess Your Art Program.” In Part 1, I covered Steps 1-4. We talked about what to assess, how to decide when to assess and how to choose the questions that best fit your student’s learning outcomes. Today, I’d like to share what happens after the assessment is through, and will cover grading the assessment, ensuring consistency in grading and what to do with the scores.
.
How to Assess Your Art Program: Part 2
Step 4: Grading the Assessment
Because our assessment was performance in nature, our art department knew we needed common expectations when grading the assessments. We didn’t want any scores to be skewed because of human error. The first step was developing a checklist we all followed when grading. This checklist was a consensus in our PLC, we all agreed to these standards. Here is the rubric for one Power Standard in our 5th grade assessment. All checklists were put into a Power Point for easy reference each year.

Because our district uses standard based grading, we matched our assessment checklist to represent this system. A 3 means the student met the standard. 2 is making progress, and 1 is not making adequate progress.
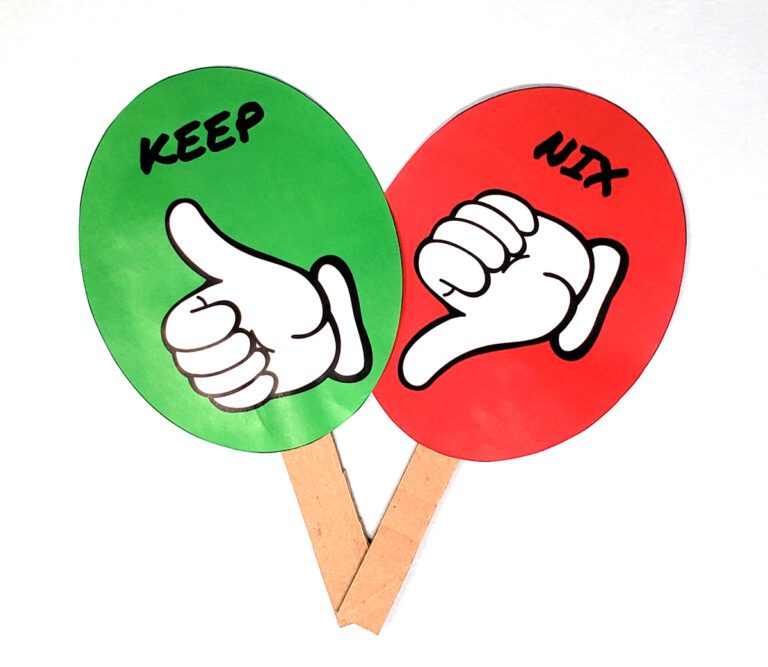
Step 5: Keeping Scoring Consistent
Because we have 7 art teachers all giving the same assessment, our team decided to take some extra steps to ensure that one teacher wasn’t grading to easy, or too hard. We wanted the assessment to be as accurate as possible, district wide. This is where Inter-Rater Reliability comes in. We all scored a sampling of each other’s student assessments. We put the score we would give on a sticky note. Everyone does this around the circle, Then, if there are discrepancies we have a discussion about why, and come to a consensus as to how we will eventually grade. The Inter-Rater Reliability should happen before you score all of your assessments.

In the sample above we had a discussion about the back lines of the cube. Would we count this one a 3, even if the back line was a bit crooked? This made for a good conversation. We had to be picky, and in the end, it made a huge difference in our outcomes.
Step 6: How to Record Your Scores
We developed a handy spreadsheet to record all of the scores for each Power Standard onto. We wanted separate data for each power standard, as well as averages of all the power standards combined. This will let us know what areas students are doing well in, and what areas students are mastering. Combining scores gives us an overall feeling for how our curriculum and art department is doing.

The scoring was so easy, because it only involved tallies, dividing the number of students who earned a “3” by the total number of students to get your percentage for each Power Standard. The percentage is what administration craves. They want to know what percentage of your students are proficient. We considered a 3, meeting the standard, proficient.
We also make a district spreadsheet where each teacher’s data was entered to get district wide totals.
Step 7: Using the Data
So, now you have some data that represents your art program. What do you do with these numbers?
First and foremost, the data is for YOU, the teacher. If most students bombed the question on “one – point perspective,” it can help you take a look at why. Was it how you taught the concept? Did you hand hold too much during the project and students were not allowed to practice independently? Was your question on the assessment misleading? Once you get to the root of the issue with your assessment you can begin to plan how you will improve your teaching for next year to hopefully raise your scores. Next year, you won’t see the same students in 5th grade, but that doesn’t matter. You don’t track year to year by student. You track an overall program score for that grade level. I will compare 5th grade last year to 5th grade this year when looking at how I did as a teacher.
You can also use the data as advocacy. Send it to administration, celebrate with your staff, email your principal your results. We have to formaly submit our data to the district, so for us, this sharing step is not an option. Even if the numbers aren’t what you want, it will give you a goal to work towards and be a learning experience. The fact that you have data, you know where you are at, and you can use it to improve, is what most administration wants to see.
By creating a program evaluation you can not only inform your instruction you can advocate for your art program in a number of ways. A quick, simple, and meaningful assessment won’t hurt you or your students; It can only help! As much as we don’t want to admit it, it’s becoming increasingly more important for the arts to find a way to showcase student learning in new ways.
If someone approached you today and asked for data to support the learning in your art program could you answer them? Is the artwork enough anymore?
Think about it long and hard.
What goals do you have regarding assessment?
Miss the first installment of “How to Assess Your Art Program?? Check it out right here!
Magazine articles and podcasts are opinions of professional education contributors and do not necessarily represent the position of the Art of Education University (AOEU) or its academic offerings. Contributors use terms in the way they are most often talked about in the scope of their educational experiences.