I always strive to make art history connections in my lessons, but I was stumped as I worked to design my fifth-grade curriculum last year. I wondered:
– How and what can motivate my students to learn more about art history?
– What could we do to make art history hands-on and fun?
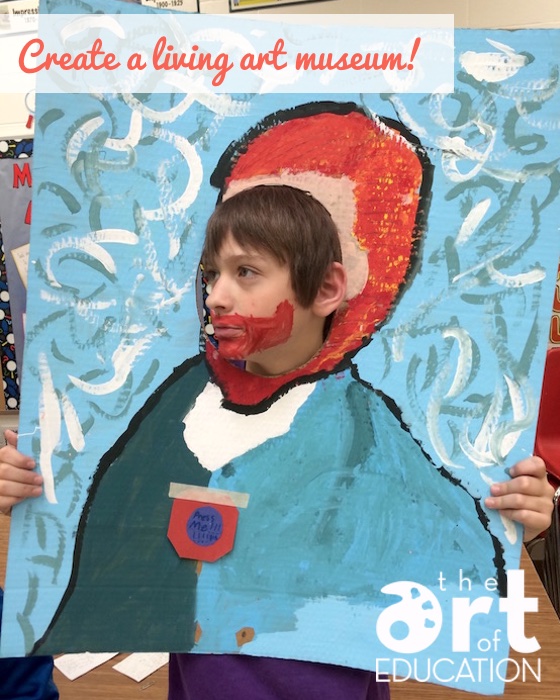
I had seen living museums done as history projects before. I thought, why not have my fifth-grade students create their own living art museums?
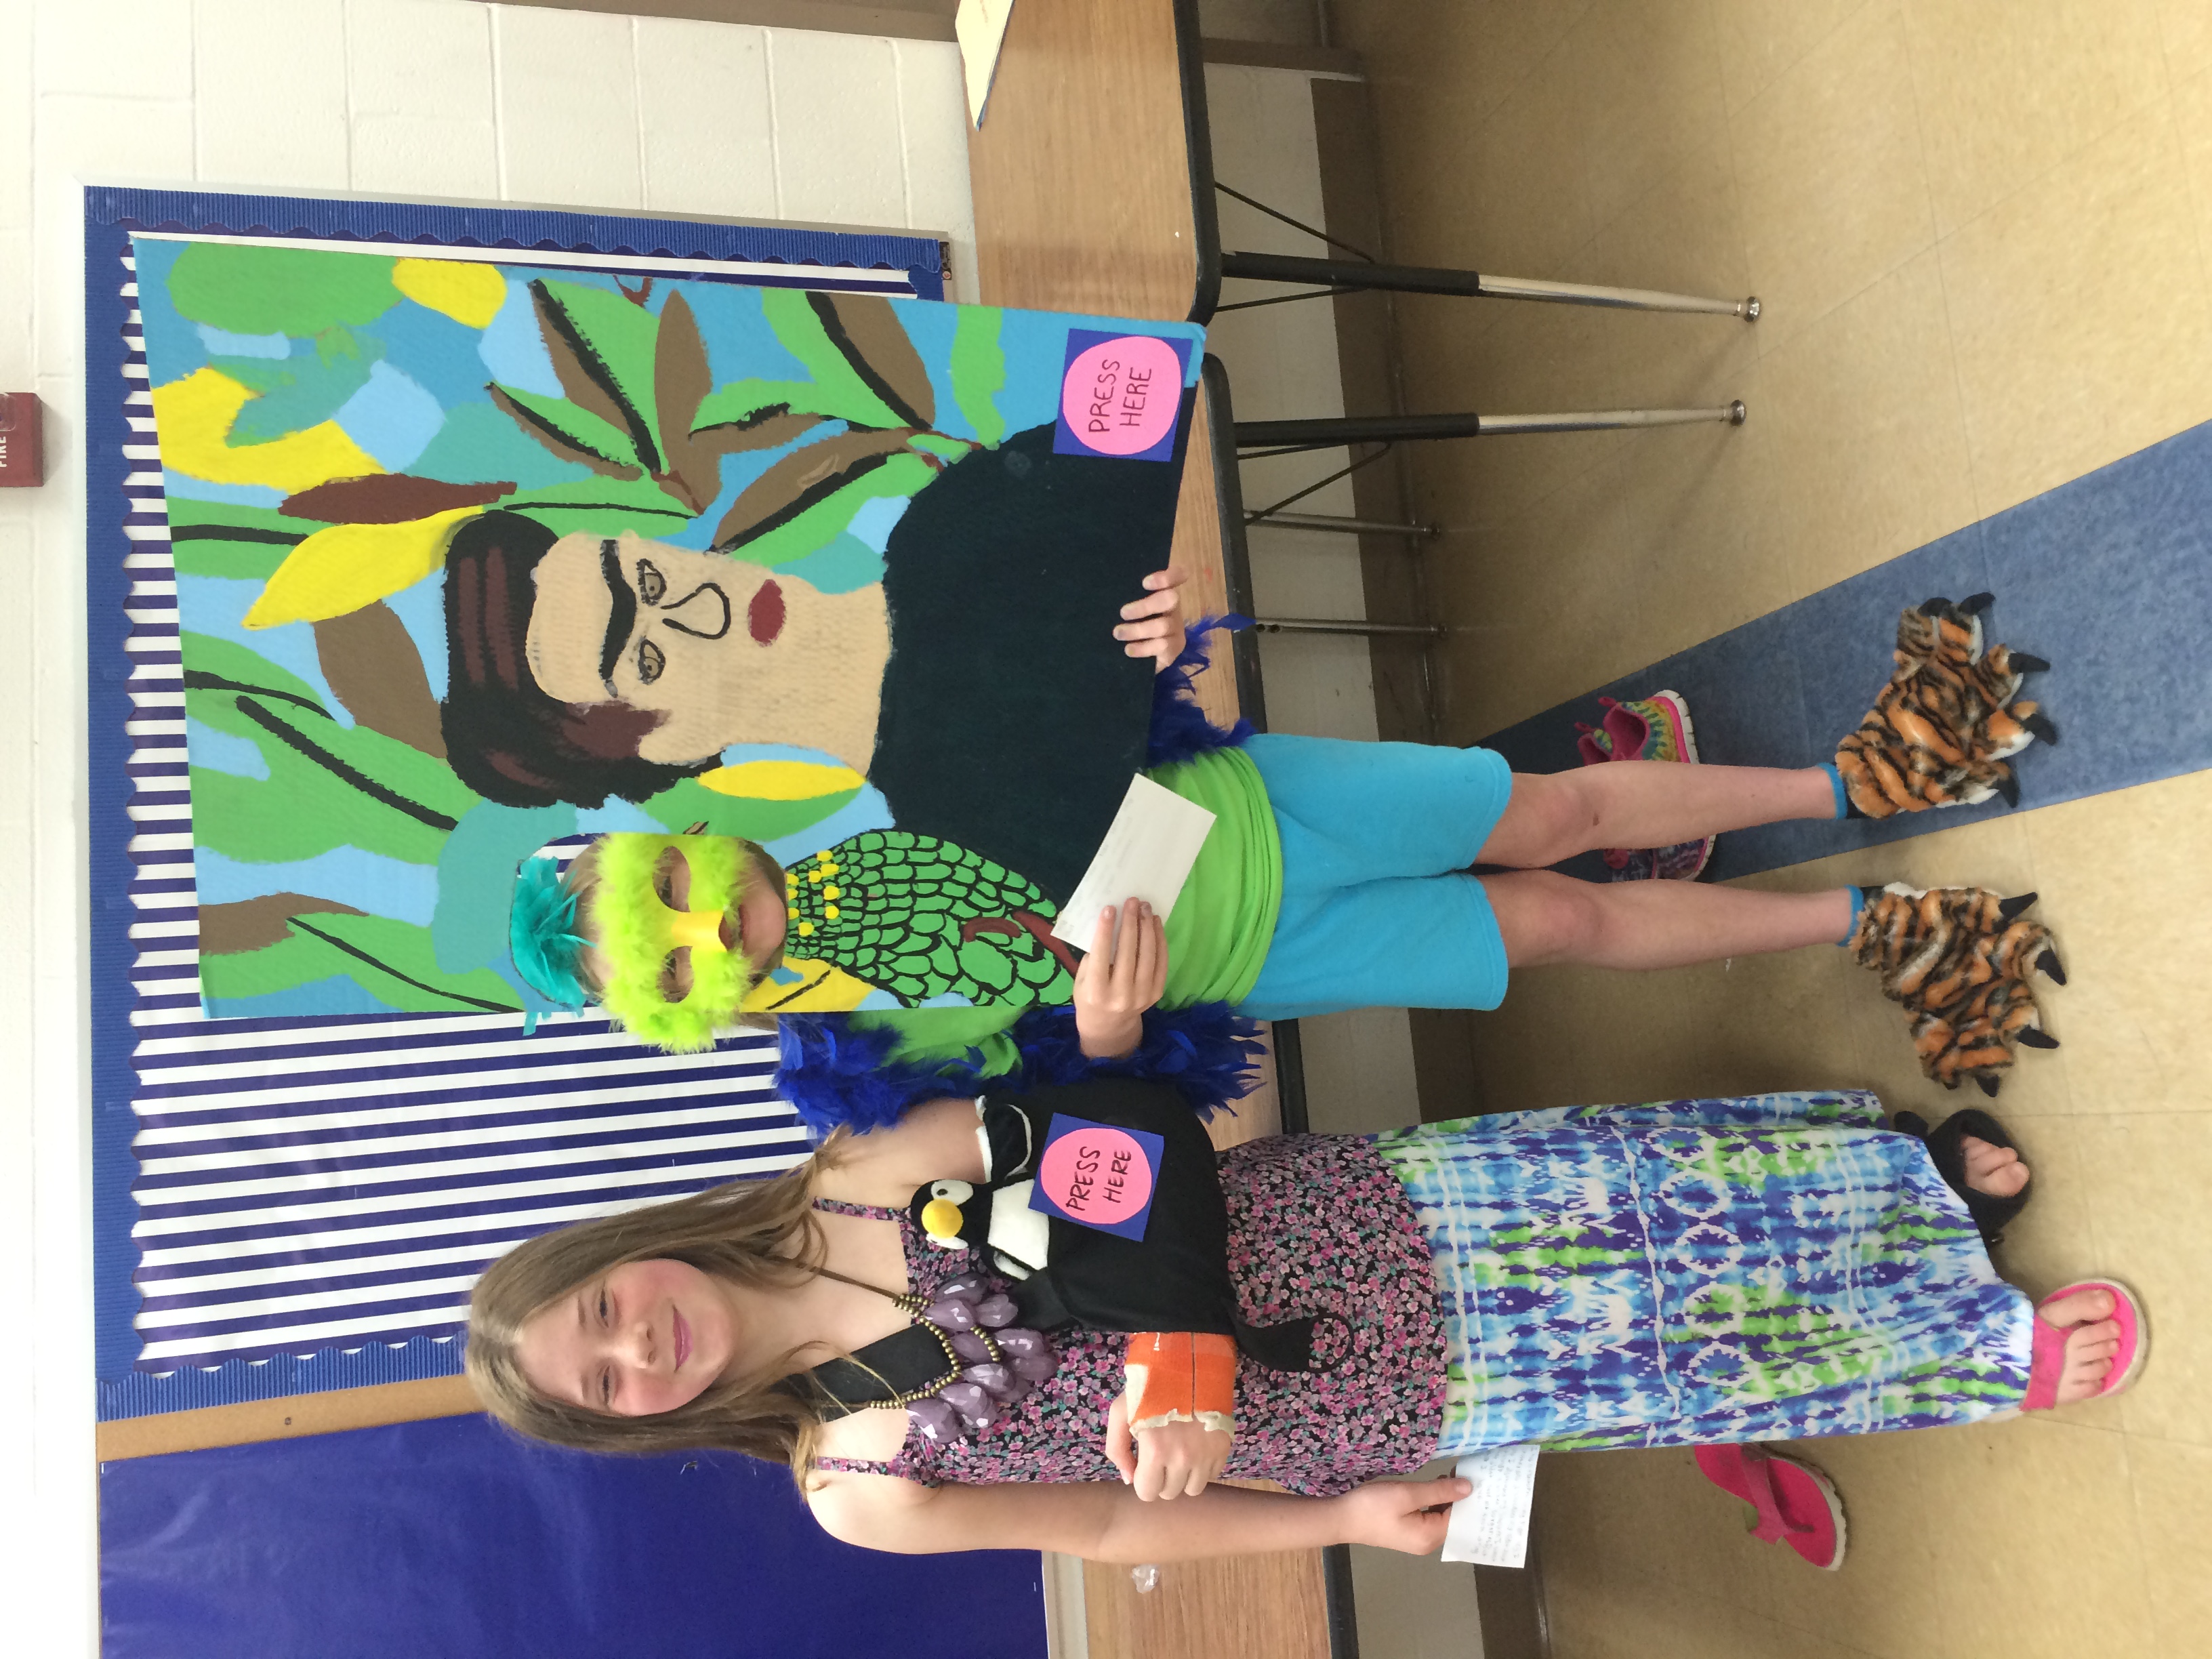
I began to visualize the project as I perused Pinterest, especially when searching for “art costumes.” The concept was beginning to take form. I decided to have students pair up. One would take the role of the artist, the other, the role of the artwork.
As this project came to fruition, I took many steps to ensure it ran smoothly. Read on to see how I prepped, what was required of my students and some helpful hints I learned along the way. In addition, download planning documents and research packets. I’m sharing everything you need to create a living museum in the art room!
Teacher Prep
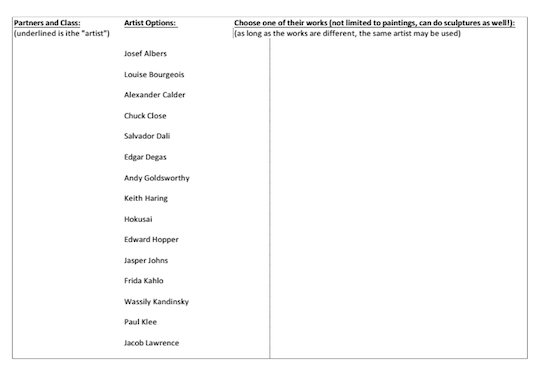
1. Create a list of artists from which your students can choose.
I pair this list with a PowerPoint featuring a few of works by each artist. Below, I’ve included my Excel list that allows for names and titles of specific works to be added.
2. Have your librarian pull books from the library and put together a list of websites for students to search.
If your teacher librarian is really awesome, they might even help you with the research portion of this project! Just ask!
3. Make worksheets to guide students through the process.
I’ve made mine available for download in the next section!
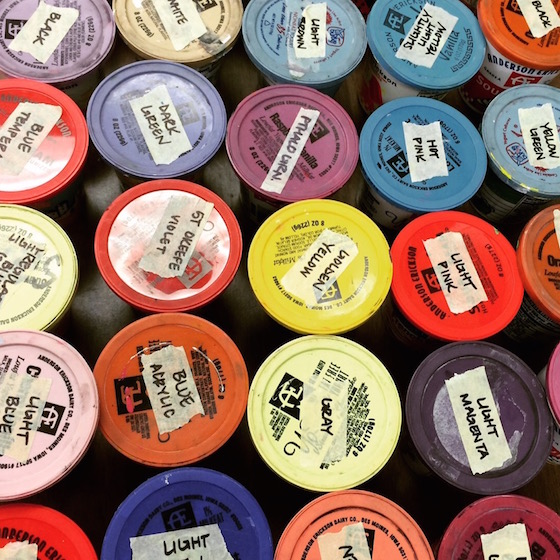
4. Collect containers to hold mixed colors from week to week.
Last year, I used mini cupcake containers. This year I used yogurt cups with lids. (Don’t forget to make sure you have an ample supply of paint!)
5. Cut cardboard or foam board to size for the artwork.
I cut mine into 24″ x 30″ rectangles. This correlates proportionally when gridding from 8″ x 10″ printed images.
6. Develop pairs of students with the classroom teachers.
7. (Optional) Plan a mini lesson on the gridding method if your students haven’t experienced it yet.
Check out this article, and show your students this video!
8. Introduce and launch the project!
Student Prep
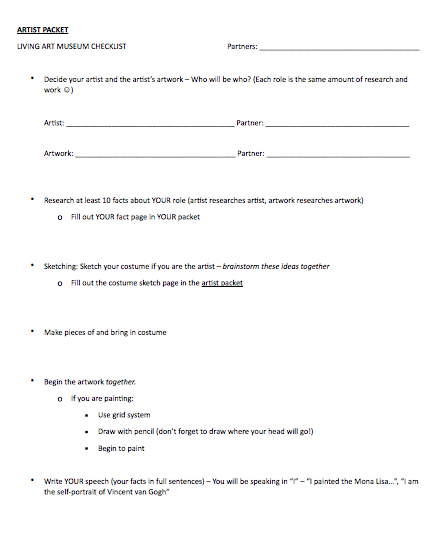
Because this is an involved project with many parts, I created a checklist for my students to complete as they go. The checklist makes up the first page of their packets which are available for download below. They work through their packets from beginning to end. I have outlined the students’ basic tasks below:
In this project, each pair of students will have to…
1. Decide who will play the role of the artist and who will play the role of the artwork.
2. Research their individual roles and fill out the coordinating fact pages in their designated packets.
3. Plan out the artist’s costume and props. (Students can bring items from home and/or create items in class).
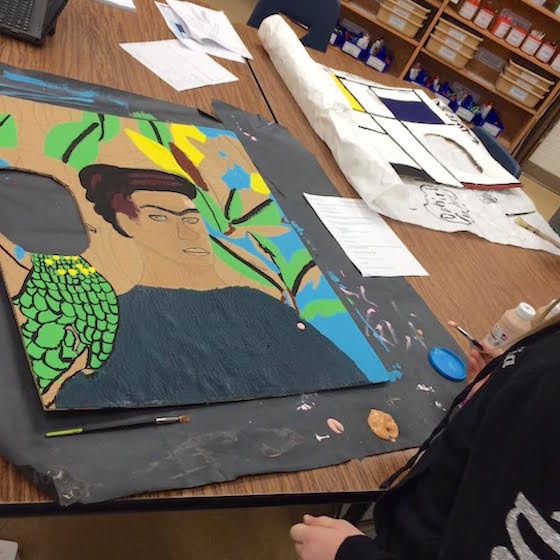
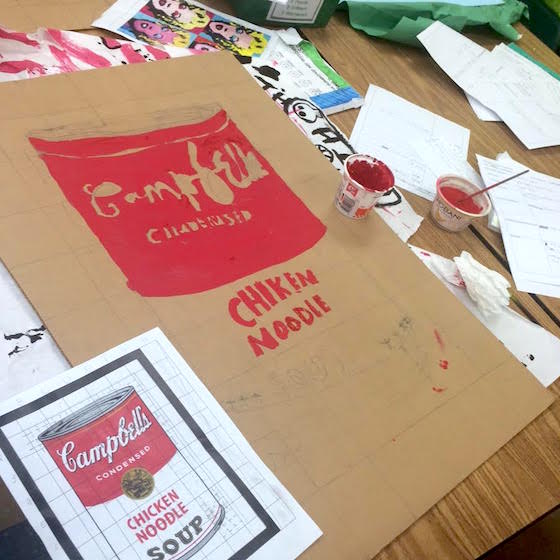
4. Create the piece of artwork.
5. Use their research to create a speech in first person. For example, “I am Leonardo da Vinci. I was born in 1452…”
6. Practice, practice….and practice some more!
7. Present to the class.
8. Fill out the project rubric.
Packet Downloads
Here are the two packets that help guide students through the steps above. Note that there is one packet for the students playing the artists and a separate packet for the students playing the artworks. These packets include the checklist, fact sheet, costume planning page, and rubric for each role.
5 Helpful Hints
During this project, I figured out a few ways to make things go more smoothly.
1. Each class period, keep your students on track with a PowerPoint slide featuring the daily goal.
2. If students have trouble finding enough information about their chosen artwork, they can also research facts about the artist and/or time period in general.
3. Before starting, clear some extra space to store all of the materials that will be created during this project.
4. Print images with the grids already on them. I put each image in Word then created an 8 x 10 table of 1-inch squares. I sent the image “behind” the table, instantly creating a gridded image.
5. Some artworks may not perfectly fit in the 8 x 10 grid. Simply adjust the cardboard size accordingly.
As with any project, it is most successful when you make it your own and adapt it for your students’ needs and interests. Please feel free to use and adjust the documents I’ve included to implement your own Living Art Museum. I can’t wait to hear about and see the amazing museum pieces you and your students create! Tweet us your results @theartofed!
Looking for some other fun art history activities? Check out the articles below!
- When the Art History Carnival Comes to Town!
- 3 Super Fun Art History Games
- A Fun New Way to Teach Art History!
- Hotties of Art History
- Make Art History Sticky: Using Hooks to Help Students Learn
Have you ever facilitated a Living Art Museum? What are some helpful hints?
How do you make art history more engaging?
Magazine articles and podcasts are opinions of professional education contributors and do not necessarily represent the position of the Art of Education University (AOEU) or its academic offerings. Contributors use terms in the way they are most often talked about in the scope of their educational experiences.