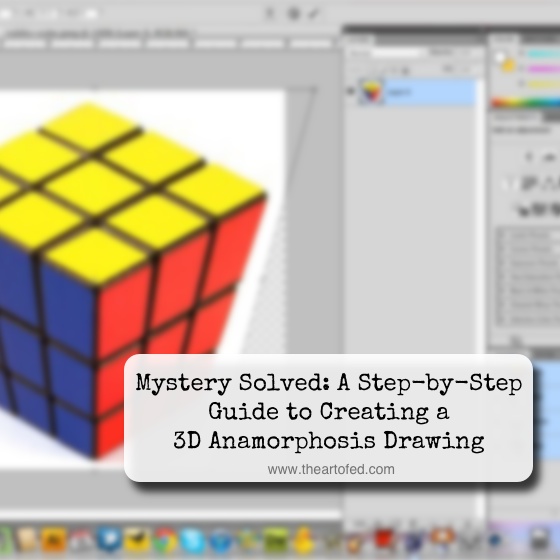
How many times have we stared in amazement at the street art chalk drawings of Julian Beever or the 3D pencil drawings of artist Nagai Hideyuki and thought, “How did they do that?” Their art appears to pop off the very pavement or paper that it was created on. We know it’s an illusion. We know it’s anamorphosis. What we aren’t quite sure of is how it’s done. Today I’d like to let you in on the secret with a project that merges technology with traditional drawing and the concept of perspective into one fun, effective lesson.
You will learn how to manipulate photos of common everyday objects so they can be used as references for 3D anamorphosis drawings.
Let’s get started!
Manipulating Your Reference
The first step is to manipulate the reference that will be used for the drawing. The student will need an image to import into Photoshop or other digital photo manipulation software and a camera to test out the reference. This tutorial uses screen captures from Photoshop CS4.
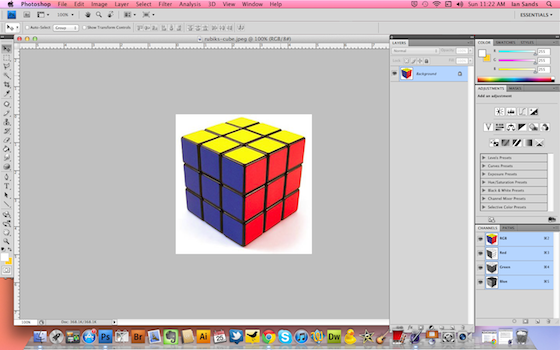
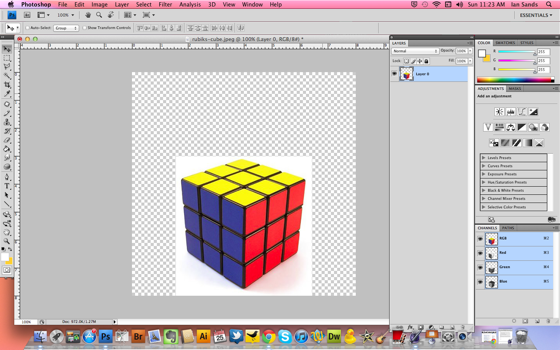
Step 1
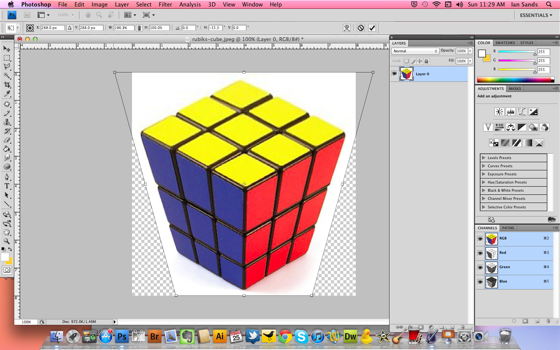
I opened an image of a Rubik’s Cube in Photoshop. This is the image I will be using for my reference. To avoid copyright issues, you might consider having students take their own photos of objects with a digital camera.
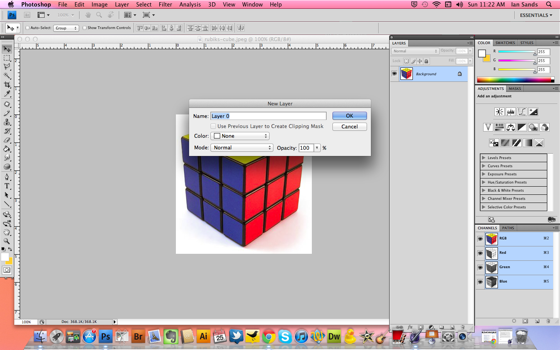
Step 2
In order to use the transform tool (in Step 3) it is important to make sure the image is on its own layer. Here, I simply doubled clicked on the background layer to turn it into a layer.
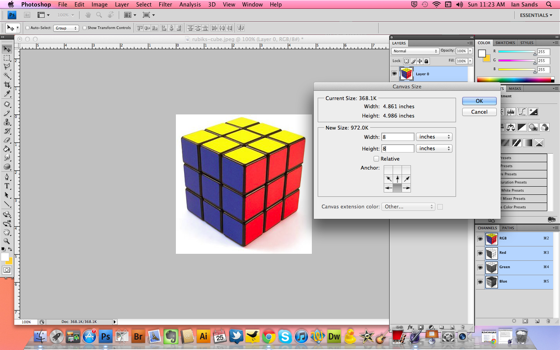
Step 3
Next, I enlarged the canvas size. Do this by going to Image->Canvas Size. Note two things: First, where it reads “Anchor,” I selected the bottom box so the canvas would expand upward. Second, I doubled the size of both the width and height, in this case from 4 to 8 inches.
Your reference will now look like this.
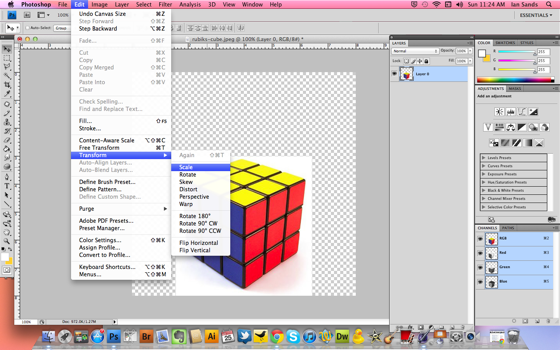
Step 4
Go to Edit->Transform-> Scale. The Transform control box will surround your image.
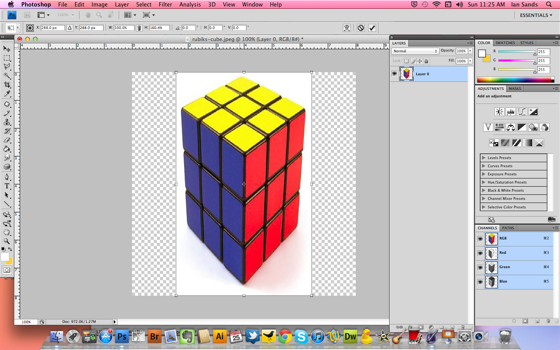
Step 5
Grab the middle anchor point and drag the bounding box straight up. This will stretch your image upward. Hit Enter.
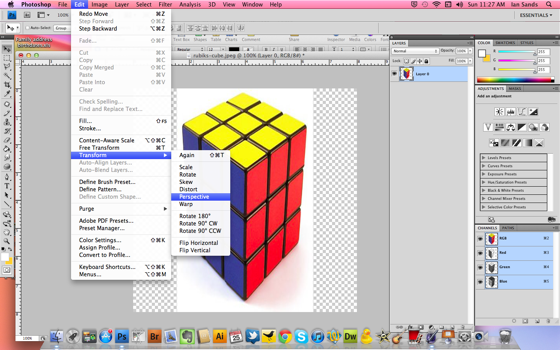
Step 6
Go to Edit->Transform->Perspective. The Transform control box will surround your image.
Step 7
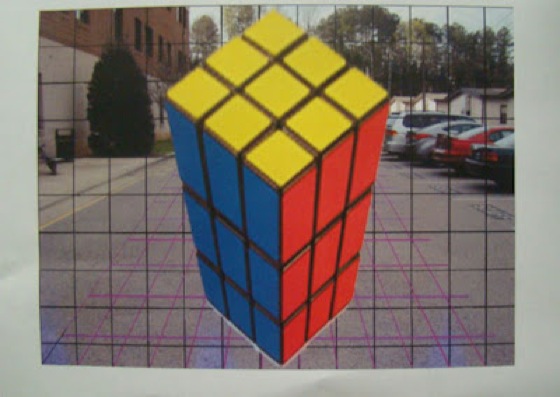
Grab the left top side anchor point and drag to the left until your object is fat on the top but still small on the bottom. Hit Enter.
Step 8
Your reference should now be correctly manipulated. Print a copy.
Testing Your Reference
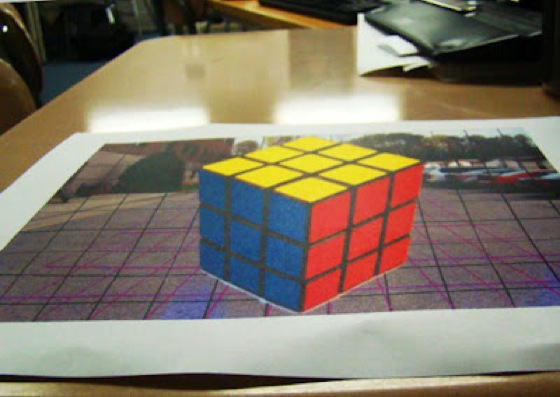
You can test your reference to make sure it will work as a 3D anamorphosis drawing by taking a photograph with a digital camera. Lay the printed reference on the table. Position the camera so it is at an angle about 20 degrees higher than parallel.
Note the following two examples. Both of these photos are taken of the same printout. The first photograph was taken directly above the printout. The second photo was taken at an angle. See how different the Rubik’s Cube looks?
Good To Go!
If your image worked when photographed, you are ready to go. This image can be use for anything from a colored pencil drawing on paper to a larger-than-life work of street art. For best results, use a grid to transfer the image. Also, consider adding a shadow to give the work an extra sense of depth.
Tell us, have you ever tried to create an anamorphosis drawing? What techniques did you use? Did it turn out?
Have you ever seen the work of Julian Beever or something similar in person? What was your reaction?
Magazine articles and podcasts are opinions of professional education contributors and do not necessarily represent the position of the Art of Education University (AOEU) or its academic offerings. Contributors use terms in the way they are most often talked about in the scope of their educational experiences.